Dethatch cool‑season grasses in early fall—late August to early September—when they’re emerging from dormancy and temperatures stay below 75°F, finishing at least three weeks before the first frost. For warm‑season lawns, aim for late spring to early summer, May through early June, when growth is at its peak and soil is moderately moist. Measure thatch with 2‑inch wedge samples; anything over 0.5 inch needs removal, and 1 inch or more calls for reseeding. Keep soil just moist, work on 50‑75°F days, and avoid heavy rain or extreme heat. Follow these steps and you’ll master the seasonal timing, then you’ll uncover the full prep and recovery plan.
When to Dethatch Your Lawn (Timing Guide)
When should you dethatch? You target cool‑season lawns in late summer to early fall, beginning in August, after the second spring mow and before temperatures exceed 75 °F. For warm‑season turf, schedule the process in late spring to early summer, once the grass has green‑up and temperatures sit between 80‑95 °F. Choose a mild, moist day—soil should be damp but not soggy—so the blades recover quickly. Mow shorter than usual beforehand, then dethatch while the thatch layer exceeds a half‑inch. Allow three to four weeks for regrowth before high heat or the first frost. Integrate lawn dormancy considerations to avoid stress, and time the work to aid perennial weed control by disrupting weed seedbeds during active growth. Dethatching before active growing season can damage the grass. Proper soil aeration after dethatching promotes root health and improves nutrient uptake. Regular dethatching also enhances water infiltration by reducing surface barriers. Timing your dethatching to coincide with peak microbial activity can further improve soil structure.
Why Dethatching Matters for Healthy Turf
Timing your dethatching sets the stage, but the real benefit lies in what the process does for turf health. When you strip excess thatch, you open pathways for nutrient availability and improve soil structure. Roots can then penetrate deeper, accessing moisture and essential minerals that were previously blocked. This deeper root network yields thicker, greener grass that resists drought, heat, and disease. Removing the thatch barrier also accelerates water infiltration, reducing runoff and eliminating dry patches. By disrupting the moist habitat that pests and fungi favor, you lower infestation risk. The net result is a resilient lawn with uniform growth, stronger air‑water‑nutrient flow, and a robust, healthy turf system. Lawn Alive contains four strains of microbial fungi that extend roots and improve nutrient and moisture uptake. Aerating before seeding enhances seed‑to‑soil contact and promotes better root development.
How to Measure Thatch Depth and Decide If You Need It
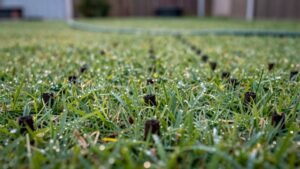
A quick visual check isn’t enough; you need a concrete measurement to decide whether dethatching is necessary. To start measuring thatch layer density, cut a 2‑inch‑deep pie‑shaped wedge with a knife, shovel, or plugger at several representative spots. Pull the wedge out and examine the brown, compressed mat just above the soil surface. Use a ruler to record its thickness; repeat until you have a reliable average. Evaluating thatch condition hinges on these numbers: a layer up to ¼ inch is healthy, under ½ inch remains safe, and anything above ½ inch signals intervention. At 1 inch or more you must remove the thatch, while 2 inches or more warrants reseeding. Compare measurements with grass type and observed runoff to confirm the need for dethatching. Excessive thatch can prevent water, air, and nutrients from reaching the soil. Performing dethatching in the spring or fall maximizes recovery because the grass is actively growing. Proper soil aeration enhances root development and overall lawn vigor. Aeration improves soil health by increasing oxygen availability and promoting deeper root growth.
Ideal Soil Moisture & Weather for Safe Dethatching
If the soil feels just moist enough to form a crumbling ball when you squeeze it, you’re ready to dethatch without harming the grass roots. Aim for a topsoil absorption rate that allows a handful to hold together briefly then break apart; this indicates the ideal 1.5 inches of weekly water retention without pooling. Choose a day with air temperatures between 50 °F and 75 °F and suitable humidity levels—typically 40‑60 %—to keep the grass from drying out too fast or staying soggy. Avoid work when the forecast predicts heat above 85 °F, cold below 40 °F, or wind that will scatter debris. After a light rain, wait 2‑3 days for the surface to dry to a friable state before you begin. This timing maximizes tool efficiency and protects root systems. Early spring is especially effective because the grass is emerging from dormancy and can recover quickly. Proper aeration also improves soil oxygen distribution, enhancing root growth and nutrient uptake.
Timing for Cool‑Season Grasses (Early Fall & Early Spring)
Because cool‑season grasses are still emerging from dormancy, you should schedule dethatching in early fall—late August through early September in northern U.S. zones—so the grass can recover during its peak growth phase and finish at least three weeks before the first frost. In this window, temperatures drop below 75 °F and rainfall is frequent, meeting ideal dethatching conditions that promote rapid tiller expansion for Kentucky bluegrass, perennial ryegrass, and tall fescue. Regional dethatching considerations dictate that zone 5A and changeover zones aim for late August, while avoiding midsummer heat stress. If you miss fall, target mid‑April, after the second mow, before temperatures exceed 75 °F, ensuring the lawn has exited dormancy and can sustain vigorous growth without encouraging weeds. This timing maximizes root health, prepares winter dormancy, and enhances spring greening.
Timing for Warm‑Season Grasses (Late Spring‑Early Summer)
Late spring to early summer is the ideal window for dethatching warm‑season lawns, when bermudagrass, zoysia, and St. Augustustine are fully greened and in peak vegetative growth. During May through early June, the soil is moderately moist, the air temperature sits between 80 °F and 95 °F, and sunlight is abundant but not oppressive—conditions that satisfy lawn maintenance requirements and favorable weather conditions. Check that the thatch layer exceeds 0.5 inches; if it does, schedule a dethatch. Guarantee the lawn isn’t recovering from recent fertilizer or herbicide applications, and avoid periods of heavy rain or drought. By acting within this 45‑day growth window, you promote rapid recovery, vigorous runner production, and a carpet‑like appearance before the summer heat intensifies. Aerating during this period can further improve soil oxygenation and root health. Consider scheduling aeration in early fall to align with optimal root growth for cool‑season grasses. Proper aeration also enhances nutrient uptake by reducing soil compaction.
How to Pick the Right Dethatching Season in Transition Zones
Choosing the right dethatching season in a changeover area hinges on matching the grass type’s peak growth window with mild, moist weather. For cool‑season grasses, target late summer to early fall—starting in August and ending three to four weeks before the first frost. Warm‑season species require late spring to early summer, when growth spikes and soil remains damp but not saturated. Align these windows with your lawn maintenance schedule to avoid dormant periods that could stress the turf. Measure thatch depth; if it exceeds ½ inch, schedule a dethatch session and then apply thatch prevention techniques such as regular aeration and proper mowing height. This timing maximizes recovery, minimizes weed pressure, and supports seamless overseeding later. Proper aeration enhances root growth and improves water and nutrient absorption. Regular soil aeration also helps prevent compaction and promotes healthier root systems.
Lawn Prep for Dethatching: Aeration, Fertilizer & Watering
After you’ve nailed the ideal dethatching window, the next step is preparing the lawn so the process works efficiently. Begin with lawn mowing height reduction to half of the normal cut; this exposes the thatch layer and eases core penetration. Apply one inch of water the evening before aeration to achieve slightly moist soil, then mark all utility lines. Aerate using a single‑pass drill, creating uniform perforations that boost water infiltration, air exchange, and nutrient uptake. Immediately after aeration, water deeply to settle soil and encourage deep root growth. Skip fertilizer until after dethatching; instead, aim for ideal soil nutrient status by testing and amending later, ensuring the lawn recovers without excess nutrients that could stress the new thatch removal. Apply synthetic fertilizer after the lawn has fully recovered. Proper aeration improves soil structure and supports healthier thatch removal. Selecting the right type of aerator, such as a plug aerator versus a spike model, can further enhance soil loosening and nutrient distribution. Core aerators create soil plugs that allow deeper penetration and better water movement.
How to Dethatch: Step‑by‑Step Procedure for Homeowners
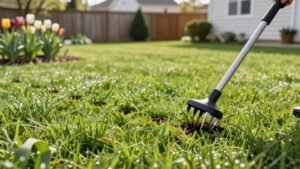
A solid dethatching routine starts with a quick, low cut—trim the grass to about half its normal height, then bag the clippings so the thatch layer is fully exposed. Next, loosen the soil with a garden fork; a light irrigation the day before softens compacted areas. Mark any underground utilities, then divide the lawn into 250‑sq‑ft sections. Use a dethatching rake, pulling the tines upward until the thatch separates, retaining roughly ½ inch of thatch for mulch. For larger zones, rent a power dethatcher, but follow power dethatcher maintenance guidelines: clean the blades, check the belt, and lubricate moving parts after each use. After raking, bag the loosened material, mow again, and overseed. Apply the appropriate dethatching frequency—once every 2–3 years for cool‑season grass, annually for warm‑season varieties. Dethatching significantly improves lawn performance for the coming season. Hand aeration boosts root growth when combined with proper dethatching. Proper soil aeration after dethatching enhances nutrient absorption and promotes a healthier root system. Manual aeration using a garden fork can also increase soil porosity and further support grass recovery.
Common Mistakes, Fixes & Post‑Dethatching Recovery Plan
When you skip the timing checklist, you’ll quickly see wilted blades, weed invasions, and a stressed root system that can’t recover. Align dethatching to active growth windows—spring or fall for cool‑season grasses—and avoid wet or extreme‑heat conditions. Calibrate aggressive technique by measuring thatch thickness, using a light‑touch rake, and working in a single direction to prevent cross‑stress patterns. Respect Soil pre treatment importance: water the soil a day before, assess texture, and select tools matched to clay or loam. After removal, clear debris, apply a balanced fertilizer, and water deeply for 48 hours. Overseed sparse patches, keep a weed barrier, and monitor moisture weekly to guarantee a resilient, seasonal recovery. Avoid dethatching during dormancy or stress periods.