Mow your grass to half its normal height, bag the clippings, and lightly water the soil the day before. Choose the right tool— a rake for small lawns, an electric dethatcher for medium areas, or a tow‑behind scarifier for larger spaces—and set it to a shallow depth. Run the machine or rake across the lawn, lifting the spongy thatch layer while keeping the soil just moist. Rake up the debris, then water deeply for ten days, apply a slow‑release starter fertilizer, and consider overseeding. Continue for to uncover detailed timing and troubleshooting tips.
When to Dethatch & How to Spot Thick Thatch
Kick off your lawn care by pinpointing the right window for dethatching and learning how to spot thick thatch. For cool‑season grasses, aim for late summer to early fall—starting in August—after the second spring mow and before temperatures top 75 °F. Finish 3–4 weeks before the first frost, giving the turf at least 45 days of active growth for recovery. Warm‑season lawns need dethatching in late spring to early summer, when temperatures sit between 80‑95 °F and new growth appears; in Arizona, March‑April works if nighttime lows stay above 60 °F. Align with seasonal considerations: avoid dormancy, drought, or heat waves, and choose a day with moist, not saturated, soil. Spot thick thatch by measuring a layer over ½ inch deep; this signals the most appropriate timing for treatment. Dethatching also helps the lawn breathe and improves overall health. Lawn Alive contains microbial fungi that extend roots and improve nutrient and moisture uptake. Proper timing maximizes soil aeration benefits and supports faster recovery. Homeowners should also consider that a lawn with a thatch layer thicker than ½ inch can become more prone to disease buildup if not addressed promptly.

LIFT OUT DEAD GRASS & THATCH - The 15-inch head with 19 sharp steel tines pulls up matted thatch. Use this manual dethatching rake for small lawns, spot cleanup, and clearing dead patches before reseeding.

【Efficient Lawn Revival Tool】This dethatcher rake is designed to quickly remove thick layers of thatch, moss, and dead grass. Improve airflow, water absorption, and nutrient penetration with this powerful lawn dethatcher, helping your grass grow greener and healthier.

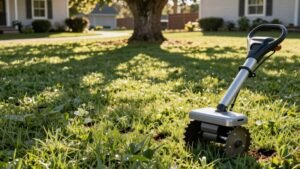
Smooth-Rolling Wheels for Ease of Use: The dethatching rake equipped with high-quality wheels, the rake glides smoothly across your lawn—cutting down on bending and reducing the effort of lawn care. The thatch rake's rollers boost thatch-clearing efficiency while preventing unnecessary physical strain.
Detect Excess Thatch Before You Dethatch
If you feel the lawn bounce like a trampoline underfoot, that spongy texture is a clear sign of excess thatch. Begin by probing the surface; a soft, squishy feel usually means the thatch layer measurement exceeds half an inch. Cut a 2‑ to 3‑inch turf plug with a trowel, then dig a 3‑4‑inch deep wedge to expose the mat. If the fibrous layer is over ½ inch, it blocks sunlight, water, and nutrients, impairing root health. Look for visible mounds above the grass line, yellow patches, or uneven mower cut—these are visual cues of thick thatch. Remember that thatch decomposition factors such as moisture, temperature, and microbial activity influence how quickly the layer breaks down, affecting whether dethatching is necessary. Aerating the lawn before overseeding can improve soil aeration and promote healthier root development. Proper aeration also reduces soil compaction and enhances water and nutrient absorption. Regular aeration helps increase root depth and improves overall lawn resilience.
Select the Proper Dethatching Tool for Your Lawn Size
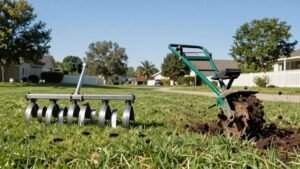
Choosing the right dethatching tool starts with your lawn’s size. For lawns under 1/4 acre, a manual rake—like the Anvil 51″ Wood Handle Steel 14‑Tine Bow Rake or Ames 15″ Adjustable Thatch Rake—offers precise control and fits tight beds. These tools weigh under 3 lb, need no power, and have modest storage requirements; you can keep them in a shed corner. If your yard spans 1/4 to 1 acre, an electric dethatcher such as Greenworks 15″ 40V Cordless model or BILT HARD 16‑in Corded Electric provides 15‑16 in widths, motorized tines, and interchangeable tine replacement options for varied thatch thickness. For properties over 1 acre, a power unit like Brinly’s 40‑in model or a tow‑behind scarifier delivers rapid coverage; its larger frame demands more storage space and regular tine replacement to maintain performance. Choose based on size, storage, and maintenance needs. The adjustable depth settings allow you to customize how aggressively you remove thatch. Aeration also enhances water infiltration by loosening compacted soil, which can complement dethatching efforts. Regular soil compaction relief improves root growth and overall lawn resilience. Improved drainage further supports healthy grass after dethatching.

[Powerful 13 Amp Electric Motor]:Equipped with a 13 Amp copper motor, this electric dethatcher delivers a strong 3700 RPM, making it ideal for tackling tough lawn care tasks. It effortlessly removes thatch and debris, helping your lawn breathe better and promoting healthier grass growth.

DUAL-SIDED 19-TINE HEAD: This 15-inch dethatcher rake features 19 curved steel tines. One side lifts dead grass and surface buildup; flip the head to loosen topsoil and cultivate the lawn surface. The wide head covers more ground with each pass.

Promote Lawn Health and Neatness: This thatch rake is designed to clear away thatch buildup, dead grass, fallen leaves, and small debris across lawns and garden areas. By removing compact layers on the surface, it allows air, water, sunlight, and nutrients to reach the soil and roots, supporting steady turf growth. With a total length of 74 inches, it helps reduce bending and supports seasonal lawn maintenance tasks.
Prepare Your Lawn: Mow, Bag, and Loosen the Soil
Before you start dethatching, mow the lawn to roughly half its normal height so the thatch layer becomes visible and the grass stays healthy; this also lets you avoid over mowing and maintain consistent mowing height. Immediately after cutting, bag all clippings to prevent thatch re‑accumulation and rake away any loosened debris. Moistening the soil a day before—about an inch of water—softens it enough for the dethatching tool to lift thatch without tearing roots, yet you must keep the ground from becoming soggy. Mark sprinkler heads, utility lines, and other obstacles, then use a core aerifier to loosen compacted areas, directing tines in multiple patterns. This preparation creates a uniform, healthy surface ready for efficient dethatching. Consider using a hand aerator to further improve soil aeration before you begin. Regular lawn aeration promotes root health and enhances nutrient uptake. Using lawn aerator shoes can provide additional light aeration that supports deeper root development.

【Efficient Lawn Revival Tool】This dethatcher rake is designed to quickly remove thick layers of thatch, moss, and dead grass. Improve airflow, water absorption, and nutrient penetration with this powerful lawn dethatcher, helping your grass grow greener and healthier.

Effortless, Ergonomic Lawn Thatch Removal: Professional thatch rake features a heavy-duty head and an extended, adjustable stainless steel handle. This design drastically reduces back-breaking bending and strain, allowing air, water, and nutrients to penetrate deep to the roots for a lush, healthy lawn all year round

Smooth-Rolling Wheels for Ease of Use: The dethatching rake equipped with high-quality wheels, the rake glides smoothly across your lawn—cutting down on bending and reducing the effort of lawn care. The thatch rake's rollers boost thatch-clearing efficiency while preventing unnecessary physical strain.
Dethatch Manually: Rake Technique & Timing
Now that your lawn’s surface is loosened and clear of debris, grab a heavy‑duty dethatching rake and start pulling up the thatch in short, overlapping strokes. Use a firm, ergonomic grip—proper grip techniques keep your wrists neutral and maintain steady pressure. Position the rake so the tines strike at an effective tine angle, roughly 45°, which maximizes penetration without tearing grass blades. Work in rows, overlapping each pass to avoid missed patches. For cool‑season grasses, schedule this in early spring after the second mow or late summer, keeping at least two weeks before temperatures hit 75 °F and three weeks before frost. Warm‑season lawns benefit from late spring to early summer, ideally before peak heat. Keep soil moist but not soggy, and finish by removing all debris and watering the area. Tool rental can be a cost‑effective option if you don’t own a dethatching rake. Proper timing helps prevent stress to the lawn. If the thatch layer exceeds ½ inch, it’s advisable to dethatch even later in the season to maintain healthy root growth. Regular soil aeration improves root oxygenation and promotes vigorous grass growth.
Dethatch With Power: Verticutter & Electric Dethatcher Tips
If you want a fast, low‑impact way to lift thatch, a verticutter or electric dethatcher is the tool to reach. First, mow the lawn short so the blades can contact the thatch layer. Choose verticutter blade types that suit your turf—standard steel blades for most lawns, serrated blades for tougher thatch. Set the depth to 1–2 mm for routine maintenance or up to 0.5 inches if the layer exceeds 0.5 inches. Make overlapping passes, testing depth on a hidden spot to protect crowns. Verticutting seasonal timing matters: aim for late spring or early summer on warm‑season grasses, avoiding stress periods. After slicing, rake or blow the loosened material onto a tarp, then clear the area promptly to prevent re‑accumulation. The process also helps to remove thick stolons that hide soil and impede water penetration. Proper timing ensures the grass can recover quickly and reduces the risk of disease spread after the operation. Aeration can further improve soil compaction by allowing better oxygen flow to roots. Incorporating a post‑dethatch soil health assessment can guide targeted fertilization for optimal turf vigor.
After‑Care After Dethatching: Water, Fertilize, Recycle
After dethatching, the lawn’s recovery hinges on three quick steps: deep watering, light fertilizing, and thorough debris removal. Water deeply each morning until the soil is moist to a six‑inch depth—about one inch of water—adjusting for sandy or clay soils. Continue for 10‑14 days, 15‑20 minutes per zone, to reduce shock and prevent fungus. Apply a light, slow‑release starter fertilizer low in nitrogen and high in phosphorus at roughly three pounds per thousand square feet, then water lightly to move nutrients into the root zone. Finally, practice debris recycling: rake away all thatch clumps, damaged blades, and foreign objects, keeping the surface clear for overseeding support and healthy soil breathing. This regimen promotes rapid, uniform regrowth. Dethatcher should be set to zero setting to avoid damaging soil. Proper soil aeration enhances root development and nutrient uptake. Performing aeration in the early spring maximizes root expansion before summer heat. Selecting a high‑germination grass seed blend can further improve turf density after dethatching.