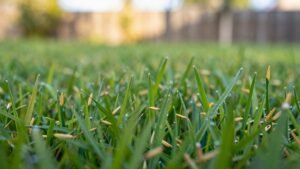
First, water your lawn a day or two before so the soil’s damp but not soggy, then mow it short and clear debris. Choose a garden fork for small areas or aeration shoes for larger spaces; both let you punch holes 1‑2 inches deep. Push the fork tines 3‑6 inches straight down, rocking gently, and space holes 4‑6 inches apart, or walk in overlapping rows with the shoes, applying steady pressure. After aerating, water thoroughly for two weeks and add a thin sand top‑dressed layer—keep going for more detailed tips.
How to Aerate Your Lawn in 5 Steps
Ever wondered how to give your lawn a gust of fresh wind without a pricey machine? Start by choosing manual aeration tools that fit your space— a core aerator for medium lawns, a garden fork for small patches, or aeration shoes if you prefer walking. Grip the core aerator with both hands, plant your foot on the bar for leverage, and drive the tines 1‑2 inches deep. Align a garden fork’s tines perpendicular and press them into the soil, then rock the fork back and forth to widen each hole. With aeration shoes, strap them securely and step firmly to puncture the surface. Move methodically, inserting a few inches apart, to guarantee achieving lawn coverage. Leave the extracted cores on top; they’ll break down and enrich the soil naturally. Repeat annually in spring or fall for best results. Aeration forks are effective when tilting to create fissures. Proper timing enhances soil aeration and promotes deeper root growth. Regular aeration also improves water infiltration by reducing soil compaction. Enhanced nutrient uptake further supports a resilient, lush lawn.
Prepare Your Soil for Lawn Aeration
After you’ve chosen the right manual aeration tool, make sure the soil is ready to receive those tines. First, testing compaction helps you gauge how hard the ground is; if it’s overly dense, water it a day or two before you start. Evaluating soil moisture is equally pivotal—apply about one inch of water 48 hours prior, then check that the surface feels damp but not soggy. Mow the grass to the recommended height for its type—2‑3 inches for cool‑season, 1‑2 inches for warm‑season—to let tines penetrate easily. Clear leaves, sticks, and debris so nothing blocks the cores. Finally, mark any shallow sprinkler lines and consider a quick pH test if you suspect nutrient issues, but keep the focus on moisture and compaction before you begin aerating. Proper aeration also encourages root growth and improves nutrient uptake. Aerating in spring takes advantage of the optimal growing season when grass is actively recovering from winter stress. Regularly checking soil aeration benefits can help you time future maintenance for maximum lawn health.
Choose the Right Tool for Lawn Aeration
When you’re ready to aerate, pick a tool that matches your lawn’s size and the level of compaction you’re tackling. If you have a medium‑to‑large yard with heavy compaction, a manual core aerator gives the best results—its foot bar provides leverage, and the hollow cylinders remove soil plugs, boosting root growth and water absorption. For small lawns or spot treatment, choosing cost effective aeration tools like a garden fork or aerator shoes works well; the fork’s sturdy tines create 1‑2‑inch spikes, while shoes let you cover area simply by walking. A manual spike aerator offers a middle ground, loosening soil without plugs. Remember to mow short, moisten the soil, and flag obstacles before you start. Core aerators create soil channels that allow deeper water infiltration and root expansion. Aerator shoes can provide light aeration that improves oxygen and nutrient penetration in thin or compacted lawns.
Aerate With a Garden Fork – Step‑By‑Step
A few quick prep steps will set you up for a successful garden‑fork aeration: mow the lawn to its normal height, clear away sticks, stones and thick thatch, mark any underground lines, and water the soil a day or two beforehand so it’s moist but not soggy. Then push the fork’s tines straight down with firm foot pressure, aiming for the importance of proper depth—at least three to four inches, preferably five to six in compacted clay. Rock the fork gently front‑to‑back to widen each hole, then pull straight out without twisting. Space insertions four to six inches apart, working in straight rows or a grid, and add a perpendicular pass where compaction is severe. This manual aeration improves drainage, root growth, and nutrient uptake while keeping the process low‑cost and controlled. Adding to process helps improve drainage. Proper aeration also enhances seed‑to‑soil contact for more successful overseeding. Performing aeration during the optimal seasonal window maximizes soil recovery and root development. Aerate during the growing season for cool‑season grasses to achieve the best results.
Aerate Using Aeration Shoes – Quick Method
If you prefer a faster, hands‑free option after mastering the garden fork, slip on a pair of aeration shoes and let each step create the needed holes. First, water the lawn until the soil is moist but not soggy, then flag sprinkler heads, pipes, and utility lines. Choose shoes with sturdy straps that secure over your regular footwear; the spikes should reach 1‑2 inches deep. Walk in overlapping rows, applying steady pressure so each spike punctures the ground. After you finish, clean the spikes to prevent rust and store the shoes dry—this is essential aeration shoes maintenance. If you’re on a budget, homemade aeration shoes made from plywood strips, galvanized nails, and nylon straps work just as well. Combine the aeration with overseeding or a light fertiliser for best results. The lawn is currently nearly dead in several spots, so the aeration will help revive those areas. Aerating in the early spring maximizes root growth for cool‑season grasses.
Manual Aeration Tools: Pros and Cons
Many homeowners find that manual aeration tools strike the right balance between cost and effectiveness, especially for modest lawns or spot‑treatment of compacted patches. Core aerators pull 4‑inch plugs, creating open channels for oxygen, water, and nutrients. Their steel tines bite dense soil without bending, and the long handle with foot plate gives you ease of use and accessibility for elderly users. Spike aerators merely push solid spikes; they compact surrounding soil and the holes fill fast, offering little long‑term benefit. Step‑on models are cheap, durable, and have no moving parts, making them perfect for small areas or targeted spots. They require a bit of effort on larger lawns, but for under‑10,000‑square‑foot spaces they’re a practical, low‑cost alternative to renting a machine. Manual aerators are easier to use when dealing with compacted soil because they have fewer prongs, which reduces the effort needed to plunge into the ground. Using a roller after aeration can further improve seed contact and help flatten the lawn for a more even appearance. Dethatching should be performed when the that layer exceeds ½ inch to ensure optimal soil health.
Advanced Lawn Aeration Tips & Common Mistakes
Wondering how to turn a basic aeration session into a high‑impact lawn upgrade? First, schedule the frequency of aeration at least once a year for cool‑season grasses and twice for warm‑season varieties; over‑aerating can stress roots. Before you start, water the lawn 1–3 days ahead so the soil is moist but not soggy, then mow to 1.5–2 inches. Use a hollow‑tine core aerator, spacing holes 4–6 inches apart, and run criss‑cross passes to break up compacted zones. Leave the cores on the surface to decompose, which helps avoid repeated dethatching. After aeration, water thoroughly every 2–3 days for two weeks and apply a high‑quality fertilizer. Topdress with a thin sand layer to fill holes and improve structure. Skip spike aerators and never aerate newly seeded grass within its first year. Compacted soil prevents water, air, and nutrients from reaching grass roots. Proper timing in spring maximizes root recovery and nutrient uptake. Aerating in early fall takes advantage of warm soil temperatures and active growth for optimal results. Consistent soil moisture management after aeration is crucial for seed germination and root development.
When to Overseed After Lawn Aeration
When should you overseed after aerating? Aim for the moment you finish making holes; seed immediately to let each pocket become a nest. Late summer or early fall provides ideal seeding conditions for cool‑season grass, while early spring works if you wait until after the last frost. Spread seed evenly with a broadcast spreader, then lightly rake to improve soil contact. Apply a phosphorus‑rich starter fertilizer at seeding, followed by a high‑quality NPK feed 24‑48 hours later. Water lightly and frequently for the first week, keeping the soil damp but not saturated, then shift to deeper, less frequent irrigation. Follow these proper seeding practices and avoid mowing for 2‑4 weeks to let roots establish. Cool‑season grass thrives best when overseeded during the transition from summer to fall. Pre‑emergent herbicides can inhibit germination if applied too soon after seeding. Properly soil testing before overseeding ensures the pH and nutrient levels are optimal for seed germination.