First, check oil, fuel, spark plug, air filter, and blades; drain stale fuel if needed. Prime the carburetor by pressing the rubber primer 3‑4 slow times, inspecting the bulb for cracks. Depress the brake lever, pull the starter cord quickly, and set the choke to “on.” Once the engine runs, move the throttle lever to FAST, adjust the height levers to a uniform setting, and level the deck. Guide the mower in a consistent pattern, varying direction to avoid grain; the mower’ll will then the’re’ll learn more details for. mower maintenance.
Prepare Your Mower to Start a Lawn Mower Safely
Before you fire up a push mower, verify the oil level, drain any stale fuel, inspect the spark plug, check the air filter, and examine the blades and tires. Perform an oil condition check by removing the dipstick, wiping it clean, reinserting, and reading the level; if the oil appears dark or gritty, drain it completely and refill with fresh SAE 30. Conduct fuel system maintenance by emptying the tank, discarding fuel older than one month, and filling with ethanol‑free gasoline; add a stabilizer if desired. Examine the spark plug for carbon deposits or wear, clean or replace it as needed. Inspect the air filter for blockage, replace if clogged. Finally, verify blade sharpness and tire pressure to guarantee safe, efficient operation. Ensure the fuel level is adequate before starting. Also, remember to park on a level surface to prevent spills while draining oil. Follow the recommended oil change interval of every 25–50 hours of run time to maintain optimal engine health.

SAE 10W-30 MOTOR OIL FOR SMALL ENGINES: One 32 fl oz bottle of STP Premium Synthetic Blend 4 Cycle Small Engine Oil SAE 10W-30, formulated for small engines in lawnmowers, generators, tractors, snow blowers, and other outdoor power equipment

2-18oz Briggs and Stratton 30W Oil

Prime the Engine Before Starting a Lawn Mower
If you’ve confirmed oil, fuel, and filter conditions, the next step is to prime the engine by pressing the red primer bulb near the carburetor three to four times, slowly and deliberately, to push a measured amount of fuel into the carburetor throat and guarantee reliable ignition. First, locate the rubber primer—often part of the Prime ’N Pull™ system—ensuring the gasket seals cleanly against the carburetor face. Press the bulb three times; each slow depression forces air that draws gasoline from the bowl into the throat. Verify that the bulb yields a firm resistance; a weak feel may indicate a worn gasket or blockage. Inspect primer bulb periodically for cracks or corrosion, and wipe any spilled fuel to prevent fuel contamination. After priming, you’re ready to engage the starter cord. The oil level is almost full, indicating sufficient lubrication for the engine. Most residential mowers typically hold 0.5 quart of oil, so be sure to check the owner’s manual for the exact capacity. Properly cleaning the carburetor jets can restore fuel flow and improve engine performance. Carburetor cleaning ensures that debris does not clog the fuel passages.

Replacement Tecumseh #: 640259 36045 36045A, Replacement Oregon #: 49-085 120-658.

694395 Lawn Mower Primer Bulb Replacement

Package includes: 5 pieces 694394 primer bulbs, enough quantity for your immediate replacement or use as a backup.
Master the Starter Cord for Starting a Lawn Mower
A few deliberate pulls on the starter cord will engage the tangs, lock the flywheel, and spin the engine fast enough for ignition. First, grasp the cord handle firmly while keeping the engine brake lever depressed. Pull the cord straight away from the mower body, then guide the rope back gently, maintaining grip on the brake lever throughout. Each pull drives the tangs into the flywheel’s grooved lug, turning the engine over. After the pull, the small spring retracts the cord, preventing a sudden snap. Perform tangs maintenance before every use: inspect the two tangs, springs, and left‑handed threads for wear or corrosion. If the cord feels loose, execute a cord tension adjustment by tightening the stationary piece and confirming proper thread engagement. This systematic approach guarantees reliable starter performance without premature wear. The return spring must be properly tensioned to ensure the cord retracts smoothly. When the cord becomes jammed, apply gentle pressure to release the stuck cord before attempting to pull again. Regularly check the recoil assembly for debris that could impede cord movement.
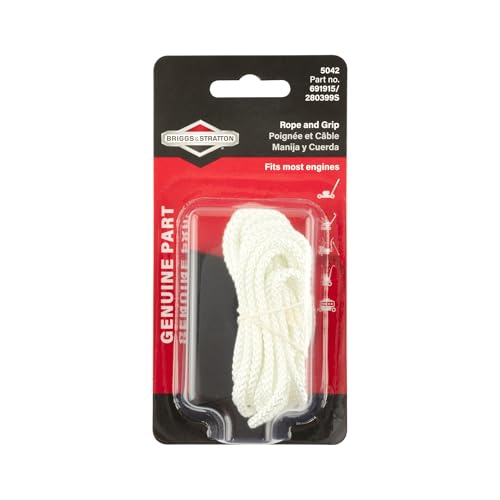
APPLICATION CHECK: Starter rope and grip kit for select Craftsman, Murray, Yard Machines and Bolens walk-behind mowers, tillers and edgers. Match engine series and recoil-starter design before ordering.
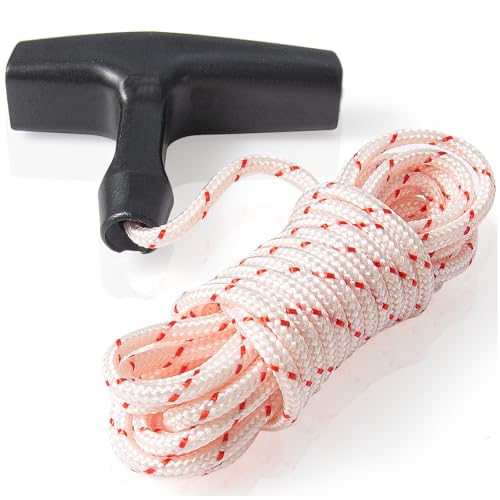
Start Strong, Last Long: No more snapped ropes! Our 2000lb, 16-strand braid ensures first-pull reliability and lasting durability. Replace once, forget it.

PRODUCT: This product is a universal lawnmower rope guide, used to secure the pull cord and handle of the lawnmower recoil starter
Start the Engine: Step‑by‑Step Ignition
After mastering the starter‑cord pull, move on to the ignition sequence. First, verify oil level and fuel quality, then clear debris around the mower. Set the engine stop lever to the operating position and keep it held throughout the start. Depress the control bar, disengage the drive lever if present, and position the choke lever in the choke position. Open the fuel shut‑off valve, then press the primer bulb three times, waiting two seconds between presses. Pull the recoil starter handle slowly until resistance, then yank quickly until the engine fires. After the engine catches, switch the choke off and continue pulling until the mower runs smoothly. Finally, release engine stop once the engine idles consistently. Check the spark plug before starting to ensure proper ignition. Also, inspect the spark plug for carbon buildup to maintain optimal performance. Inspect the plug gap to confirm it meets manufacturer specifications.
Set Throttle & Cutting Height After Engine Starts
Once the engine is running smoothly, set the throttle before adjusting the cutting height to guarantee the deck responds predictably; move the handlebar lever to the FAST (rabbit) icon for full power, then shift to SLOW (turtle) for fine control. Warm the engine first; idle adjustments reduce throttle responsiveness. Locate the four height levers between deck and wheels, grip the plastic‑coated tips, and pull each lever toward the wheel to disengage notches. Raise the deck by moving levers down/right (or turn the electric knob counter‑clockwise) and lower it by moving them up/left (or clockwise). Align all levers to the same notch—typically the second from right—to achieve a consistent height of about two inches. Re‑engage each lever firmly, then verify uniformity by rocking the mower on a flat surface. Use the adjustable wrench to fine‑tune the wheel assembly if the height setting feels loose. For precise height control, consult the owner’s manual to confirm the exact notch count for three‑inch settings. Proper blade speed helps prevent uneven cuts and reduces strain on the engine. Avoid mowing when temperatures exceed 90 °F as it can stress the grass and increase disease risk.

[DESIGNED FOR MOWERS] These height adjustment knobs are compatible with popular mower models such as 20092, 20333, and more, tailored to meet your lawn care requirements.

Genuine, OEM Briggs & Stratton Replacement Part

787-01818A-0637 Lawn Mower Height Adjuster Plate
Push & Guide the Mower for Even Cuts
Typically you’ll keep a steady, moderate forward push while gripping the mower’s handles firmly with both hands, ensuring the deck stays level and the blades cut cleanly without tearing. Apply consistent pressure, avoid sudden pushes, and distribute body weight evenly to maintain consistent blade height. Move in straight lines, overlapping each pass by one‑third of the mower width, and use visual markers for alignment. Periodically check wheel heights and front‑to‑rear blade pitch, correcting any tilt before it affects the cut. Monitor mower stability on slopes by adjusting your path gradually, keeping the deck level. Inspect the grass on‑the‑go; if you notice tearing or uneven length, pause, re‑level the deck, and resume with the same systematic technique. Use a deck height gauge to verify that the mower deck is level before each mowing session. Regularly inspect the deck for debris or worn blades, as a clean, sharp deck is essential for even cutting performance. Keeping blades sharp reduces weed seed spread and promotes healthier grass growth.
Adjust Your Mowing Pattern to Avoid Grain & Ruts
If you vary your mowing direction each time you cut, you’ll prevent the grass from developing a consistent grain and stop ruts from deepening. Begin with a uniform mowing schedule that alternates north‑south, 45‑degree diagonal, and stripe‑loop passes. Conduct a careful terrain inspection before each session; note slopes, wet spots, and obstacles. On flat sections, rotate between diagonal and stripe‑loop methods to break up tread patterns. For hillsides, adopt a diagonal approach and avoid vertical travel to maintain traction. When the lawn is rectangular, employ the spiral technique, starting at the center and moving outward, ensuring you exit without recutting finished rows. Adjust the pattern every visit to distribute load, minimize compaction, and keep turf upright. Varying the mowing pattern also prevents permanent ruts that can cause an uneven, ridged appearance. Regularly cleaning the mower deck with a deck cleaning solution helps reduce grass buildup and maintains optimal cutting performance. Properly sharpening the blade before each season ensures clean cuts and reduces stress on the grass. Proper dethatching improves soil aeration and promotes healthier root growth.
Maintain Your Mower After Use – Clean, Sharpen, Store
After you finish mowing, promptly clean the deck, grass catcher, and exterior, then inspect and sharpen the blades before performing routine engine checks and preparing the mower for storage. Use a stiff‑bristled brush to sweep loose clippings from the deck, wheels, and underside, then scrape stubborn debris with a putty knife. Rinse the underside with a hose while the mower tilts fuel‑cap up, dry, and spray silicone lubricant for rust prevention methods. Empty the grass catcher, wipe it clean, and air‑dry before reinstalling. Inspect blades for chips or dullness; sharpen or replace as needed. Check oil level, adhere to oil change intervals, clean the air filter, and examine the spark plug. Finally, store the mower in a dry, ventilated space, apply WD‑40 to gears, and remove the spark plug for safety. Remember to secure the blade with a wrench before lifting the mower to avoid accidental injury. When sharpening, maintain a consistent cutting angle of about 30‑45 degrees for optimal performance. Follow the bench grinder safety guidelines to protect yourself while achieving a sharp, balanced blade.

Eliminates 98 Percent Caked Grass Under Deck In Minutes With Dual Cleaning System

Lawn Mower Care: featuring a dual action design, our set contains 2 sturdy lawn mowers bristle brushes for daily replacement use, ensuring uninterrupted cleanliness and performance of your lawn mower; Equipped with an integrated scraper, these brushes easily remove stubborn grass clippings and dirt

RELIABLE MATERIALS - Scrubbing brush surface is smooth and polished, made of natural wood. Not lacquered. Hard bristles are strongly installed into the wooden base of the cleaning brush and are securely fixed.