First, spot the head type—spray heads give a fan‑shaped mist, rotary heads spin thin streams 55‑80 ft, and pop‑ups often cover quarter, half, or full circles. Check the main line pressure; 40‑60 PSI is ideal, and install a regulator if it’s high or low. Turn the top screw clockwise to shrink the radius up to 25 % or counter‑clockwise to extend it, adjusting in small increments and watching the arc close or widen. Tighten gently to avoid damaging the nozzle, and verify coverage after a few minutes. If you keep going, you’ll uncover deeper troubleshooting tips.
Identify Sprinkler Type for Proper Sprinkler Adjustment
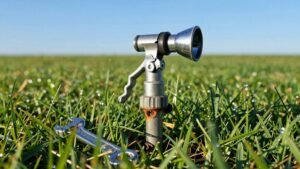
Start by spotting the spray pattern: a steady mist tells you you’re looking at a spray head, while a rotating stream signals a rotary head. You then measure coverage area, noting radius and arc, to confirm the type. Fixed spray heads give a fan‑shaped mist; adjustable heads let you tweak arc and radius. Rotary heads produce thin, rotating streams that reach 55‑80 ft. Pop‑up heads retract below ground and often have quarter, half, or full‑circle arcs. Flood bubblers emit a steady flow for a 5‑ft zone. Identify sprinkler materials by feeling the nozzle—plastic is common, brass indicates higher durability. Matching material to terrain and pressure guarantees precise adjustments and optimal performance. Properly adjusting the height of a pop‑up head can prevent water runoff and improve efficiency across the lawn. Install a pressure regulator to maintain consistent water flow and protect the system from over‑pressurization. Remember to depressurize the line before making any adjustments to avoid accidental spray bursts.
Check Water Pressure and Why It Affects Sprinkler Performance
Why does water pressure matter for your sprinklers? It determines the force that pushes water through pipes and out of each nozzle, shaping flow rate, spray pattern, and coverage uniformity. Low pressure yields spotty or missing arcs; high pressure creates mist, overspray, and waste—each 5 PSI over the 30‑45 PSI sweet spot adds 6‑8 % extra water. Check pressure with a gauge at the main line, then compare to the ideal 40‑60 PSI window. If readings drift, apply pressure management strategies: install regulators at laterals, use WaterSense heads with built‑in control, and balance elevation and friction losses. Consistent water supply reliability preserves sprinkler performance, prevents flow variation, and keeps your lawn evenly irrigated. Measure the static pressure by slowly turning on an outside faucet fully before testing. Properly zone each section of your lawn can further improve uniformity and reduce waste. Head spacing guidelines help ensure each sprinkler covers its intended area without overlap. The sprinkler arc should be adjusted to match the shape of the planting beds for optimal coverage.
Set the Correct Spray Distance With the Top Screw
Maintaining the right water pressure sets the stage for fine‑tuning each head’s reach, and the top adjustment screw lets you dial that distance precisely. First, locate the optimum screw position: wipe away dirt, then use a flathead screwdriver. Turn the screw clockwise while holding the sprinkler body steady; each quarter‑turn reduces radius, up to 25 % on Rain Bird models. Watch the spray as you turn, so you can monitor screw adjustment impact in real time. Counterclockwise does the opposite, extending the throw from 75 % to 100 % on Rain Bird or increasing range on Orbit diffusers. Keep the water running, make incremental turns, and verify coverage after a few minutes. Avoid overtightening to prevent nozzle damage. Spray distance can be reduced all the way to a trickle by turning the screw to the right.
Fine‑Tune Spray Pattern & Arc for Accurate Sprinkler Adjustment
A well‑tuned spray pattern and arc are the backbone of precise watering, ensuring every square foot receives the right amount of water without waste. First, measure sprinkler trajectory with a tape or string line; note the farthest reach and the arc width. Then, set head spacing at half the average throw distance to achieve 50 % overlap. Use calibrated markers to verify that each spray diameter meets the overlap requirement, adjusting the nozzle or rotor until the pattern touches but doesn’t double‑cover adjacent arcs. For rotary or impact heads, turn the adjustment screw in small increments, watching the arc close or widen. Finally, run a 10‑minute test, flag dry spots, and fine‑tune until you see uniform wetting across the entire lawn. Check for loose fittings that can cause erratic rotation and correct them before final adjustments. Remember to shut off the water supply before starting any adjustment to avoid accidental spraying. Properly set the water pressure to match the sprinkler’s specifications for consistent throw and arc shape.
Adjust Rotor Radius & Arc With a Flat‑Head Screwdriver
Adjusting the rotor radius and arc with a flat‑head screwdriver is a quick, precise way to fine‑tune spray coverage. You locate the tiny radius screw on the rotor’s top, turn clockwise to extend the spray up to 25 % and counter‑clockwise to shorten it, testing while the head runs. For the arc, press gently on the rotor, lock it at the right‑stop, then insert the screwdriver into the keyhole. Turn left to widen the arc, right to narrow it, and push the nozzle down while rotating to add or subtract degrees. This manual rotor adjustment respects sealed sprinkler components, keeping them intact. After each tweak, remove the tool, observe the pattern, and replace any vandal collar or head as needed. Ensure the rotor is operating clockwise to increase the arc size. Proper head selection is essential because different head types provide varying spray patterns and distances, and using the correct type helps avoid une spots and overlaps. Check the spray distance against the manufacturer’s specifications to confirm optimal coverage. Remember to dig the correct depth to prevent damage to the riser and ensure stable head placement.
Watch Your Sprinkler in Action and Spot Gaps
When you turn the system on and watch each head fire, you’ll instantly see where the spray lands, where it falls short, and where it overreaches. You’ll Identify sprinkler obstructions—shrubs, garden edging, low‑lying furniture—by noting misting or sputtering that deviates from a clean arc. Observe wet/dry patterns across the lawn: brown patches flag insufficient coverage, while puddles or soggy spots reveal overwatering. Walk the perimeter of each zone, flagging dry gaps between adjacent heads and marking areas where water pools around the base. Compare green, evenly wet sections with the drier blocks; this visual map tells you exactly which heads need adjustment. Record the overlap percentage, aiming for no more than 50 % to avoid waste while ensuring full, uniform coverage. Adjust the sprinkler heads by tightening the screw to reduce flow and prevent watering pavement. Relieving pressure before adjustments helps avoid sudden spray bursts. Properly set the spray radius to match the intended coverage area for each head. Understanding cap types helps you choose the right cap for seasonal adjustments.
Troubleshoot Common Issues and When to Replace Nozzles
If you notice uneven spray, low arcs, or persistent leaks, it’s likely a clog, pressure fault, seal breach, or misalignment is at play. First, inspect each nozzle for lawn clippings, dust, or dirt; remove the head and flush with a hose to restore flow. Check pressure by observing pop‑up behavior; low arcs signal a blockage or valve issue, so tighten connections and replace worn seals. For misdirected arcs, perform Sprinkler head angle adjustments, aligning the spray to cover the intended quadrant. When a head drips, won’t retract, or shows cracked casings, it’s time to replace the nozzle entirely. Matching new heads to the system’s specifications guarantees uniform coverage and prevents recurring troubleshooting sprinkler flow issues. Proper cleaning greatly extends the lifespan of sprinkler components. Follow the step‑by‑step guide to replace a head safely and efficiently. Remember to shut off the water supply before any maintenance to avoid accidental flooding.