First, shut off the mower and disconnect the power, then wear gloves and goggles. Secure the blade in a vise, note its orientation, and clean off any debris. File each cutting edge at a consistent 30‑40° angle, keeping about 50 strokes per side. Use a nail or balancing cone to see which side hangs lower, then file a little more from that heavy side until the blade sits perfectly horizontal. Reinstall the blade with the curved side up, and you’ll notice smoother cuts and less vibration as you continue.
How to Balance a Mower Blade: Quick Step‑by‑Step Guide
First, shut off the mower, disconnect the battery or spark‑plug wire, and don gloves and goggles before you flip the deck or tilt it onto a stable work surface. Loosen the center bolt with a socket wrench, then remove the blade and note its orientation for proper blade positioning. Clean the blade, inspect for cracks, and secure it in a vise. Apply blade leveling techniques: file each cutting edge evenly, maintaining a 30‑40° angle, and keep stroke count consistent (≈50 per side). After sharpening, use a balancing cone or nail method to identify heavy spots, filing additional material until the blade sits horizontal. Reinstall with the curved side up, tighten the bolt, reconnect power, and verify alignment before operation. Use a homemade balancing jig to ensure the blade is perfectly balanced after sharpening. Always wear safety glasses when handling the blade to protect your eyes from metal shards. Regularly check the air filter for debris to maintain optimal engine performance.

Accurate Lawn Mower Blade Balancer: Ensure your mower blades are perfectly balanced after sharpening with the SporGain Lawn Mower Blade Balancer. Reduces blade wobble, vibration, and engine wear, giving your lawn a smoother, cleaner cut every time.

SHARPENER AND BALANCER: Universal Blade Sharpening and Balancing Kit for Walk-Behind Mowers, Lawn Tractors and Zero-Turn Mowers

The lawn mower blade sharpener is made of brown corundum, which has high durability and is not easily melted at high temperatures, making it suitable for long-term use.
DIY Tests to Check Blade Balance
Even if you don’t have professional equipment, you can reliably gauge a mower blade’s balance with a few DIY tests. First, use the nail method: insert a horizontal nail through the center hole, let gravity settle the blade, and note which side dips. This low‑cost test offers clear pros and cons—easy setup versus limited accuracy. Next, try a cone‑style balancer (≈$10‑$20). Its notched design provides better accuracy comparisons than the nail, while remaining simple. For a more thorough check, employ a wall‑mounted magnetic balancer; it reveals weight imbalance and detects bends, offering the highest precision among DIY options. After each filing, repeat the chosen test to confirm the blade stays level before reinstalling. Moreover, a blade’s cutting angle can be verified after sharpening to ensure optimal performance. Always wear protective gloves to prevent cuts while handling the blade. Properly securing the blade on a bench grinder helps maintain consistent grinding angle and prevents uneven wear.

𝗟𝗔𝗪𝗡𝗠𝗢𝗪𝗘𝗥 𝗕𝗟𝗔𝗗𝗘 𝗕𝗔𝗟𝗔𝗡𝗖𝗘𝗥 𝗧𝗢𝗢𝗟: Verifies unbalanced and bent blades after sharpening, improving mower longevity with reduced vibration and engine wear providing a smoother cut

Lawn Mower Blade Balancer: This precision blade balancer is designed to balance mower blades after sharpening. Provides precise blade balancing and verifies unbalanced and bent blades, reduce vibration and avoid engine wear, extend mower life

Easy Blade Balancing for Smooth Cutting: Tired of wobbly mower blades? This round balancer simply sits on your blade's center to quickly check balance. A balanced blade cuts grass faster and cleaner, reduces mower vibration, and extends your machine's life—perfect for beginners and DIYers
How to Spot an Unbalanced Blade Using Simple DIY Tests
A vibrating mower, uneven grass patches, or rattling noises are immediate signs that a blade is out of balance, and you can confirm the issue with a few simple DIY tests. First, run the mower at idle and feel the handles; note vibration severity patterns—steady low‑frequency tremors mean minor imbalance, while sharp, high‑frequency shakes indicate severe issues. Next, inspect cut quality deviations: after a short pass, look for ragged edges, torn tips, or clumped clippings. If the grass is uneven or some strips remain taller, the blade is likely unbalanced. Finally, perform a quick visual check: remove the blade, balance it on a nail, and observe any wobble. A wobble confirms the imbalance, prompting corrective action. A sharp blade also reduces the strain on the mower, leading to a cleaner cut and healthier grass. Keeping blades sharp improves fuel efficiency and reduces weed seed spread.
Common Blade‑Balance Mistakes, Needed Tools, and Fixes
When you tackle blade‑balance errors, the most common pitfalls stem from uneven filing, improper measurement methods, and neglecting cleanup. You’ll often over‑file one side, creating a persistent overweight condition, or use the nail‑in‑wall trick, which measures from the wrong point and can misread by up to 2.75 in‑oz. Ignoring blade centering on a balancer or skipping grass‑debris removal also masks true imbalance.
Use a precision bearing‑style balancer or the MAG‑1000 to quantify imbalance, a bubble level to confirm alignment, and a balancing jig for stability. If manufacturing flaws or striking objects have deformed the blade, grind the dented area lightly, then re‑check. File or sand the heavier side incrementally, alternating sides until the blade sits level on the balancer. Verify the final reading before reinstalling.
Balanced blades reduce deck vibration and improve cut quality. Selecting the proper blade type for your grass, such as a mulching blade for fine lawns, can also enhance overall cutting performance.
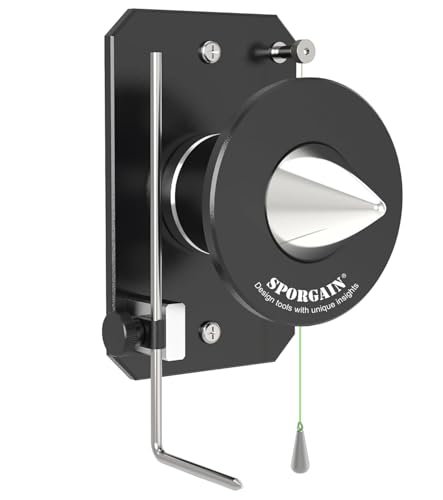
[Precision Craftsmanship]: The lawn mower blade balancer advanced finishing processes are used to ensure extreme precision in every detail, lawnmower blade balancer providing unrivalled durability and balanced performance

Easy Blade Balancing for Smooth Cutting: Tired of wobbly mower blades? This round balancer simply sits on your blade's center to quickly check balance. A balanced blade cuts grass faster and cleaner, reduces mower vibration, and extends your machine's life—perfect for beginners and DIYers
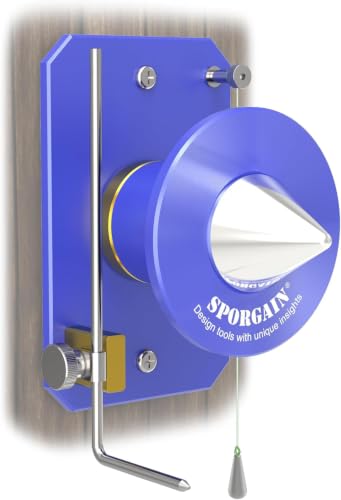
[Precision Craftsmanship]: The lawn mower blade balancer advanced finishing processes are used to ensure extreme precision in every detail, lawnmower blade balancer providing unrivalled durability and balanced performance
How Often to Re‑Balance a Blade After Sharpening and During Use
Three key moments demand a fresh balance check: right after you finish sharpening, whenever the blade encounters a hard impact, and at regular intervals during use. After sharpening, test balance immediately; even a few file passes can shift weight. If you hit a rock, root, or other hard object, inspect the blade for bends or chips and rebalance before the next cut. Schedule a season specific rebalance at least once per mowing season—early spring and mid‑summer for homeowners, every 1–3 months for robotic mowers. Apply a usage based rebalance whenever you log 20–25 mowing hours, or after each sharpening cycle. Watch for vibration, wobbling, or ragged cuts; they signal an imbalance that must be corrected promptly. Most homeowners should aim to sharpen the blade every 20 to 25 hours of mowing. Maintaining sharp blade geometry ensures a clean cut and reduces wear on the mower. Regularly checking blade weight distribution helps prevent premature dullness and uneven wear.