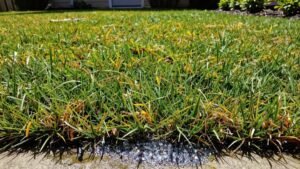
Loosen the top 3‑4 inches of soil with a tiller or harrow, rake out debris, and spread a thin layer of compost or Scotts® Turf Builder® Lawn Soil for firm seed‑to‑soil contact. Choose a spreader that matches your lawn size—drop for small, obstacle‑rich areas, push for medium, broadcast for large. Set the spreader to the recommended rate, walk straight lines, then repeat at a right angle to create intersecting passes that guarantee uniform coverage. Lightly rake the seed in, roll it gently, and water with a fine mist for 5‑10 minutes. Continue to the next steps for deeper insight.
How to Prepare the Soil for Seeding a Lawn
When you’re ready to seed a lawn, begin by opening and loosening the soil surface to a depth of at least three to four inches; tilling or harrowing to this depth creates a receptive seed bed, enables proper water absorption, and prevents runoff that could wash seeds away. Use effective tilling equipment—rotary tillers or disc harrows—to achieve a uniform looseness while maintaining ideal soil moisture conditions; the soil should feel damp but not soggy. After the bulk loosening, break up any compacted zones with an electric dethatcher or a sturdy rake, creating a fine, friable layer. Rake the surface to remove debris, then roll or drag a weighted tool to firm and level the bed, ensuring a smooth, even platform ready for seed placement. Multiple passes are required to properly prepare the area. Adding a thin layer of topsoil before seeding can improve seed‑to‑soil contact and nutrient availability. Proper soil testing before starting helps you adjust pH and nutrient levels for optimal grass growth. Knowing the correct seeding rate for your grass type ensures you achieve dense, healthy coverage without waste.

Sturdy Spring Steel Blades: Crafted from tempered spring steel, the rotary blades offer outstanding strength and flexibility—resisting bending, breaking, and deformation even under heavy pressure. Ideal for breaking soil and uprooting weeds season after season

【Multi Function Rotary Tiller】: Handle adjustable stainless steel handle rotary cultivator with light weight strong aluminum tines and wheels, the garden tiller is easy aerating and cultivating your ground make soil mixing and reseeding the grass
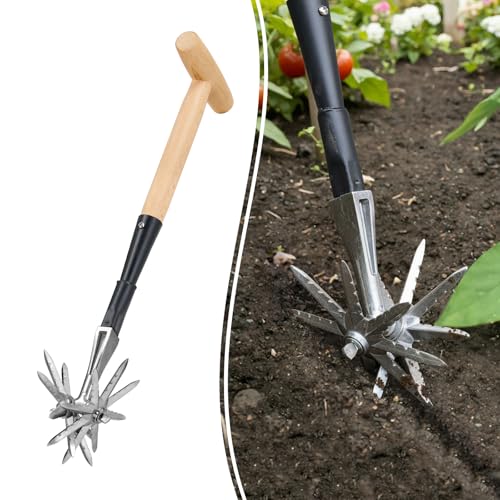
HEALTHIER SOIL, HEALTHIER PLANTS -- stop struggling with hard, compacted earth. By breaking up compacted soil, Colwelt manual rotary cultivator can improve soil structure so air and water can penetrate more easily. That means stronger root systems, more efficient nutrient absorption, and visibly healthier plants. And when it's time to re-seed bare or damaged areas, you'll have the perfect environment for success.
How to Test and Amend Lawn Soil Before Seeding
If you want reliable results, start by gathering a representative composite sample of your lawn’s soil before you even think about seeding. Collect 10‑15 cores in a zig‑zag pattern, using a 6‑inch coring tool to reach 4‑6 inches depth, removing thatch, roots, and debris. Mix the cores in a clean bucket until uniform; dry any moist portions on newspaper. Perform a ribbon test to gauge texture, then a jar test for sand‑silt‑clay ratios. For precise data, send a 2‑cup composite to a lab for professional soil testing, targeting pH, phosphorus, potassium, organic matter, and cation exchange capacity. Identify soil nutrient deficiencies, then amend with lime, sulfur, or targeted fertilizers according to lab recommendations before seeding. A yearly soil test can help you save money and achieve the best results from your lawn care products. Understanding seed per acre calculations ensures you purchase the right amount of seed for optimal lawn density. Conduct a germination test to verify seed viability before planting. The origin of grass seeds traces back to mature grass plants that produce seeds through pollination and fertilization.

✅ 1Dial & 1 LCD Screen - Replace/install all 3 batteries each time. Put button to %RH/°F to - Turn On, and put to LIGHT to - Turn Off. Read the LCD results in 3-5 mins. (Not Water Moisture Meter, so, please don't test liquid)

Kindly NOTE: This soil tester can not be applied to test pH value of any other liquid. If the soil is too dry the indicator will not move, and water it before testing.
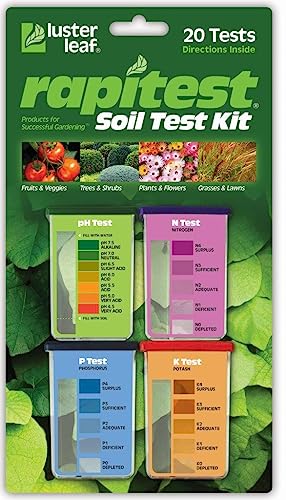
Quick, at home results for Soil pH, Nitrogen, Phosphorous and Potash Innovative and inexpensive soil test kit features an easy-to-use capsule system and patented color comparators
How to Choose the Right Grass Seed for Your Lawn
Where do you live, what sunlight does your yard receive, and what soil conditions prevail? Assess your climate zone suitability first: cool‑season species (Kentucky bluegrass, fine fescue, perennial ryegrass, tall fescue) fit northern zones; warm‑season varieties (Bermuda, Zoysia, St. Augustine, Bahiagrass, Centipede) thrive in southern hot, humid zones. Match sun exposure requirements to your yard’s light pattern: 4–6 hours direct sun for most grasses, 8+ hours for sun‑loving Bermuda, 3–4 hours filtered light for shade‑tolerant fine fescues. Then cross‑reference soil compatibility: sandy Gulf soils suit St. Augustine, well‑drained sites favor Zoysia, drought‑prone soils benefit tall fescue. Choose a blend that respects these three parameters, ensuring each component satisfies the identified climate zone suitability and sun exposure requirements. Pennington Smart Seed offers region‑specific blends that align with these guidelines. Selecting the right soil texture enhances seed‑to‑soil contact and promotes uniform germination. Understanding soil pH helps you amend the soil for optimal nutrient availability. Proper seed depth is critical for successful establishment.

This pack of lawn seeds is ideal for new lawns, overseeding and lawn repair
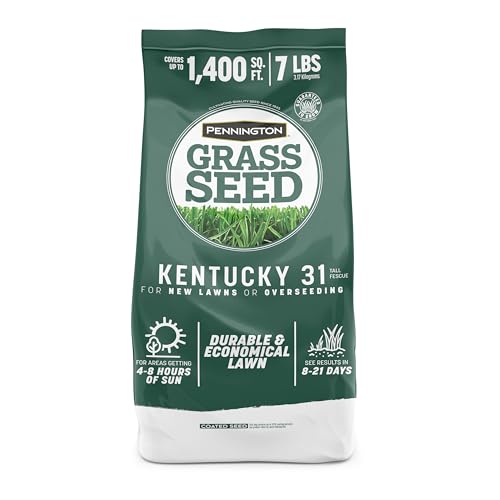
A grass seed for lawns that grows thick blades of grass that stand up to hot summers and heavy rains

ESTABLISHES NEW YARDS & FILLS IN BARE SPOTS - Black Beauty Ultra Grass Seed quickly germinates for the fast establishment of newly seeded lawns. It also rapidly fills in bare spots to invigorate thin or damaged lawns.
Which Spreader Works Best for Your Seed Type?
After matching your climate, sun exposure, and soil to a suitable grass‑seed blend, the next step is selecting a spreader that delivers that blend accurately. For lightweight seed on a small, obstacle‑rich lawn, choose a drop spreader; its direct‑drop mechanism yields uniform distribution and minimizes drift. If you have a medium‑size yard up to half‑acre, a push spreader with 50 lb. spreader capacity and AutoFlow technology offers precise control while maintaining speed. Large lawns benefit from broadcast models—Scotts Turf Builder Edgeguard Mini for ≤5,000 sq ft, Edgeguard DLX for ≤15,000 sq ft, and Elite for up to 20,000 sq ft—each providing spreader adjustability via calibrated settings. For acreage, a tow‑behind spreader with a 3.5 cu ft hopper guarantees consistent coverage and reduced labor. Proper seed‑to‑soil ratios ensure optimal germination and recommended coverage rates for each grass type. Understanding the soil pH range helps you amend the soil for better nutrient availability. Adjusting soil pH with lime can also suppress certain weed species and promote healthier grass growth.

NO ASSEMBLY REQUIRED: Scotts spreader comes pre-calibrated and ready-to-use with a fold-down handle for easy storage; use it year-round including as an ice melt spreader or salt spreader for snow

Holds 10,000 square feet of product

OPERATION: Adjustable arm support on this seed, salt and fertilizer spreader helps provide maximum comfort
How to Apply Lawn Seed Evenly in Intersecting Passes
When you lay lawn seed, the criss‑cross technique guarantees even coverage by splitting the total seed amount in half and applying each half on perpendicular passes; you set the spreader to optimal spreader settings, then walk a north‑south line at a steady pace, overlapping each pass by 50 % of its width. Reverse the spreader to the same settings and walk an east‑west line, again overlapping 50 % to achieve the required seeding pattern variations. Begin at the perimeter, then fill the interior with parallel lines, maintaining consistent speed to preserve the ¼–½″ target spacing. The bell‑curve distribution of the rotary spreader confirms the center receives the highest concentration, while the tapered edges fill gaps. This systematic overlap eliminates under‑seeded zones and yields a uniform, professional lawn. Proper mowing height is essential for optimal lawn health and helps the stripes stay sharp. For best germination, sow during the optimal planting window for your climate zone.

64-OUNCE BOTTLE: high-capacity poly bottle with a wide opening and easy screw top, quickly remove the lid to add your preferred seed, salt, fertilizer, etc. and simply screw back into place

NO ASSEMBLY REQUIRED: Scotts spreader comes pre-calibrated and ready-to-use; use it year-round including as an ice melt spreader or salt spreader for snow

Precise Spreading, Beautiful Lawn: With an 8-inch wide spread and 18 adjustable settings, plus a disc pellet controller, this push spreader ensures precise coverage of seeds and fertilizer. Multi-directional adjustments guarantee even distribution with no missed spots.
How to Rake Seed and Mulch a Lawn After Seeding
The criss‑cross seeding pattern you just set up creates a uniformly distributed seed layer, but the work isn’t finished until the seeds are properly incorporated and protected. First, grab a garden rake and sweep the surface to break up clumps, then drag the rake across the lawn once to brush the seed into the topsoil. Lightly work a thin mulch or compost layer into the upper two inches, ensuring you’re minimizing seed disturbance while improving seed‑soil contact. Next, spread a one‑inch coat of Scotts® Turf Builder® Lawn Soil evenly, using a spreader for uniformity. Finally, employ a lawn roller—or a mower with a roller attachment—to apply firm pressure, achieving pressing seed into soil and securing the seed’s position before any watering. Use a lightweight roller to avoid compacting the soil excessively. Proper soil aeration before seeding also promotes healthier root development. Waiting 2‑3 weeks after germination before the first mow helps the grass develop strong tillers and reduces stress.
How to Water a Newly Seeded Lawn Correctly
Do you know the exact timing and amount of water a newly seeded lawn needs? You must water immediately after seeding, using a mist or oscillating nozzle to apply ⅛‑¼ inch of water for 5‑10 minutes, keeping the top 1.5‑2 inches of soil evenly moist. Start with 2‑4 short sessions daily, early morning or early evening, to minimize evaporation and prevent runoff. Continuously monitor soil moisture; if the surface dries between sessions, adjust watering schedule accordingly. After emergence, reduce to one daily session for a week, then shift to longer, deeper soaks per the long‑term plan. Use automatic timers or hand‑held sprinklers, ensuring uniform coverage without puddling. This methodical approach guarantees ideal germination and root development. All seeds require moisture and temperature for germination. Maintaining light frequent watering during the first two weeks helps prevent seed rot while promoting consistent moisture. Keeping your dog off the new lawn for at least two weeks protects the delicate seedlings from paw pressure and urine. Some grass seed varieties, such as ryegrass, can cause digestive upset in dogs if ingested.
How to Care for a Lawn After Seeding
A newly seeded lawn demands careful post‑planting stewardship to guarantee robust establishment. You must avoid soil compaction by restricting foot traffic for at least four weeks, especially during the first month after power seeding. Keep people and pets off the area to prevent seed dislodgement and protect shallow roots. Begin mowing only after the grass reaches four inches, using the highest mower setting and a sharp blade to avoid pulling seedlings. Remove leaves and debris gently with a blower before they mat, preserving sunlight and preventing critter habitats. Delay weed control until the lawn has been mowed twice, then apply targeted treatments. Apply a balanced fertilizer six weeks after germination, and resume normal fertilization schedules thereafter. Proper soil preparation, including soil testing for pH and nutrient levels, enhances seed germination success.