You can sharpen a lawn‑mower blade at home with a hand file, a drill‑powered attachment, or an angle grinder, or you can take it to a hardware store, a mower‑service shop, or a mobile sharpening vendor. DIY methods let you control the bevel angle and balance, while professional services cost $10‑$15 and handle bent or cracked blades. Choose the option that matches your skill, time, and budget, then follow the safety and balance steps to keep the blade at its factory angle and avoid vibration. Continue for detailed tips and a step‑by‑step guide.
Diagnose Blade Dullness Before You Sharpen
One quick way to tell if your mower blades are dull is by inspecting the grass right after a cut. Look for ragged, torn tips, white or brown discoloration, and frayed edges; these signs of blade damage reveal factors influencing dullness such as soil grit, frequent mowing, and metal fatigue. Uneven lawn height and shredded grass fragments indicate the blade is cutting instead of slicing. Check for clumps of grass yanked from the soil and excessive pushing effort, which signal reduced cutting efficiency. Visually examine the blade: rounded, chipped, or nicked edges, dents, or missing chunks confirm dullness. Compare the edge to a new blade; minor nicks may be sharpened, but severe warping or chipping requires replacement. Dull blades increase wear-and-tear on lawnmower components, making regular inspection essential. Keeping blades sharp promotes a healthier lawn by preventing uneed seed spread. A sharp blade also ensures even nutrient distribution across the turf. Properly maintaining the blade angle during sharpening can extend blade life.
Set Up Safely: Gear, Blade Removal, and Vise Securing
After confirming the blades are dull, you’ll need to set up a safe work environment before removal. Wear heavy work gloves and cut‑resistant gloves; disconnect the spark plug wire or remove the spark plug, and for electric mowers, remove batteries and unplug the cord. Apply penetrating lubricant to the mounting bolt, then use a socket or combination wrench to loosen it. Identify reverse thread bolts and turn clockwise; standard threads turn counter‑clockwise. Raise the mower on a lift or lay it on its side, block the deck with a 2×4 or C‑clamp, and pull off the blade. Snap a photo for Blade orientation documentation. Clean the blade, then secure it in a vise, flat in the jaws, using a wooden block opposite the mounting hole to prevent movement during sharpening. A sharp blade ensures a healthier lawn and cleaner cuts. Follow the five‑step method to avoid injury and protect the equipment. Remember to maintain proper posture while lifting the mower to reduce strain. Understanding the pollination process of grass seeds helps appreciate how natural reproduction contributes to lawn health.
Sharpen a Lawn Mower Blade With a Hand File
If you’ve already secured the blade in a vise, grab a standard flat file and start with the coarse grade to knock down the rough, folded edge; then move to a medium file for shaping and finish with a fine file to polish the edge to a bright, uniform sheen. Choose proper file choice: a coarse file removes material quickly, a medium file restores the bevel angle, and a fine file yields a polished, sharp edge. Follow the blade’s grain and contour, filing from the tip toward the hub to avoid burrs on the flat side. Watch the metal turn silver as you progress; uniform shininess signals complete coverage. After progressive sharpening steps, the edge will feel noticeably sharper and retain the original taper, delivering ideal cutting performance. Use a deburring rod to eliminate any remaining burrs on the back side of the blade. Remember to check the blade for balance before reinstalling it to prevent uneven wear and vibration. Proper blade balance reduces vibration and extends mower lifespan.


VERSATILE – The most versatile sharpener in the market to sharpen and hone both single and double beveled blades including knife, mower blade, pruner, loppers, hedge shears, axe, machete, hatchet, scissors, edged tool, etc.
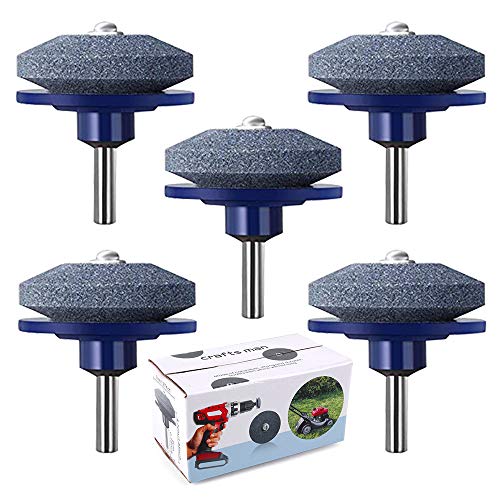
Lawn Mower Blade Sharpener : The new version of the Lawn Mower Blade Sharpener is Made of corundum, it solves the base wear caused by the excessive speed of grindstone, and effectively prolongs the service life and improves the use effect of the product. Our lawn mower blade sharpener is provided by the original factory, and it is guaranteed.
Sharpen a Lawn Mower Blade Using a Drill‑Powered Attachment
Securing the blade in a vise and using a hand file gives a solid foundation, but a drill‑powered attachment speeds the process dramatically. First, remove the blade with a wrench, mark its orientation, and clean off debris. Clamp the blade securely; then attach the drill‑powered sharpener attachment with its whetstone, tightening it in the drill’s 1/4‑in. or 3/8‑in. chuck. Set the attachment to match the existing bevel angle. Turn on the drill and glide the sharpener along the edge, moving back and forth while monitoring temperature; pause periodically to let the blade cool. After achieving a uniform, sharp edge, use a blade balancer to confirm evenness, then reinstall the blade, tightening the bolt clockwise. Store the drill and sharpener attachments in a dry drill storage spot to protect them from rust. A sharp blade ensures a healthy, green lawn. Always wear protective gloves while handling the blade to prevent cuts. Blade tension should be checked after reassembly to maintain optimal cutting performance.

New Materials: The lawn mower blade sharpener tool is made of all-metal accessories and diamond grinding wheels, which has a longer service life and higher grinding efficiency

【Long‑Lasting Diamond‑Coated Abrasive Disc】Features a premium diamond‑coated abrasive layer. Compared with standard grinding discs, it delivers more consistent sharpening performance — balancing fast material removal with a finer, cleaner cutting edge.
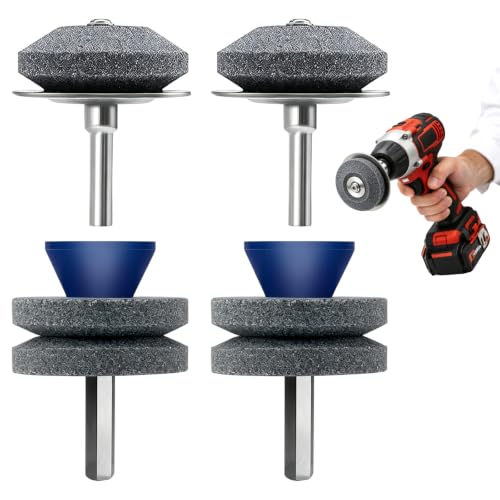
Lawn Mower Blade Sharpener :The mower blade sharpener made of double layer corundum, strong and durable, quality item which will last long, is a great helper for lawn mowers and lawn tractor blades
Sharpen a Lawn Mower Blade With an Angle Grinder
While you’re prepping the mower, remove the blade with a wrench, clean off all debris, and clamp it firmly in a vise; this blade removal technique guarantees stability. Wear gloves, goggles, and ear protection, then attach a 20‑30° grinding wheel to a cordless or corded angle grinder. Set the grinder to moderate speed to limit heat. Use an angle finder to verify sharpening angle consistency before each pass. Apply light to medium pressure, moving the disc slowly in one‑directional strokes along the edge. Complete one side before flipping the blade. Inspect the edge for nicks, test sharpness with a grass blade, then rebalance if needed. Reinstall the blade with proper torque, avoiding over‑tightening. The workbench was built temporarily for on‑site sharpening. Regularly checking blade condition helps prevent uneven cuts and maintains lawn health. Following the step‑by‑step guide ensures optimal performance and safety.

High performance aluminum oxide grain for long life and high material removal of the grinding wheel


UNIVERSAL: Diamond blade for angle grinder is designed for domestic use and DIY. GRAFF turbo cutting disc is intended for working with concrete, artificial stone, paving flag and kerb.
Keep the Factory Blade Angle While Sharpening
Keeping the factory‑specified 27‑30° bevel while sharpening preserves the blade’s original geometry, guarantees ideal cutting performance, and prolongs service life. You should set your hand file or grinder to the Ideal blade angle adjustment of 30° for most mowers, or stay within the 27‑30° range if your blade manufacturer recommends a tolerance. First, clamp the blade securely and align the tool’s fence with the cutting edge. Then, file along the existing bevel, removing only the dull metal layer. After each pass, perform Proper blade angle verification by checking the edge against a calibrated protractor or angle gauge. Maintaining this angle prevents temper loss, reduces vibration, and extends the blade’s service interval. Avoid over‑grinding, as any deviation beyond the factory bevel compromises durability and could cause premature failure. Sharp blades also promote healthier grass growth by preventing tearing. Regular sharpening is especially important when the grass becomes thicker or tougher, as dull blades can cause uneven cutting and stress the mower. Using the correct right‑hand thread ensures the blade remains securely fastened during operation.
Blade Balance Test After Sharpening
If you skip a balance check after sharpening, the mower will vibrate excessively and cut unevenly. Perform blade balancing testing before reassembly. Hang the blade on a wood screw or nail; observe any tilt. A tilted blade indicates excess weight on one side, usually from uneven grinding or material loss. Remove a light amount of metal from the heavy side, then retest repeatedly until the blade hangs level. Alternatively, place the blade on a balancer device or a screwdriver edge; both methods reveal imbalance quickly. Clean the blade of grass and debris before testing to avoid false readings. Achieving proper blade balance confirmation guarantees engine stress is eliminated, fuel efficiency is improved, and uniform cuts across the lawn are achieved. Regularly check blade balance throughout the year to maintain optimal mower performance. Sharpened blades that maintain the recommended cutting angle provide smoother operation and longer blade life.
When to Hire a Pro to Sharpen Your Lawn Mower Blade?
When should you call a professional to sharpen your mower blade? You need a pro when you see bent or cracked steel, white frayed grass tips, or thin “mowhawks” that DIY tools can’t fix. Also, impact damage from rocks or rapid dulling after 10‑15 mowing hours justifies expert inspection. Conduct a cost benefit analysis: a $10‑$15 service can restore a blade for 5‑10 sharpenings, saving replacement costs and reducing labor time (under 10 minutes versus 30‑45 minutes DIY). Seasonal timing matters—schedule early‑spring sharpening before the first mow, and a mid‑summer service during cool‑season growth spikes. Residential lawns with 20‑25 mowing hours between sharpens typically benefit from one to two professional visits per season. Regular sharpening is recommended every 20 to 25 hours of mowing. Maintaining the correct oil level is essential for engine health while you’re sharpening. Proper oil change intervals help ensure the mower runs smoothly after blade maintenance. A well‑balanced blade also improves fuel efficiency and reduces engine strain, which is why checking for blade balance during each sharpening session is advisable.
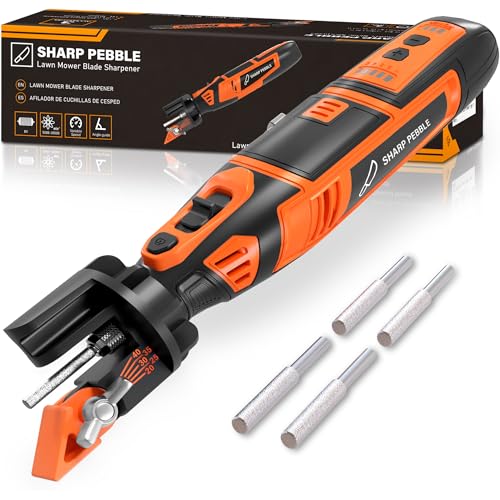
SHARPEN YOUR MOWER BLADE IN MINUTES: Blade removal is optional with this cordless lawnmower sharpener — many standard residential blades can be sharpened right on the mower, saving you the hassle of disassembly. Routine touch-ups take about 2–3 minutes per blade; badly worn edges take longer and are best done with the blade removed.

New Upgrade: The new upgraded Lawn Mower Blade Sharpener is different from the old version. New version Lawn Mower Blade Sharpener made of corundum with stainless steel base, primeun quality, durable, long service life, blade sharpener can be used repeatedly

SHARPENER AND BALANCER: Universal Blade Sharpening and Balancing Kit for Walk-Behind Mowers, Lawn Tractors and Zero-Turn Mowers
Pick the Right Sharpening Method for Your Skill, Time, and Budget
After evaluating whether a professional service is warranted, you’ll need to match the sharpening technique to your own skill level, available time, and budget. If you’re a beginner, hand‑filing offers low skill demand and minimal equipment cost considerations—just a file, a vise, and steady strokes at a 30‑degree angle. Intermediate users can opt for a drill‑attachment stone; it’s faster, requires moderate cost, and maintains personal comfort level when you control the angle. Experienced DIYers may choose a bench grinder or angle grinder for rapid results, but both demand precision, heat monitoring, and higher initial equipment investment. Balance time versus cost: files are cheapest and slowest, grinders are pricier but quickest. Aim for butter‑knife sharpness, then verify blade balance before use. Dull blades can cause frayed grass that is more susceptible to disease. Wearing protective gear while sharpening reduces the risk of injury. Proper blade angle ensures an even cut and helps prevent uneven wear.

Ideal Use: Sharpens tools, removes burrs, smooths rough edges, and shapes materials for maintenance, fabrication, repair, and woodworking projects

High-Quality Diamond Sands: Industrial diamonds are electroplated onto steel base. It has higher durability and longevity

Durable monocrystalline diamonds coated full tang stainless steel. The diamond coating of this product has a very high hardness. It can sharpen all your tools like new ones.