First, clear the deck and exterior with a hose, scrape softened grime, then wipe dry—avoid the engine and electrical parts. Warm the engine, drain the oil through the valve and pan, replace the filter, refill fresh oil, and set the correct level. Disconnect the battery, clean each post, coat with a protector, and store it cool and dry. Remove the spark plug, inspect and gap it, reinstall with 15 ft‑lb torque. Drain the fuel, add stabilizer, run the engine 5‑10 minutes, then fill to the tank’s midpoint. Finally, sharpen or replace blades and cover the mower. Continue for detailed instructions.
Winterize Your Mower: Full‑Step Overview
When winter approaches, you’ll want to complete a full‑step winterization of your mower to protect its components and guarantee reliable performance next season. Begin by clearing the deck and exterior of debris with a hose and wash‑out port, then scrape softened grime with a stick or screwdriver. Wipe the surfaces, avoiding engine and electrical parts, and after drying apply a thin WD‑40 coat to inhibit rust. Disconnect the battery, starting with the negative terminal, clean each post, coat with a protector, and store the unit in a cool, dry place to protect storage environment and minimize maintenance costs. Warm the engine, drain the oil through the valve and pan, replace the filter, refill with fresh oil, and verify the level with a dipstick. Finally, disconnect the spark plug wire, replace the plug to the correct gap, hand‑tighten then quarter‑turn, and inspect blades for wear, sharpening or replacing as needed. This methodical sequence safeguards the mower and reduces future service expenses. Check oil level before refilling. Change oil after the first 5–10 hours of operation to ensure optimal engine health. Remember to park on level surface before beginning any maintenance to avoid spills. The typical residential mower uses 0.5 – 1 quart of oil, so be sure to consult the owner’s manual for the exact capacity.
Drain and Stabilize Fuel for Winterizing the Mower
If you skip draining the tank, the fuel can go stale, form deposits, and attract moisture that corrodes the carburetor. First, run the mower until the engine stalls or disconnect the fuel line at the carburetor and collect the runoff in a sealed container. Use a siphon pump for the final few ounces, tilt the mower to drain residual fuel, and cap the container tightly. Clean any spills immediately. For a quicker method, add the recommended amount of fuel stabilizer—about 1 oz per 2 gal—to a partially filled tank, then top off with fresh gasoline. Run the engine 5–10 minutes to circulate treated fuel. Fill the tank to the midpoint of the filler neck, seal it, and store the mower in a dry, well‑ventilated area to guarantee proper fuel storage and prevent ethanol related problems. Ensure the fuel line is free‑flowing before re‑installing the tank. Properly storing chemicals can extend their shelf life and maintain effectiveness. Maintaining optimal temperature during storage can also reduce the rate of capacity loss in the mower’s battery. Wear protective gloves while handling fuel to minimize skin contact.

Fixes rough running and hard-to-start engines: Breaks down gum and varnish that cause rough running, hard starts, sputtering, and no-start issues in small engines, helping restore performance quickly
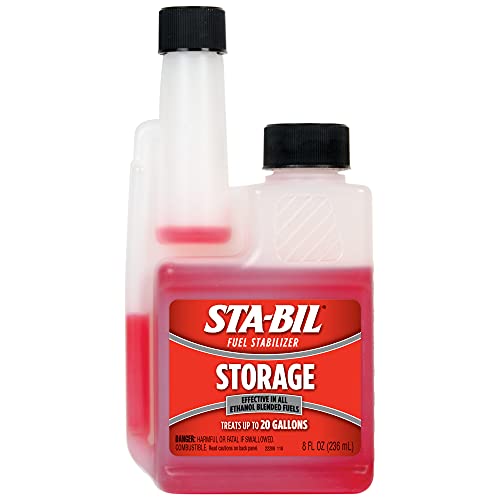
PRESERVES FUEL: This fuel stabilizer ensures keeps gasoline fresh for up to 24 months for storing vehicles that are not in use, boats, outdoor power equipment during winter months, or stocking up on fuel.

Great Product
Change Oil and Replace the Oil Filter Properly
Changing the oil and swapping the filter are essential steps for protecting your mower’s engine during winter storage. First, warm the engine briefly, then shut it off and disconnect the spark‑plug wire. Position the mower so the oil side faces down, remove the fill cap, and place an oil pan beneath the drain plug. Use a socket wrench to loosen the plug, let the oil fully drain, then reinstall and tighten it. For filter maintenance, set a rag under the old filter, turn it counter‑clockwise with a filter wrench, and discard it. Lightly coat the new gasket with fresh oil, hand‑tighten the new filter, then turn an additional half to three‑quarters turn. Fill with SAE 30 oil, checking level with the dipstick, run the engine at idle, re‑inspect for leaks, and cap the fill opening. Change oil after the first 5 hours of use. Remember to use a drain pan that can hold at least a quart of oil to avoid spills. Using the correct viscosity grade ensures proper lubrication and reduces wear in cold temperatures. Always consult the mower’s owner manual for the recommended oil capacity specific to your model.


SAE 10W-30 MOTOR OIL FOR SMALL ENGINES: One 32 fl oz bottle of STP Premium Synthetic Blend 4 Cycle Small Engine Oil SAE 10W-30, formulated for small engines in lawnmowers, generators, tractors, snow blowers, and other outdoor power equipment

10W-30 motor oil formulated to keep engines clean and responsive
Disconnect the Battery and Store It Safely
Before you begin storing the mower, make sure it’s on a flat, level surface, the engine is cool, and the ignition key is removed; wear gloves and goggles, then engage the parking brake. Using a 7/16‑inch or 10‑mm wrench, loosen the black negative terminal first, slide the cable off, and secure the nut on the bolt to prevent accidental contact. Next, disconnect the red positive terminal, keeping the cable away from any metal parts. Remove any brackets, straps, or bungee cords holding the battery, release the tension rod, and lift the heavy unit with assistance if needed, noting its orientation. Place the battery in a cool, dry container for battery storage, apply dielectric grease to terminals, and schedule battery recycling at a certified center. Remember to check voltage before storage to confirm the battery is fully charged. Perform a load test to verify the battery can sustain the mower’s starting current. Proper temperature management can significantly extend the overall lifespan of the battery. Proper disposal of hazardous materials, such as fuel residues, helps protect the environment.
Remove and Inspect the Spark Plug
You’ll start by removing the spark plug to inspect its condition, so make sure the engine is off, cool, and the ignition wire is disconnected by gripping the boot rather than the wire. Use a 13/16‑inch socket or ratchet to turn the plug counter‑clockwise; if it’s stuck, apply penetrating oil, let it sit, then gently tap the socket with a small hammer. Once loose, pull the boot off, then remove the plug with a spark plug wrench. Perform a Spark plug damage assessment: look for cracked porcelain, burned electrodes, or excessive carbon. Verify the gap with a feeler gauge and note any discoloration. Conduct a pre installation inspection, clean the threads, and store the plug in a dry container if it passes. Reinstall using a torque wrench set to 15 ft‑lb. A spark plug gauge is essential for checking the gap accurately. Properly cleaning the spark plug can prevent engine misfires and improve fuel efficiency. spark plug maintenance is a key step in ensuring reliable mower operation. Regularly checking the spark plug condition helps identify wear before it leads to performance issues. When testing the spark, you can use a spark tester to verify that a strong, blue spark is produced.
Sharpen or Replace Blades and Lubricate Moving Parts
If the blades are dull or damaged, you must sharpen or replace them and lubricate the moving components before the next mowing session. Inspect each blade with a wire brush for nicks, dings, or curls; replace any blade that exceeds the factory angle of 30‑35°. You decide to sharpen, clamp the blade securely and apply a Blade sharpening technique. Use a 10‑inch file at a 45‑degree angle, filing in one direction with medium pressure—about 50 strokes per edge. After sharpening, balance the blade on a nail, grinding the heavy side lightly if needed. Follow the Lubrication schedule: grease the spindle, bolts, and any moving bearings, then reinstall the blade tightly with a socket wrench. This guarantees consistent cutting performance and prevents premature wear. Sharp blades should be inspected at the start of each mowing season. Regularly check blade sharpness because dull blades can tear grass, leading to a uneven cut. For best results, consider using a bench grinder to achieve a smoother edge.

Brushless Motor for Powerful Performance: SporGain mower blade sharpener tool is equipped with a high-performance brushless motor, this lawn mower blade sharpener provides stronger power, lower noise, and longer lifespan than traditional motors, delivering smooth and efficient sharpening for lawn mower blades
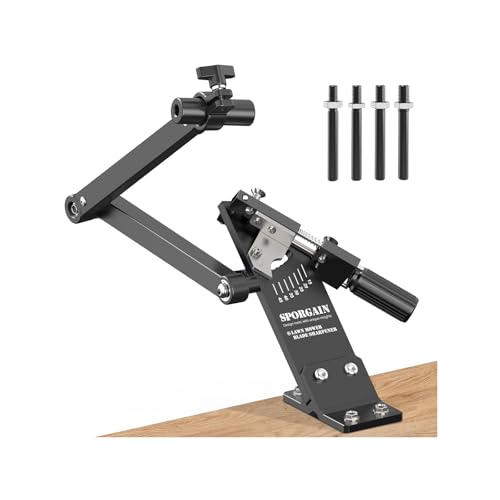
[ Updated ] Lawn Mower Blade Sharpener: SporGain mower blades sharpener suitable for Blades standard straight, mulching and high-lift mower.

The lawn mower blade sharpener is made of brown corundum, which has high durability and is not easily melted at high temperatures, making it suitable for long-term use.
Clean the Deck, Blades, and Engine Thoroughly
When you empty the fuel, turn the mower onto its side and spray the deck with a hose to flush out loose debris. Then use a soft‑bristled brush to dislodge stubborn grass, and apply cleaning solutions for one minute before scrubbing. Rinse thoroughly, dry the deck, and spray silicone lubricant to prevent rust. For the blades, hand‑remove clumps, wet a nylon sponge with detergent, and scrub the blade surface. Apply foam, let it sit, brush, then rinse and wipe dry. Move to the engine: let it cool, remove the spark plug, and brush loose debris from the housing. Wipe the engine with a rag and cleaning product, avoiding the air filter, oil filter, spark plug housing, and vents. Throughout, inspect for damage, checking for cracks, bent blades, or worn seals before reassembly. Proper airflow under the deck is essential for optimal cutting performance. Remember to check blade sharpness before each season to maintain clean cuts. Using a bench vise can securely hold the blade while you work. Properly aligning the blade angle to 45 degrees ensures consistent sharpening results.

490-900-M061 Deck Wash Kit Replaces Cub Cadet MTD Troy Bilt 490-900-M061, 490-900-0025. This Kit Includes 1x921-04041 Lawn Mower Deck Wash Adapter Nozzle+1x737-04003D Deck Wash Nozzle(Stainless Steel)+1x736-0225 Washer-Intern L 5/8+1x712-0641 Hex Nut+1x731-07487 Deck Wash Nozzle (Plastic)+1x738-04278 Shoulder Screw.
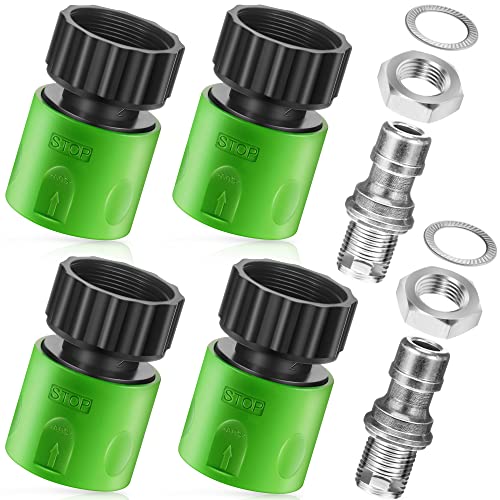
Lawn Mower Deck Wash Kit: combine different components, practical item for helping washing lawn mower, playing an important role in cleaning the machine; Sufficient connectors for you to use and replace, meet your needs of easily washing the deck and for a long period usage

Multiple Parts: This package includes a lawn mower/ lawn tractor deck washing kit, including plastic wash hoses, 2 x quick connector adapters (green and black finish, 5.1 x 3.3 x 3.3 cm), 1 x silver spray nozzle made of steel (4.9 x 2.3 x 2.3 cm), 1 x silver stainless steel blade and 1 silver stainless steel nut. The quick connector adapter will make it faster and more convenient to wash the deck and improve your deck washing efficiency.
Cover, Store, and Protect the Mower for Cold Weather
After cleaning the deck, blades, and engine, place the mower in a dry, cool indoor space—preferably a garage or shed—where it won’t be exposed to moisture, extreme cold, or corrosive substances. Choose a level, paved floor to prevent mud or freezing, then elevate the mower on bricks or a wooden pallet to achieve moisture reduction from ground contact. Secure a heavy‑duty, UV‑resistant polyester cover with bungee cords or weighted straps; tuck the edges under the frame for full coverage. If the shed lacks natural airflow, install a vent or fan to promote ventilation improvement and discourage condensation. Remove the battery, storing it in a climate‑controlled area away from heat sources, and keep the mower away from fertilizers, chemicals, and any open flames. This systematic arrangement safeguards all components throughout winter.

| Universal Fit Riding Mower Cover | - Measures 72" x 54" x 46" (L x W x H), Zettum lawn mower covers are designed to fit most brands' riding mowers with decks up to 54 inch, including: John Deere, Honda, Husqvarna, Cub Cadet, Toro, Ryobi, Greenworks, Sun Joe, EGO, PowerSmart, Craftsman, LawnMaster, Snapper and more. For special lawn tractor models, please check the size carefully.

UNIVERSAL: Suitable for most walk behind weeding machines (with a maximum size of 25 *74 inches); Including for Brand John Deere, Toro, Craftsman, Honda, Husqvarna, Law Boy, Greenwork and Troy Bilt

HEAVY-DUTY 600D FABRIC WITH LONG-LASTING DURABILITY: This push mower cover is constructed of a durable 600D solution-dyed Oxford polyester fabric with reinforced double-stitched seams to resist tearing and outdoor wear while holding its color and appearance season after season.
Quick Checklist to Verify You’ve Completed All Winterization Steps
Ever wonder how to confirm every winterization task is truly finished? Follow this systematic checklist. First, inspect filters; remove the air filter, brush off debris, and verify it’s dry or replaced. Next, verify battery charge by measuring voltage, then disconnect the negative terminal before storage. Confirm the spark plug is removed, inspected, and a correct replacement installed. Check that the oil drain valve is fully closed, the new oil filter is secured, and fresh oil is at the proper level without leaks. Guarantee the fuel tank is empty, stabilizer added, and the fuel valve turned off if present. Finally, confirm blades are removed, sharpened or replaced, and stored safely. Each step must be signed off before covering and storing the mower.