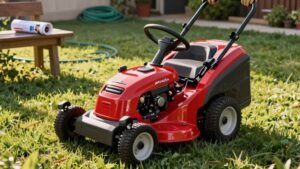
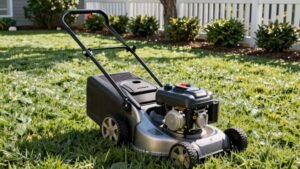
First, read the manual, grab gloves and safety glasses, and disconnect the spark‑plug wire. Run the engine five minutes, then tilt the mower with the air‑filter side up and place a pan under the drain plug. Unscrew the plug counter‑clockwise, let the oil fully drain, and tighten it again. Remove the old filter with a strap wrench, oil a fresh Briggs & Stratton filter, and hand‑tighten it. Fill with the recommended oil, check the level, and look for leaks; the next steps will show you how to finish safely.
Safety Precautions Before Starting
Before you even touch the mower, read the operator’s manual—its safety warnings, oil‑type recommendations, and capacity limits are essential to avoid injury or damage. Then gather proper PPE: gloves, safety glasses, and sturdy shoes to protect skin and eyes. Disconnect the spark‑plug wire and secure it away, preventing accidental start‑up while you work. Clean the work area with a cloth, wiping the oil‑fill cap, dipstick, and drain plug to keep debris out of the crankcase. Position the mower on a stable surface, tilt it with the air‑filter side up, and place newspaper underneath to catch spills. Follow the manual’s oil‑capacity instructions, and keep a dealer’s contact handy for any engine troubleshooting that may arise. Remember to drain the oil completely to prevent old oil from mixing with the new. Always dispose of the used oil in a sealed container and take it to a certified recycling facility, respecting local disposal regulations. It’s also wise to check the mower’s fuel filter condition before storage to avoid clogs when you resume use.
Warm Up the Engine for a Quick Mower Oil Change
A quick five‑minute run gets the oil warm enough to thin out and carry debris out of the crankcase, making drainage fast and clean. You’ll start the mower, let it idle for about five minutes, and then shut it off as soon as the engine feels warm. This brief warm‑up circulates oil, suspends particles, and reduces oil contamination, which protects the crankcase and prolongs engine lifespan. After stopping, disconnect the spark‑plug wire and keep it away from the plug to avoid accidental start‑up. Wipe the area around the oil fill and drain plug to keep foreign material out. Then tilt the deck safely, place an oil pan beneath the mower, and prepare for a clean, efficient oil change. Using a plastic bag to contain gas while tilting helps prevent spills. Proper ventilation is essential to avoid inhaling fumes during the oil change. Proper soil compaction management can extend the life of your mower’s engine. Check the primer before pulling the starter cord.
Locate and Remove the Mower Oil Drain Plug
Once the mower’s engine is off and the spark‑plug wire is disconnected, locate the drain plug on the bottom of the crankcase—often a yellow or white plug with two prongs—then position an oil pan beneath it, tilt the deck with the air‑filter side up, and turn the plug counter‑clockwise with a 3/8‑inch socket or by hand if it’s a pronged type, allowing the warm oil to flow cleanly into the pan. Check for drain plug location variations; some models use the fill port or dipstick tube instead of a separate plug. Note the drain plug materials—typically aluminum or steel—to choose the correct socket or hand‑turn method. Keep the work area clean, use a newspaper to catch drips, and avoid touching hot engine parts. When the oil empties, tighten the plug securely with a box wrench, ensuring it’s fully seated to prevent leaks. Lay down a mat to protect the garage floor while working. Most residential lawn mowers require between 0.5 and 1 quart of oil, so be sure to verify the exact capacity in your owner’s manual before refilling.

Drain plug key set includes: 7x hex sockets (8 - 9 - 10 - 12 - 13 - 14 - 17 mm), 9x square sockets (5/16" - 3/8" - 7 - 8 - 10 - 11 - 12 - 13 - 14 mm), 1x spline socket M16, 1x torx socket T45, 1x triangle socket 10 mm, 1 socket 10 mm

Size: 1/2" Drive: 8mm,10mm,12mm,14mm,3/8",1/2" socket.

Knurled "speed ring" provides quick removal and installation
Drain the Old Mower Oil Completely
Tilt the mower so the air‑filter side is up, then turn the drain plug counter‑clockwise with a 3/8‑inch socket until oil begins to flow. Keep mower level while the oil drains; this prevents sludge from pooling in the crankcase. Position a clean pan or jug directly under the drain plug location, and use a newspaper to catch any spills. Let the oil run until it stops completely, then wipe the area with a rag to keep debris out of the engine. Once the flow ends, close the valve or plug by turning it clockwise and tighten securely with a box wrench. Verify that no leaks appear before you move the mower. Dispose of the used oil according to local regulations. Oil lubricates engine parts to reduce friction. Using the correct small‑engine oil ensures proper viscosity and additive protection for the mower’s design. Regular oil checks help maintain optimal performance and longevity. Proper drainage prevents contamination of fresh oil when refilling.

Wide range of professional automotive specialy tools

【Multifunctional Automotive Repair Kit】The multifunctional automotive repair kit is suitable for disassembling various automotive components, including gearboxes, rear axles, engine oil caps, and oil pan plugs. It can be used with any 3/8" drive ratchet/bar and is compatible with various car models.

Versatile Automotive Repair Kit: Versatile automotive repair kit is designed for removing drain plugs and filler plugs on engine oil pans, rear axles, differentials, and transmissions of most vehicles, as well as various other automotive components.
Replace the Mower Oil Filter Correctly
First, disconnect the spark‑plug wire and clean the area around the oil filter to keep dirt out of the crankcase. Review the owner’s manual before you start, then position the mower with the air‑filter side up and place an oil pan beneath the filter. Use a strap wrench or oil‑filter wrench to rotate the old filter counter‑clockwise; be ready for spillage and catch any residual oil. Examine the sealing surface, then discard the old filter. Select a genuine Briggs & Stratton filter (e.g., 492932S) and apply a thin coat of oil to its gasket ring. Hand‑tighten the new filter clockwise, then give it a snug turn with the wrench—never over‑tighten. Verify the filter sits fully against the base and that you guarantee proper oil filter fit. Finally, reconnect the spark‑plug wire and run the engine briefly to confirm no leaks. Ensure the engine is cooled before beginning the oil change. Wear protective gloves to prevent skin contact with hot oil. Check the oil level before starting the mower to ensure proper lubrication. Properly voltage‑check the battery before the oil change can prevent unexpected shutdowns.

SIZE CHECK: 2-1/4" H. Compatible with select John Deere (D100, E100, S100 series), Husqvarna (YTH series), Craftsman, Cub Cadet (XT1, XT2), Toro TimeCutter, Troy-Bilt, Ariens, Poulan Pro equipment. Verify filter height and fitment before ordering, especially when replacing short or tall lawn mower oil filter profiles.

2 Pack Genuine Briggs & Stratton 492932s Oil Filter 492932 Vanguard Small OEM

SIZE CHECK: 2-1/4" H. Compatible with select Scag, Ferris, Bobcat, Bad Boy, Hustler, John Deere ZTrak, Toro, Gravely equipment. Verify filter height and fitment before ordering, especially when replacing short or tall lawn mower oil filter profiles.
Select the Right Oil for Your Mower Oil Change
After securing the filter, choose an oil that matches your climate and mower’s work demands. Oil type selection factors include temperature range, engine load, and warranty requirements. For warm climates, SAE 30 works fine; for variable conditions, SAE 10W‑30 improves cold starts but may use more oil. Synthetic oil advantages shine in all temperatures—synthetic SAE 5W‑30 or Vanguard 15W‑50 offers superior protection, reduced consumption, and maintains warranty compliance when you pick a Briggs & Stratton‑certified product. Guarantee the oil meets the “SF, SG, SH, SJ” service classification. Match the oil volume to your mower: walk‑behind models need 15–18 oz, riding models 48–64 oz. Verify the level seasonally, and avoid additives that could damage the engine. Proper oil disposal is essential to protect the environment and comply with local regulations. Using fertilizer past its shelf life can reduce its effectiveness and potentially harm your lawn. Regular maintenance, such as timely oil changes, can significantly extend the overall service life of the mower.


MAINTENANCE FIT: Compatible with select Husqvarna, Toro, and Craftsman push mowers equipment. Confirm your model and engine fitment before ordering.

2-18oz Briggs and Stratton 30W Oil
Add New Oil Without Overfilling the Mower
Adding oil correctly is essential to prevent overfilling and protect your mower’s engine. Begin by positioning the mower on a flat, stable surface with the engine upright. Use the designated yellow or white fill plug and a measuring device; pour in small increments—about a half‑teacup (3‑4 oz) at a time. After each pour, perform consistent oil level monitoring by fully inserting the dipstick, checking that the oil sits between the two holes, and aiming for the top hole without exceeding it. Repeat the half‑quart or half‑quart additions, rechecking the dipstick between each pour, until the level reaches the top hole. Secure the dipstick cap once the correct level is confirmed, and avoid any sudden spills by keeping a newspaper and oil pan beneath the fill area. Overfilling can cause smoking or engine lock‑up, so it’s crucial to add oil slowly and stop once the top hole is reached. Before adding oil, always warm up the engine for a few minutes to ensure accurate level reading. Follow the pre‑start safety checklist to verify that the mower is on a stable surface and the brake is engaged before beginning the oil change.

Genuine, OEM Briggs & Stratton Replacement Part

Kit includes: (1) 100028 48 oz bottle, (1) 100005 18 oz bottle, (1) 696854, (1) Oil absorbent pad

MAINTENANCE FIT: Compatible with select Universal for mowers, tractors, snow blowers, and boats equipment. Confirm your model and engine fitment before ordering.
Check the Oil Level and Look for Leaks
Now that the oil is correctly added, verify the level and inspect for leaks before starting the mower. Park the mower on a level surface and wipe the area around the crankcase clean. Remove the dipstick, clean it, and fully reinsert it to read the oil mark; it should sit between the FULL and ADD lines. If your model lacks a dipstick, dab a clean cloth into the filler tube and confirm the oil reaches the top of the fill hole. Visually inspect engine for any fresh oil drips, wet spots, or pooling around the oil cap, gasket, and seal areas. Look for overfilling by ensuring the dipstick isn’t above the FULL line. Address any detected leak before operation to prevent damage. Clean the carburetor before reassembly to ensure optimal performance. Keep your lawn free of grass seed to protect pets from accidental ingestion.
What to Do If You Spot a Leak After an Oil Change?
If you spot a leak after the oil change, shut the mower off immediately and wipe away any excess oil before inspecting the fill cap, drain plug, and surrounding gaskets for damage or looseness. Tighten the drain plug to the manufacturer’s torque and verify the oil fill tube is seated correctly. Examine the fill cap seal; replace it if worn. Run the mower briefly to see if the leak returns, then check the oil pan for proper reinstallation. If oil still drips, remove the pan and perform a thorough internal engine component inspection, looking for misaligned bearing rings or cracked valve gaskets. Replace any defective gaskets or seals, and re‑assemble with correct torque. If the problem persists, consult a qualified technician. Rocker cover gaskets may also need replacement if oil is leaking from the engine’s top.
Mower Oil Change: Proper Disposal of Used Oil & Rags
After fixing a leak, your next priority is handling the spent oil and rags safely. Collect used oil in a clean plastic pan with a screw‑on lid, then pour it through an eight‑quart strainer into a leak‑proof container. Keep the container sealed, store it away from workers, and transport it to a local shop or recycling center for oily waste management. Separate oily rags from solvent‑contaminated ones, air‑dry them outdoors, then store the dry rags in a water‑filled, tight‑fitting can. If you wipe excess oil off, you may discard the rags in regular trash. Puncture and drain used filters, then recycle them as scrap metal—oil filter recycling reduces landfill waste. Follow local regulations to prevent fire hazards and environmental contamination. Dry rags individually outdoors to reduce fire risk.