First, verify head‑to‑head coverage so you won’t create dry spots. Gather a shovel, pipe cutter, wrench, and safety gear, then mark the new location and protect the grass. Dig a 6‑8‑inch trench, position the sprinkler, and connect the pipe without kinks, tightening the fittings to the manufacturer’s torque. Adjust the nozzle angle and radius for uniform spray, then test for leaks and pressure before backfilling. Continue for and you’ll uncover detailed troubleshooting tips.
Check Head‑to‑Head Coverage Before Relocating a Sprinkler Head
Before you relocate a sprinkler head, verify its head‑to‑head coverage to guarantee the new position will maintain the required overlap and uniform water distribution. Begin by mapping the existing spray pattern on a square grid, noting each head’s radius. Identify critical points where perpendicular lines from a part‑circle head intersect the opposite head; these four points in a square area define the overlap zone. Measure precipitation rates with a catchment test, placing identical cans across the zone and recording water depth. Compare the measured distances against manufacturer criteria: 90 % radius for 110 % overlap, 80 % radius for 120 % overlap in high‑wind zones. If any gap shows reduced depth, add a head midway between the critical points before proceeding with relocation. Ensure equal water distribution by adjusting head spacing to maintain consistent overlap. Regularly inspect for loose fittings to prevent rotation issues that could disrupt the coverage pattern. The adjustment screw or collar can be loosened with a standard screwdriver, allowing the head to be raised to the optimal height for even spray without damaging the system. Properly calculate the required flow rate per zone based on sprinkler head flow to avoid under‑ or over‑watering.
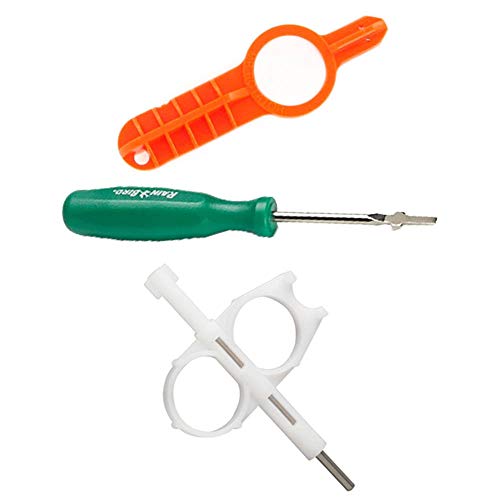
Hunter Key

HEAVY-DUTY STEEL SHAFT – 5/8" powder-coated structural steel resists bending and rust

---US Patent Pending---
Gather Tools and Safety Gear for Sprinkler Head Relocation
Preparation is key when moving a sprinkler head, so gather all required tools and safety gear before you start. Turn off the main valve, locate utilities with 811, and wear gloves and eye protection. Select a shovel or spade for bulk excavation, a trowel for tight spaces, and a small handsaw or PVC cutter for pipe removal. Keep flexible tubing cutters and barbed‑fit clamps ready for poly lines, and have PVC primer, cement, and Teflon tape for rigid connections. Use a level, measuring tape, and marker flags to verify alignment and pipe length, and pack the soil tightly around the head to mitigate compaction. Finally, cap old head connections and drain the zone to prevent residual discharge. During the dry season, hot spots become evident, indicating the need for precise sprinkler placement. Properly soil backfill] prevent future pipe movement and maintain consistent pressure.

RATCHETING PVC PIPE CUTTER: Ability to cut up to 1-1/4-Inch (31 mm) I.D.; 1-5/8-Inch (41 mm) O.D. pipes

Ratchet Drive Technology: This PVC cutter tool, specifically designed as a Pex/Pvc cutter, adopts an advanced ratchet drive system that's easy to rotate, enabling fast, efficient, and labor-saving cutting
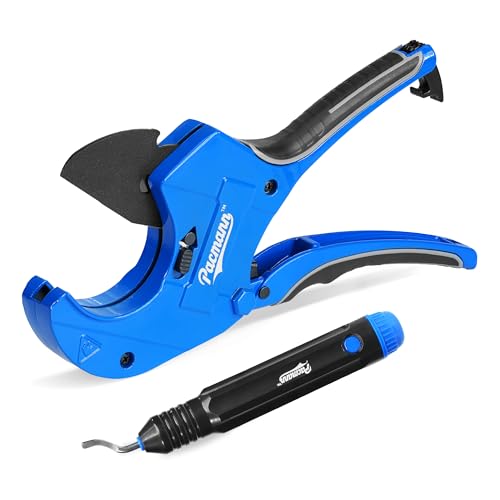
【Heavy Duty & Premium Quality】The Pacmann PVC pipe cutter body is made of durable hardness aluminum alloy steel. The thick 3mm blade used is SK5 material with precision sharped and Teflon coated. Sturdy construction and big size suitable for heavy-duty use.
Mark New Spot and Preserve Grass When Moving a Sprinkler Head
Now that you’ve gathered tools and shut off the valve, pinpoint the exact new location and protect the existing lawn before digging. Use landscape flags to mark the moving head and adjacent heads, ensuring precision measurement of head‑to‑head distances for consistent watering. Cut sod squares around the original head, keep them intact, and store them safely. Activate manual mode, set the zone to two minutes, and visually confirm active heads. Lay markers along the planned route to verify layout accuracy. After relocating the head, replace the sod squares exactly where removed, back‑filling and packing soil firmly around each piece. Fill gaps with soil, then water the restored grass heavily for two weeks to promote root establishment and maintain consistent watering. Marking heads helps prevent accidental damage during lawn maintenance. Remember to check the torque specification when tightening the new sprinkler head to avoid over‑tightening.

YARD FLAGS FOR OUTSIDE - Use our yard flag markers for yard projects such as landscaping flags, yard flags marking sprinkler heads, marker flags for lawn care, or property markers.
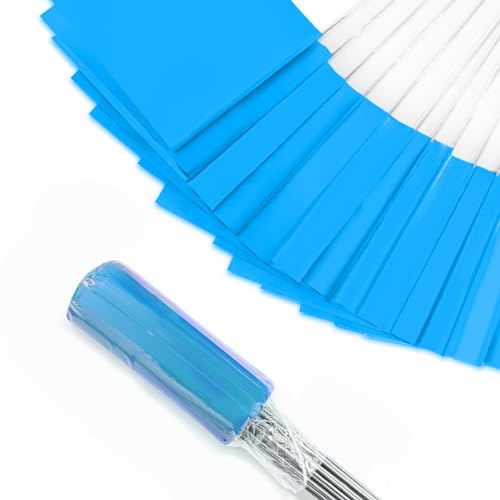
⛳【MARKING FLAGS】Made of PVC, Not faded, the flags do not tear easily, and they are attached to a high carbon steel wire pole with a high-strength adhesive. These poles are also able to easily penetrate the soil without deforming. Support writing on it for better markup, Marking flags are best marking solution. Reuse many times.

YARD FLAGS FOR OUTSIDE - Use our yard flag markers for yard projects such as landscaping flags, yard flags marking sprinkler heads, marker flags for lawn care, or property markers.
Dig a 6‑8‑Inch‑Deep Trench and Position the Sprinkler Head
If the soil is moist, grab your sharp‑shooter shovel and start a 6‑8‑inch‑deep trench along the planned pipe line, keeping the width just wide enough for a ¾‑inch pipe (about 5‑6 inches). Water the area two days early to loosen compacted layers, then remove sod to one side and set aside any loose debris. Lay the pipe in the trench, ensuring it rests on a clean, level base to minimize soil compaction. Apply trenching tips: use a straight edge to verify depth, and tap the pipe lightly with a rubber mallet to seat it without creating gaps. Backfill with the excavated soil, tamping in 2‑inch increments to restore density and prevent future settling. Finally, position the sprinkler head so its top aligns with the ground surface, confirming full coverage before completing the backfill. Call 811 to mark buried utility lines before digging. Turn off the water before starting any work to avoid accidental flooding. Make sure to fully depressurize the system before removing any components to prevent sudden water spray. Always wear protective gloves to safeguard your hands while handling sharp tools and debris.
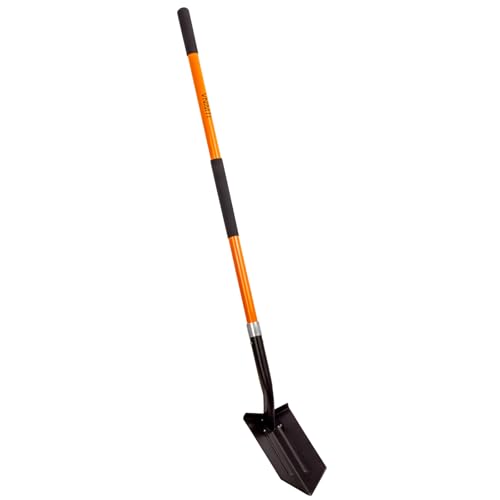
High-Quality Materials: The well-made trenching shovel blade is crafted from premium high-carbon steel, offering exceptional hardness and wear resistance. It withstands heavy-duty digging without damaging the shovel head. A rust-resistant coating ensures long-lasting durability.

Trenching Tool: When you need to dig a trench or clear a ditch and transplant small shrubs, this trenching shovel is perfect for making your trenching very easy!

1. EFFICIENT 4-INCH V-SHAPED BLADE: The narrow, sharp blade is specifically designed for precision trenching. It easily slices through tough soil, clay, and roots to create clean, uniform trenches for irrigation pipes, landscape lighting wires, or edging, minimizing yard disruption.
Connect Pipes, Avoid Kinks During Sprinkler Head Relocation
How can you guarantee a seamless pipe connection while keeping the line free of kinks? First, locate the existing pipe depth and cut 2 inches from the sprinkler head connector with a pipe cutter, preserving the PVC or funny pipe integrity. Measure the new extension, then lay it off‑track to avoid tight turns; keep each funny‑pipe segment under 15 ft. Use a funny‑pipe insert coupler or compression coupler for flexible joints, and PVC elbows for rigid bends. Apply PVC cement to each joint, hold the coupling for several seconds, then pinch clamping rings with channel locks. After securing the tee fitting, thread the riser, tighten all connections, and finally adjust nozzle angle to achieve the desired spray while you pipe disruption. The trench must be dug carefully to expose the existing PVC pipe without damaging it. Consider zoning zones to optimize water distribution across different lawn areas. Properly assess water distribution to ensure uniform coverage before making any adjustments. sprinkler head adjustment is essential for achieving consistent watering patterns.

FIX BROKEN PVC IRRIGATION AND PLUMBING PIPE FAST: Expandable repair coupling is engineered to effectively repair damaged 3/4 in. PVC pipe to stop leaks

【PVC Female Coupling】FNPT female threads on both ends for connecting two pipes or PVC fittings with MNPT male threads. Rotate to remove for easy maintenance and cleaning later.

Versatile PVC Female Couplings: This set includes 10 female x female threaded PVC couplings for connecting pipes of the same diameter in a straight line, allowing easy connections to male threaded pipes.
Adjust Spray Pattern for Uniform Watering After Relocation
After relocating a sprinkler head, you’ll need to fine‑tune its spray arc and distance to achieve uniform coverage. Turn the stem clockwise until the indicator dot aligns with the right edge of the target area, then hold the nozzle base and twist the top counter‑clockwise to align the dot with the left edge. Keep water running while you watch the arc; a full counter‑clockwise twist yields a 360° pattern. Adjust spray distance by turning the central metal screw clockwise to shorten, counter‑clockwise to lengthen the radius. If the spray remains short, increase water pressure and re‑check. Guarantee each head overlaps adjacent heads by redirecting the stem base while the system runs, observing rotation and flow for even distribution. Fine‑tune until the radius matches lawn needs. Check the videos on the website for more conservation tips. Proper head selection ensures the sprinkler can cover the intended area without waste. Installing a fixed cap can prevent accidental over‑watering during seasonal changes.
Test Sprinkler Head for Leaks and Coverage After Relocation
When you finish relocating a sprinkler head, you must verify that it’s leak‑free and delivering the intended coverage before the system returns to regular operation. First, isolate the zone and run it while you observe the head for geysering, low pressure, or irregular spray. Then, shut the system, wait 30‑60 minutes, and read the water meter; any movement indicates a leak. Next, inspect the head visually for cracks, loose fittings, or water gurgling from the seal. Record the baseline water pressure, then activate the head and check system water pressure; it should stay within the manufacturer’s range. Finally, confirm that the spray pattern matches the target area without gaps or oversaturation. If any anomaly appears, tighten joints or replace the head before proceeding. Check the low flow indicator after shutting off the main sprinkler valve to confirm whether the leak is inside the home or in the main pipe. Make sure to relieve pressure before testing to avoid false readings. Properly tighten the adjustable riser to maintain consistent head height after relocation. A well‑placed head should maintain an even sprinkler radius across the lawn.
Fill Trench, Repair Any Leaks, and Restore the Lawn
If the trench is filled and any leaks are repaired, you can move on to restoring the lawn. Begin by backfilling the 6‑8‑inch trench with soil, leaving a 4‑5‑inch gap at the top. Pack the soil in 1‑inch layers, tamping each layer to prevent soil settling and to maintain head stability. Use water packing: fill the trench partially, run water from the sprinkler head until the soil is saturated, then resume packing. After the final layer, compact the soil firmly, then check for proper drainage by observing water flow away from the head. Replace excavated sod pieces or spread seed, press the seed into the soil, and water consistently for two weeks to reestablish root growth. This systematic approach guarantees a durable, level installation and a healthy lawn. Open the ball valve only about a quarter open to start the water flow. Properly zone mapping ensures each area receives the right amount of water without waste. Always verify the sprinkler head torque before final tightening to avoid damage. Adjust the spray pattern to match the lawn’s shape for even coverage and optimal water use.