First shut off the water and depressurize the line, then locate the target sprinkler and trace the pipe upstream. Dig a shallow trench to expose the pipe, cut it cleanly with a pipe cutter or hacksaw, and wipe the threads dry. Wrap Teflon tape around the threads and screw on a matching universal plug or PVC cap, tightening it firmly. Re‑pressurize the system, check for leaks, and compact the soil around the cap. Continue for more detailed steps and maintenance tips.
Prepare the System: Safety, Tools, Layout for Irrigation Line Capping
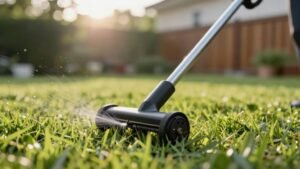
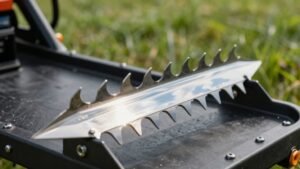
Before you start capping, shut off the water, depressurize the line, and clear the area of any utilities. You’ll first do location marking: identify the target sprinkler, trace upstream to the nearest head, and note any T‑branches that need a cut. Then begin trench digging with a shovel or trowel, exposing the pipe while keeping the trench shallow enough to maintain stability. Wear gloves and eye protection, and call 811 before you dig near electrical lines. Use a pipe cutter or hacksaw for a clean horizontal cut, leaving 1–2 inches of pipe beyond the T for the cap. Verify thread size, apply Teflon tape, and keep a PVC glue bottle handy for slip‑end caps. This preparation guarantees a safe, precise installation. Use brand‑specific caps for a semi‑permanent solution when capping directly on the sprinkler head. Pressurize the system before removal to prevent accidental spray. Properly tightening the cap prevents water pressure loss and maintains system efficiency. Relieving residual pressure ensures the line is fully depressurized before any work begins.
Temporary Cap Installation for Irrigation Line Capping – Quick Winterizing Guide
Having shut off the water, depressurized the line, and exposed the pipe, you now install a temporary cap to protect the sprinkler during winter. Choose a universal plug that matches the sprinkler model—Rain Bird, Hunter, or Toro—and verify the size and thread specs. Apply Teflon tape to threaded caps, then screw the top portion onto the bottom insert, tightening until you feel resistance. For PVC sections, use a slip‑end cap with approved PVC glue; guarantee the glue cures before exposure to cold. Conduct a quick sprinkler parts inspection to confirm the cap seats flush and nothing is cracked. Document the temporary cap warranty for future reference, then repeat the process on each zone before the first hard frost. Ensure the backflow prevention device is turned off to prevent water from re‑entering the system. Properly tightening the cap prevents leaks during freeze‑thaw cycles. A well‑installed cap also helps maintain system pressure stability throughout the winter. Proper alignment of the cap ensures even distribution when the system is re‑activated.
Permanent Cap Options for Irrigation Line Capping – Threaded Caps, PVC Plugs, Sealing Tips
What’s the best way to seal a sprinkler line permanently? You’ll want a solution that guarantees a leak‑free drip system termination and resists corrosion. Threaded caps screw directly onto standard male threads from brands such as Hunter, Toro, Rain Bird, and NDS, eliminating glue and providing a secure seal for unused heads. For mainline ends, PVC plugs—especially Hydro‑Rain lock caps—push onto the pipe and lock in place, offering quick installation and a removal tool for future tweaks. When you choose drip line caps, pick corrosion‑resistant end caps like Seapeak’s anti‑aging models; they maintain pressure and extend service life. Always clean threads or pipe ends first, then verify pressure to certify a tight, permanent seal. Before starting, be sure to shut off water to prevent accidental flooding. Loose fittings can cause rotation issues if not properly secured.
Mid‑Line Capping Techniques for Irrigation Lines – Between Sprinklers
A few essential steps let you cap a mid‑line irrigation pipe cleanly and permanently. First, locate the T‑section between the two sprinklers using a pipe locator or rod‑striking at about eight inches deep, then dig until the pipe is fully exposed. Observe pipe depth considerations; guarantee the trench reaches the riser without damaging adjacent lines. Cut horizontally as close to the branch as possible, leaving one to two inches of pipe for the cap. Choose the correct material plug—plastic tubing plugs for 1‑inch ID, slip‑end caps with PVC cement for rigid PVC. Secure the cap, then back‑fill gently, keeping the area clear for future work. Finally, add this operation to your seasonal maintenance schedule to verify integrity before each irrigation cycle. Mark the sprinkler head of interest with a white flag before locating the line. Adjust the spray pattern using the adjustment screw to ensure even water distribution. Properly setting the arc and distance helps achieve uniform coverage and prevents overspray. Raising the head can also improve water efficiency by reducing runoff.
Post‑Capping Checks: Leak Test, Backfill, and Maintenance for Irrigation Line Capping
Once the cap is in place, you’ll want to verify that the line is truly sealed before you backfill. Pressurize the system to 40 psi for two hours and watch for a loss greater than 3 psi; if it drops, you’re troubleshooting pressure issues. Follow with a 200‑psi hydrostatic test for two hours, checking for any seepage. Visually inspect the capped head, fittings, and surrounding lawn for water damage or corrosion. Run the zone for two minutes to refill the pipe, then compact soil around the cap to prevent settling. Record residual pressure after stabilizing the main drain valve and confirm each zone maintains consistent pressure. Finally, schedule annual inspections, apply winter weather precautions, and replace any damaged caps promptly. Check for leaks before backfilling to ensure the seal holds. faulty valve can also cause unexpected leakage even after capping. Adjust the spray arc to match the lawn’s layout for optimal coverage. Consider soil type when selecting a capping method to prevent water pooling and promote even distribution.