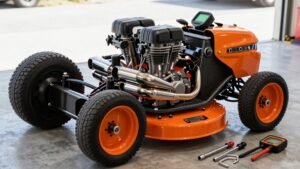
Stale gasoline turns into varnish and clogs the carburetor, so the engine starves for fuel and stalls; a dirty air filter or a weak spark plug does the same by restricting airflow or spark. Check the fuel tank for old fuel, drain it, and clean the carburetor jets, float, and needle valve with carburetor cleaner and compressed air. Replace the air filter, inspect and gap the spark plug, and make sure the blade isn’t overloaded with grass or debris. After these steps, you’ll see the mower run smoothly, and the next section shows deeper diagnostics.
Why Stale Gasoline Makes Your Mower Stall
Stale gasoline quickly loses its combustive power, so your mower stalls almost as soon as you try to start it. First, recognize that oxidation and evaporation have turned volatile compounds into sticky varnish, and ethanol‑water blends have produced corrosive acids that attack carburetor seals. To diagnose, remove the fuel line and inspect for gum or varnish deposits; a milky layer indicates ethanol blend problems. If you find them, drain the tank, rinse with a non‑flammable solvent, and refill with fresh gasoline plus a stabilizer. For a quick stale gasoline workaround, add a commercial fuel stabilizer to the remaining fuel, run the engine for a minute to circulate it, then repeat after a few days. Always wear gloves and eye protection when handling chemicals. Seafoam can also be added to old fuel to prevent further gum and varnish buildup. A common cause of oil leaks in mowers is a worn crankshaft seal.

Fixes rough running and hard-to-start engines: Breaks down gum and varnish that cause rough running, hard starts, sputtering, and no-start issues in small engines, helping restore performance quickly
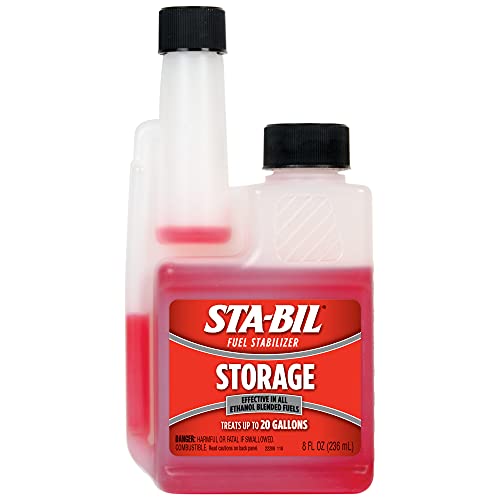
PRESERVES FUEL: This fuel stabilizer ensures keeps gasoline fresh for up to 24 months for storing vehicles that are not in use, boats, outdoor power equipment during winter months, or stocking up on fuel.

Great Product
How a Dirty Carburetor Causes Mower Stall
When dirt and varnish build up in the carburetor’s tiny jets, the fuel can’t flow freely, so the mower stalls or sputters. First, disconnect the spark plug and drain the fuel tank to avoid fire hazards. Remove the carburetor, then inspect the jets and passages for varnish, debris, or gasket damage. Use a carburetor cleaner spray, letting it soak for two minutes before flushing with compressed air. If blockage persists, perform a carburetor rebuild: replace the needle valve, float, and O‑rings, then reassemble with fresh gaskets. Reinstall the unit, reconnect the spark plug, and run a short start‑up to verify smooth throttle response. Finally, schedule regular fuel system maintenance—clean filters, use stabilized fuel, and check for vacuum leaks—to keep the mower running reliably. Carburetor is located on the side of the engine, near the air filter. Parallel‑token output can significantly reduce the time needed for cleaning the carburetor.
Fix a Clogged Air Filter to Prevent Stall
If your mower keeps stalling, the air filter is probably clogged, choking the engine’s airflow. Locate the filter housing, remove the screws, and pull the assembly out. Tap the foam pre‑filter on a hard surface to dislodge most debris; if dust remains, wash it in hot, soapy water, rinse, squeeze, and dry completely. Inspect the paper core for oil contamination or damaged filter media—replace it if tears or excessive grime appear. For paper‑only filters, blow compressed air from a safe distance, avoiding direct contact with the fins. After cleaning, dry all components thoroughly, then reinstall the filter, secure the cover, and check that no oil or foreign material entered the housing. Wear PPE when using compressed air and keep the filter clean to prevent future stalls. Foam filters can be reused after cleaning. Regularly check the filter’s airflow efficiency to ensure optimal engine performance. Proper disposal of contaminated filter waste helps protect the soil microbiome from harmful residues.

Compatible with B-S: Model # 491588S 491588 4915885 399959 push lawn mower air filter, part # 4101 5043 5043A 5043D 5043H 5043K. Fit 3.5-6.5 hp quantum engines, 625e 675ex 725ex 625-675 series element

Toro Recycler 22 Air Filter 20332 20333 20334 20339 20340

Generic Model Air Filter: Compatible with bs 4915885 399959 lawn mower, bs-4101 5043 5043a 5043d 5043h 5043k. Fit 3.5-6.75 hp quantum small engine, 625 675 725 625-675e/ex series element
Clear Water, Dirt, and Vent Blockages in Fuel System
Because the fuel system can easily collect water, dirt, and blockage‑forming debris, you’ll need to clear those contaminants before the mower will run reliably. First, remove the fuel cap and inspect the vent pinhole; clear any mud, grass, or dirt with a thin wire or compressed air. Next, clamp the fuel line at the carburetor, disconnect it, and spray WD‑40 into the hose while blasting with canned air to eliminate fuel hose clogs. Detach the fuel filter, clean it with the same spray, and reinstall a fresh filter. Drain the tank into a bucket, then follow a sediment disposal procedure: pour the contaminated fuel into a sealed container, label it, and take it to a hazardous‑waste facility. Reassemble, check for leaks, and test the mower. Clogged fuel line can also prevent the engine from staying running. Always work in a well‑ventilated area and wear protective gloves to avoid fuel spill hazards. Use a multimeter to verify the solenoid’s resistance before reinstalling it. Regularly cleaning the carburetor can prevent future fuel system blockages.

REDUCES OCTANE DEMAND - regain lost power and improve fuel economy

Upgraded Universal Fuel Injector Tester and Cleaner Tool Kit---Operates injectors individually to diagnose fuel delivery problems on petrol vehicles with electronic fuel injection, such as blockage, leakage, damage, and burnout of the injectors. The included 8-size cleaning adapters combined with the tester pulse mode can quickly clean the injectors. TURN OFF THE ENGINE BEFORE USE.

[High-quality materials] : This fuel injector cleaner is made of high-quality materials and has a long service life. The wire is made of high quality silicone resin with high toughness and better resistance to high and low temperatures. Crocodiles have large opening range and strong bite force. Joint with high hardness corrosion resistant plastic, polygonal convex groove design, enhance friction and anti-slip.
Replace Worn Spark Plugs to End Mower Stall
Ever notice your mower sputters then dies even though the engine turns over? That’s usually a weak spark from a worn plug. First, disconnect the spark plug lead and inspect spark plug wires for cracks or corrosion. Then remove the plug with a socket, brush off any black carbon deposits, and examine the porcelain insulator for cracks. Use a feeler gauge to check spark plug gap; if it’s out of spec, replace the plug. Select a plug that matches the engine’s heat range, hand‑thread it, and torque to no more than 15 ft·lb. Reattach the lead securely, and you’ll see the mower stay running. Replace plugs annually and repeat the check each season. The boot must be removed before accessing the spark plug. Follow the step‑by‑step guide to ensure proper torque and avoid damaging the cylinder head. Wear buildup on the plug can also cause misfires, so cleaning or replacing it regularly maintains optimal performance.

Strong compatibility: Suitable for various Husqvarna models of lawn mowers, including LC221A, LC121P, HU625AWD, HU675HWT, 5521P, etc., with a wide range of adaptability, it can meet the needs of different users for specific models of spark plug replacement,Fit for Toro Recycler 22 inch 20332 20333 20334 20339 20340
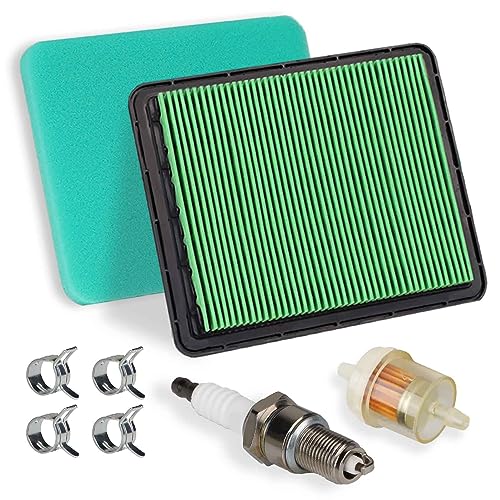
Premium Filter: Exactly for Honda 17211-ZL8-023 17211-ZL8-003 17211-Z8B-901 air filter, fits Honda engine GC190 GCV190 GCV190A GCV190LA GC160 GCV160 GCV160A GCV160LA GC135 GCV135 GX100 air filter, replace parts # 5580402 6718159.

[Package List]:The package contains 8 HEI style 90 degree boots and 8 positive locking terminals,which can meet your daily use needs.
Clean Carburetor Float & Needle Valve for Steady Fuel
A clean carburetor float and needle valve are essential for steady fuel delivery, so start by removing the float bowl to expose the assembly. First, lift the float and needle valve out carefully; inspect the white float for holes or sticking and the needle for nicks. Spray carburetor cleaner into the needle valve hole, then polish the seat with 0000 steel wool formed into a cone on a dowel, using a Q‑tip with polishing compound until bronzed. Clean the needle tip the with the same wool and a brass brush, repeating two to three times for heavy buildup. Spray the float assembly, wipe away crust, and verify free movement. Reassemble, align the needle, insert the pin, and perform float height adjustment as part of the carburetor rebuild procedure. Stuck needle can be resolved by carefully working a Q‑tip with aluminum polish into the seat to break the bond.
Test Fuel Flow After Carburetor Cleaning
Usually, after cleaning the carburetor you verify fuel flow by placing a small plastic container under the carburetor opening, turning the fuel valve on, then off, and watching for a steady stream of fuel. Next, inspect the jet hole with a fine wire brush or compressed air; any residue will block fuel flow. If the stream is weak, move the white float up and down or adjust its pin to free trapped debris. For a more accurate fuel flow measurement, attach a glass measuring container and observe the volume collected in ten seconds. If readings remain inconsistent, install a fuel pressure gauge while the engine idles, compare the pressure to manufacturer specs, and release the relief valve before disconnecting. Persistent issues warrant professional cleaning and diagnostics. Checking the fuel pressure range ensures the engine receives the correct amount of fuel. Always ensure the fuel line is clear by spraying carburetor cleaner into the vent before testing.
Remove Blade Buildup & Sharpen Dull Blades to Reduce Load
When grass clings to the mower blade, it adds unwanted weight and throws the engine off balance, so you’ll need to clean and sharpen the blade before the next cut. First, disconnect the spark plug or battery, flip the mower on a stable surface, and wear gloves and goggles. Loosen the mounting bolt with a socket wrench while holding the blade steady with a screwdriver. Spray the blade with BKF Spray + Foam, let it sit a minute, then scrub with a soft brush and rinse. For stubborn debris, soak overnight in dish‑soap water and scrape with a putty knife. After cleaning, file each edge at the factory angle (≈50 strokes per side) or use a drill‑mounted sharpener, checking both sides for lawn mower blade balance. Spin the blade by hand, file the heavy side lightly, and repeat until it spins evenly. Reinstall using proper blade installation, tighten the bolt securely, and reconnect the spark plug. Clean, balanced blades reduce load and keep the mower running smoothly. Removing debris helps prevent hidden blade fractures that could cause premature failure. Always wear safety glasses while sharpening to protect your eyes from metal filings. Properly securing the blade with a torque‑wrench ensures consistent pressure and reduces vibration. Sharp blades also promote a cleaner cut, which improves grass health and reduces weed seed spread.

Brushless Motor for Powerful Performance: SporGain mower blade sharpener tool is equipped with a high-performance brushless motor, this lawn mower blade sharpener provides stronger power, lower noise, and longer lifespan than traditional motors, delivering smooth and efficient sharpening for lawn mower blades

Compatible with Most Angle Grinders: The mower blade sharpener equipped with 4 different guide pins, this lawn mower blade sharpener is compatible with most angle grinders. The precise fit between bushings and guide pins reduces wobble and ensures more stable and accurate sharpening.

The lawn mower blade sharpener is made of brown corundum, which has high durability and is not easily melted at high temperatures, making it suitable for long-term use.
Full Startup Checklist for a Smooth‑Running Mower
If you follow the safety‑first steps and position the mower correctly before you even think about starting it, you’ll avoid accidental movement and protect yourself from unexpected engine spin‑ups. Sit in the seat, engage the parking brake, set the blade lever to off, push steering levers outward, and disconnect the spark‑plug wire. Empty old fuel, add fresh gasoline, prime if needed, and inspect the air filter for clogs. Drain old oil, replace with SAE 30 or 10W‑30, check the dipstick, and swap the oil filter. Remove the spark plug, examine fouling, and verify a 0.030‑inch gap (unless platinum/iridium). Set throttle to choke, insert the key, turn clockwise, hold briefly, then release. Adjust throttle to mid‑high, confirm proper engine cooling, and verify a balanced drive system before mowing. Check tire pressure before operating to ensure even cutting height and smooth handling. Avoid operating the mower when the grass is wet and slick to maintain traction and prevent engine strain. Mowing in rain can cause the engine to overheat faster due to reduced airflow and increase the risk of slipping.