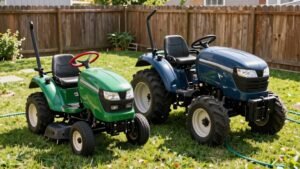
Secure the parking brake, engage the interlock, and make sure the seat sensor is pressed. Turn on the lights for five seconds to charge the battery, then set the choke—full choke if it’s cold, open if it’s warm—and set the throttle to the fast‑idle notch. Depress the brake, press the key to crank, and hold the choke until the engine catches, then gradually lean it. Once the engine runs smoothly, you’re ready to engage the PTO and start mowing. Keep going for deeper setup details.
Riding Mower Safety Checks Before Starting
Before you fire up the mower, run a quick safety sweep: park safely on level ground, engage the parking brake, and verify the interlock is engaged. Slip on protective eyewear, ear plugs, and sturdy closed‑toe shoes; avoid flip‑flops. Inspect tires for proper air pressure and tread wear; under‑inflated tires can cause loss of traction. Scan the yard for debris—rocks, sticks, toys—and remove them. Guarantee the grass is dry, children and pets are clear, and daylight conditions prevail. Check oil, fuel, and hydraulic oil levels, then confirm coolant is adequate. Examine blades, belts, and guards for damage, and make sure shields are in place. Only then proceed to start the engine. Read the user for any model‑specific safety warnings. Remember to always keep a clear line of sight to the cutting area to avoid accidental contact with hidden objects. Protective gear is essential for preventing injuries. Use a stable stance to maintain balance while operating the mower.
Riding Mower Control Overview
After the safety sweep, you’ll find the mower’s control suite organized around four primary interfaces: the steering wheel (or dual levers on zero‑turn models), the drive and brake pedals, the PTO blade‑engagement lever, and the cruise‑control switch. You use the steering wheel for fine steering precision, turning left or right with minimal play, while dual levers on zero‑turn units deliver 180° pivot capability for tight navigation around obstacles. The forward pedal accelerates, the reverse pedal backs up, and the hydrostatic transmission provides seamless driving dynamics without clutch‑like lag. The brake pedal halts instantly and releases the parking brake; depress it before shifting to reverse. Pull the PTO lever up to engage blades, push down to disengage, ensuring blades are off before reversing. Finally, set cruise control at a steady speed, release the drive pedal, and disengage by pressing either drive or brake. The choke lever must be held manually until the engine warms up. Remember to check the oil before starting the mower to maintain optimal engine performance. Before you begin, be sure to drain the oil from the engine to prevent old oil from contaminating the fresh fill. Properly inspecting the fuel filter can prevent clogging and ensure reliable engine start‑up.
Start the Engine When It’s Cold
A cold‑weather start begins by energizing the battery—turn on the mower’s lights for five seconds, then switch them off—to give the cells a quick boost before you crank. Set the choke lever to full choke position, ensuring the plate closes completely for a rich mixture. Engage the brake, set the throttle to the fast indent, then turn the key to crank. Crank for five seconds, pause ten, and repeat until the motor reaches at least 250 rpm; in extreme subzero, spin the motor briefly without choke first to break free. Once the engine fires, maintain choke while it vibrates back, then gradually reduce choke over ten to fifteen seconds. After the engine stabilizes, adjust throttle to medium‑low idle and avoid high revs until warm. Check the oil before starting to ensure proper lubrication. If the mower still won’t start, verify the fuel flow to rule out a clogged fuel filter. Replace the oil filter after draining the old oil to prevent contamination. Using the correct small engine oil helps protect the mower’s engine from wear and ensures optimal performance.

SAE 10W-30 MOTOR OIL FOR SMALL ENGINES: One 32 fl oz bottle of STP Premium Synthetic Blend 4 Cycle Small Engine Oil SAE 10W-30, formulated for small engines in lawnmowers, generators, tractors, snow blowers, and other outdoor power equipment

SIZE CHECK: 2-1/4" H. Compatible with select John Deere (D100, E100, S100 series), Husqvarna (YTH series), Craftsman, Cub Cadet (XT1, XT2), Toro TimeCutter, Troy-Bilt, Ariens, Poulan Pro equipment. Verify filter height and fitment before ordering, especially when replacing short or tall lawn mower oil filter profiles.

Lawn mower oil filter replace for Kohler OEM 12-050-01 1205001 12-050-01-S 1205001S 12-050-01-S1 1205001S1 1205001-S1 KH-12-050-01-S1 12-050-08 KH-12-050-08 KH-12-050-01-S
Start the Engine When It’s Warm
When the engine is already warm, keep the choke fully open—verify the air‑vane flap points forward—so the carburetor receives an uninterrupted air‑fuel mix. Guarantee proper choke closure before you pull the starter; a fully open choke prevents rich spikes and eliminates fuel percolation. Check the fuel tank for sufficient level and confirm the gas‑cap vent isn’t clogged, then crank. If the engine sputters, spray a brief burst of fuel into the carburetor to verify delivery, but avoid over‑fueling. Inspect the air filter; a clean filter maintains the correct mixture for hot starts. Confirm oil level, then let the mower run three to five minutes to stabilize temperature. Finally, listen for a steady idle; if it stalls, re‑check choke position and fuel flow. Water in fuel can cause the engine to stop when hot, so ensure the fuel is dry before attempting a warm start. A common issue is a flooded engine that can be cleared by pulling the starter with the choke closed. A dirty spark plug can also prevent proper ignition during warm starts. Inspect the spark before each use to catch fouling early.

Direct Fit for Craftsman Riding Mowers & Lawn Tractors. This carburetor is designed to fit a wide range of Craftsman models including the LTR2000, YTS3000, YT3000, DYT4000, GS3500, LT1000, LT2000, LT3000, T2200, LTS2000, and DLS3500.

For Predator 420cc Carburetor Compatible with MTD 951-05149, 95105149, 951 05149; Air Filter Replace for 937-05065 951-12260 951-12256. NOT FOR 951-12771 751-12771 751-12823; Its specific MPN, model & year only, please confirm fitment first.

Perfect Fit for Craftsman T110 Lawn Mower. Engineered to exact OE specifications for CMXGRAM1130036 17.5HP 42-in riding mower.
Set the Deck Height and Engage the PTO
With the engine humming and the choke set, you now turn to the deck. Begin the deck height adjustment by loosening the lock knobs on each height‑adjuster lever, then raise or lower the deck until the blade tip clears the ground by the manufacturer‑specified clearance—typically ¼‑½ in. Verify uniform clearance at all four corners with a ruler or laser level, then retighten the lock knobs to secure the setting. The deck should be slightly lower in the front to protect the blades. Next, follow the PTO engagement procedures: locate the PTO lever, guarantee the mower is in neutral, and depress the clutch pedal fully. Pull the lever forward to engage the PTO, listening for a click that confirms the clutch has locked. Confirm blade rotation before advancing, then release the clutch pedal gradually to transfer power smoothly. Use a carpenter’s level to double‑check the deck is truly level before mowing. For precise control, consult the owner’s manual to locate the height‑adjustment lever and count the preset notch positions. Properly checking the blade height with a laser level helps ensure an even cut across the entire lawn.
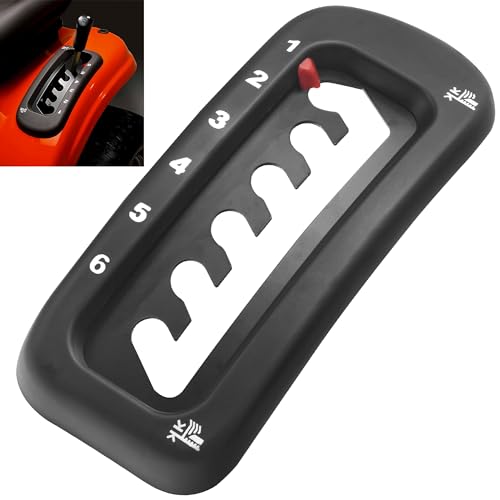
Replacement part number: 532414579 414579 532409728 532402843 402843 196378X428

Part Number: N814404

787-01818A-0637 Lawn Mower Height Adjuster Plate
Drive Forward and Adjust Speed
If you shift the lever forward from the parking‑brake notch, the mower will engage forward drive; then you can increase ground speed incrementally by moving the control lever forward while monitoring the transmission for smooth gear entry. First, verify engage drive belt condition; a worn belt will slip and reduce torque. Next, check transaxle operation by listening for smooth gear engagement and feeling for vibration. To fine‑tune speed, loosen the right‑rear wheel linkage bolt, adjust the threaded rod, then retighten the bolt to lock the position. If top speed drops, file the pedal linkage bracket for extra travel. After each adjustment, test acceleration in neutral, then release to neutral‑forward‑neutral sequence to confirm balanced control before proceeding. Shoulder steering can help maintain straight tracking while you adjust speed. Selecting the right mower size also depends on lawn terrain and the mower’s cutting width.
Use Reverse and Reverse‑Mowing Mode Safely
Activating Reverse Caution Mode begins with turning the key to the ROS position, pressing the red button until the warning light stays on, and keeping the light illuminated throughout the maneuver. You must engage the parking brake, disengage the PTO, then re‑engage blades after the red light confirms activation. While backing, constantly scan the ground and rear to avoid obstacles and back‑over hazards. Observe Reverse maneuverability limitations: the mower cannot turn sharply at high reverse speed, so you must decelerate before any steering input. Apply Reverse speed control considerations by throttling gently, maintaining a steady, low RPM to keep deck traction stable. Never mow near drop‑offs or with children present, and keep the red light on until you complete the reverse pass. Disabling the reverse switch allows the mower to operate in reverse without the safety interlock. Always consult the owner’s manual for safety checklist before operating. Perform a quick visual inspection of the fuel level to ensure adequate gasoline before starting.
Stop the Mower Properly
Pull the parking brake, disengage the blades, trim the throttle, and shut off the ignition in that order to bring the mower to a safe, complete stop. First, press the brake pedal fully, then pull the parking‑brake lever down while your foot stays on the pedal; release the foot once the lever locks, satisfying parking brake storage requirements. Next, raise the deck, flip the PTO switch off, and verify the blades have ceased spinning. Then, dial the throttle to idle to avoid engine stress and prepare for ignition cutoff. Finally, turn the key to stop and hold it until the engine fully ceases. Conduct post stop engine maintenance by checking for noises, confirming the engine stays off, and securing the area before any further work. Parking brake ensures the mower remains stationary while performing maintenance tasks. When replacing the pull cord, make sure the recoil spring is properly tensioned to avoid future cord failures. Always wear insulated gloves and eye protection when handling the battery to prevent accidental electric shock.
Troubleshoot Common No‑Start Problems
Why does your Craftsman mower refuse to start? First, verify the safety switch chain: depress the brake fully, disengage the clutch, and guarantee the seat sensor registers occupancy. Loose switch connections cause intermittent cranking, so tighten them. Next, perform battery charger troubleshooting; a weak or dead 12‑V battery won’t power the starter solenoid. Clean corroded terminals, recharge, and replace if voltage stays below 12 V. Then, conduct a wiring harness inspection. Check continuity of the red wire from solenoid to ignition switch, secure any loose bundles with zip ties, and replace blown fuses. Test the solenoid coil voltage—zero volts indicates a broken ground circuit. If the coil receives power but the motor doesn’t crank, replace the solenoid. Finally, inspect the carburetor, choke, and spark plugs for flooding or fouling. Also, verify that the parking brake is fully engaged to ensure the starter solenoid receives power.

532192507 Starter Solenoid replaces part #: Husqvrana Solenoid Part Number: 582042802, 192507, 5321925-07, 532192507, 582042801. Check Shape: 4-terminal design (2 top studs + 2 bottom spades). Different bracket/terminal = wrong purchase.
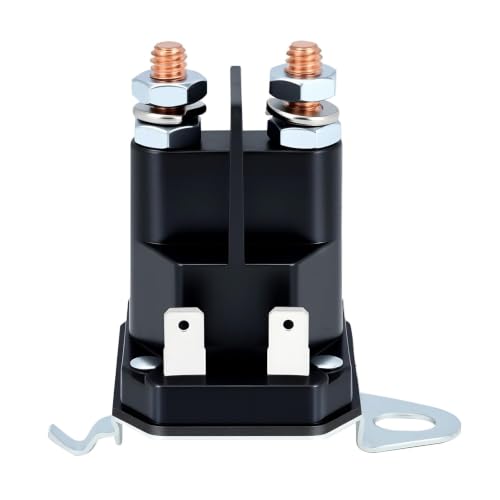
192507 Starter Solenoid Replace Part Number: Husqvrana 582042801, 582042802, 532192507, 5321925-07, 192507. Fit Note: ONLY with 4 terminals (2 Studs + 2 Spades) & metal bracket. Not for 3-terminal versions.

582042801 Starter Solenoid Fit for Crafts-man: 917253321 917253330 917253340 917253350 917253360 917253361 917253750 917253751 917253800 917254090 917254091 917254110 917254120 917254121 917254150 917254160 917254161 917254170 917254180 917254181 917254182 917254200 917254210 917254211 917254212 917254290 917254310 917254311 917254321 917254322 917254330 917254600 917254601 917254602 917254890 917276221 917277640 917277650 917278230 917274290 917274291 917288701 tractor.