First, turn the engine off and let it cool completely, then disconnect the spark‑plug wire and ground it. Inspect the drive cable for fraying or corrosion, document its routing, and replace it if needed, using a corrosion‑resistant lubricant on the ends. Check the V‑belt for cracks or glazing, align the pulleys with a straightedge, and adjust tension with a gauge. Rotate the drive pulley by hand, looking for grinding or excessive play, and verify the transmission gears aren’t worn. Re‑grease all moving parts, reattach the blade and brackets, and test the mower; the next steps will show you how to fine‑tune the self‑propel lever.
Self‑Propelled Mower Safety: Turn Off and Cool Before Repairs
Before you begin any work on a self‑propelled mower, turn the engine off and let it cool completely; this simple step eliminates the risk of accidental starts and protects you from hot components. Verify the spark plug ignition wire is disconnected and, if possible, remove the plug to guarantee zero ignition potential. Ground the wire against the engine block to prevent stray sparks. Allow the engine to reach ambient temperature before refueling; hot metal can ignite gasoline vapors, and residual oil may still be scorching. Inspect the muffler, which can retain up to 1,200°F, and wrap it with shop rags while positioning a drain pan beneath to catch hot oil. Secure all moving parts, especially blades, and wear gloves. Address self propelled mower overheating by checking cooling fins and airflow; replace the battery only after the system is fully powered down. This methodical approach minimizes burn, fire, and injury hazards. The rear wheel should be inspected for wear before any repair. When lifting the mower, engage the stability lock to keep it from shifting. Always use a blade removal wrench to loosen the blade bolt safely.
Self‑Propelled Mower Drive Cable Inspection and Replacement
If you notice fraying, corrosion, or stretching in the drive cable, start by inspecting its entire length from the handle to the engine attachment points, tracing the routing path and noting any debris or wear marks that could impede smooth operation. Perform a visual examination, document each connection, and test tension by loosening clutch nuts. Remove the old cable with screwdrivers, pliers, and a 10 mm wrench, protecting fuel openings with cellophane. Thread the replacement cable along the identical route, adhering to cable routing best practices: avoid sharp edges, keep the line straight, and eliminate restrictive clips. Secure the ends, then adjust tension until the clutch engages smoothly. Finish with cable lubrication considerations, applying a thin, corrosion‑resistant lubricant to guarantee long‑term reliability. Note that the mower’s self‑propelled mechanism requires careful routing to avoid future failures. Self‑propelled mowers provide easier maneuverability on uneven terrain. reducing physical strain for homeowners. Zero‑turn mowers excel in tight spaces due to their ability to pivot each wheel independently, offering exceptional maneuverability for complex landscapes.
Self‑Propelled Mower V‑Belt Examination for Cracks, Fraying, and Alignment
A thorough visual inspection of the V‑belt should start with a close‑up scan for cracks, fraying, glazing, or missing chunks, because any of these defects immediately compromise power transmission. You’ll use a flashlight to spot splits, unraveled edges, or shiny hardened spots, then note uneven wear that hints at misalignment. For alignment, place a straightedge along each pulley face and run a string line between pulleys; deviations beyond 1/16 inch per 12 inches indicate a problem. Verify pulley grooves are clean and undamaged, then perform belt condition monitoring by checking tension with a gauge—allowing slight flex without sagging. Conduct these checks monthly or every 10 hours, disconnect the spark plug, lock out power, and record findings before proceeding to drive system tensioning adjustments. Belts can be inspected without taking to a dealer and this can be done by rotating the pulleys by hand to view the entire belt for cracks, fraying, or wear. Regularly clean the belt surface to prevent glazed buildup which can cause slipping. Proper blade sharpness directly affects cutting efficiency and reduces strain on the belt. Bench grinder safety should also be observed when sharpening the mower blade to avoid injury.

Replaces OEM Part: Toro 117-1018 for Recycler 22

Width: 3/8", Length: 32-1/2", Package Includes: 1pc x 117-1018 V-Belt
Self‑Propelled Mower Drive Pulley Check for Wear and Free Rotation
Often the first step in diagnosing a self‑propelled mower’s drive system is to verify that the drive pulley spins freely and shows no wear. Set the deck to its lowest cut, remove the side covers, and release the belt tension by pulling the spindle pulley. Perform a pulley bearing examination: rotate the pulley by hand, listening for grinding or rumbling, and feel for binding, wobble, or excessive play. Inspect the grooves for glazing, polished sidewalls, or glass‑like spots, and check the surface for burrs or debris. If the pulley spins smoothly, conduct a mower belt tension adjustment; the belt should have minimal give when pressed midway. Any resistance, noise, or visual wear signals replacement before proceeding. Check oil level before reassembly to ensure the crankcase isn’t overfilled. Warm‑up engine for accurate oil reading.

Replace Part Number: 532194326 Mower Idler Pulley Replaces 194326 705079, 532194327 Flat Idler Pulley Replaces 194327.

Replaces OEM Part: Toro 115-4669, 115-4669-SL, Snapper, Murray 2-9604, 7029604YP, 7029604

Replaces OEM Parts: Toro 115-4669
Self‑Propelled Mower Transmission and Gear Diagnosis
Where does the power go when the drive pulley spins but the wheels stay still? You start by confirming the belt turns the pulley while the wheels remain stationary—this isolates the transmission. Inspect the self‑propel cable for kinks, breaks, or loose connections; lubricate with WD‑40 and test for free movement. If the cable functions, open the transmission gear box and examine the internal gears and axle. Look for worn teeth, cracked housing, or misaligned shafts. When wear is extensive, a transmission assembly overhaul becomes necessary, and you should evaluate gearbox replacement options. Compare OEM axle assemblies with aftermarket kits, weighing cost against durability. Choose the most reliable replacement to restore consistent power transfer to the wheels. The left rear wheel was showing resistance during testing, indicating a possible worn gear inside the gearbox. Proper timing of fertilizer application can also improve turf resilience, especially when soil temperature exceeds 55 °F. Using mulching can suppress weed growth and reduce competition for nutrients, supporting healthier lawn recovery after repairs.

【Application】Dokili 106-3955 FWD transmission assembly is compatible with Toro Recycler 22" self-propelled lawn mowers, including models 20001, 20003, 20005, 20007, 20012, 20016, 20019, 20064, 20065, 20069, 20071, 20072, 20094, 20110.

EXACT FIT FOR TORO RECYCLER & LAWN-BOY: This Jaruika replacement set is a direct match for Toro part numbers 119-2379 (Traction Control) and 112-8818 (Brake). Specifically engineered for Toro Recycler 22-inch and Lawn-Boy 21-inch walk-behind mowers, these cables ensure 100% compatibility and a factory-perfect fit without the need for modifications, adjustments, or additional hardware during installation.

COMPATIBILITY: Designed as a direct replacement drive cable for Husqvarna models 62522SH,7021P,HU550,5521CM,HU700,HU800 lawn mowers
Reassemble Blade, Brackets, and Grease All Moving Parts
When you finish inspecting the transmission, the next step is to reassemble the blade, brackets, and grease all moving parts, starting with the blade positioned so its sharp edge faces away from the deck. Perform a blade orientation inspection, confirming the adapter key aligns with the crankshaft slot. Place the support bracket on the shaft, hold the blade steady with a wood block, then apply grease to the key slot and shaft contact points. Reinstall the retaining plate, thread the mounting bolt, and tighten to 40‑50 ft‑lb using a torque wrench. Conduct a blade balancing technique by rotating the blade manually; any wobble indicates mis‑alignment. Wipe excess grease, verify all fasteners secure, and guarantee the mower is stable before moving to the next procedure. A 2×4 can be used to stop the blade from spinning while you remove the bolt. Use a blade‑balancing jig to ensure the blade is perfectly level before final tightening. Remember to maintain the blade’s cutting edge at a 30‑degree angle for optimal performance. For best results, consider a professional sharpening service to restore the blade’s edge to its original sharpness.

𝗟𝗔𝗪𝗡𝗠𝗢𝗪𝗘𝗥 𝗕𝗟𝗔𝗗𝗘 𝗕𝗔𝗟𝗔𝗡𝗖𝗘𝗥 𝗧𝗢𝗢𝗟: Verifies unbalanced and bent blades after sharpening, improving mower longevity with reduced vibration and engine wear providing a smoother cut

Accurate Lawn Mower Blade Balancer: Ensure your mower blades are perfectly balanced after sharpening with the SporGain Lawn Mower Blade Balancer. Reduces blade wobble, vibration, and engine wear, giving your lawn a smoother, cleaner cut every time.
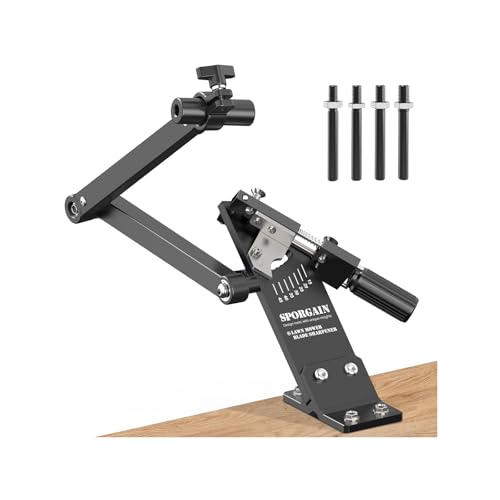
[ Updated ] Lawn Mower Blade Sharpener: SporGain mower blades sharpener suitable for Blades standard straight, mulching and high-lift mower.
Self‑Propelled Mower Test Run and Self‑Propel Lever Adjustment
Precision matters when you’re about to test a self‑propelled mower, so start by draining all fluids, positioning the handle for suitable leverage, and rotating the wheels to confirm the ratcheting clicks that signal freewheeling. Engage the self‑propel lever on flat ground and try pulling the mower backward; the wheels should spin freely and lock only when you reverse, confirming proper ratchet function. Listen for transmission gear changes that indicate mower speed adjustments, and verify idler pulleys rotate without binding. Release the cable from its anchor, tighten it to eliminate slack, and apply a thin film of self‑propel lever lubrication to guarantee smooth actuation. Pull the lever repeatedly, checking for consistent engagement and no excess play, then perform a final test run to validate the adjusted propel response. The height adjuster arms were rusted together, requiring lubrication to free them before testing. A common issue is a dead battery that can prevent the mower from starting, so check the battery voltage before beginning the test run. Proper storage temperature can prevent age‑related capacity loss and extend overall battery life.