First, wear gloves and safety glasses, then park the mower on flat flat stable surface and disconnect the spark‑plug wire. Use a screwdriver to lock the pulley, loosen the three – four 10 mm bolts holding the starter housing, and lift it off so the recoil spring can unwind. Clamp the spring, turn it counter‑clockwise to its maximum extension, thread a fresh 58‑inch 3/16‑inch nylon cord through the eyelet and pulley, and tighten the spring wheel a half turn. Re‑assemble the housing, reconnect the spark plug, and test the cord; the next section shows deeper troubleshooting tips.
Pull‑Cord Replacement: Step‑by‑Step Guide
Usually the first step is to remove the pull‑cord housing, which is secured by three to four small bolts—typically 10 mm—on the mower’s top deck. After loosening those bolts, lift the housing off, allowing the recoil spring to unwind. Clamp the spring with a screwdriver or a dedicated clamp, then back it counter‑clockwise to its maximum extension while keeping the pulley under tension. Thread the 58‑inch, 3/16‑inch nylon cord through the eyelet and pulley, then loosen the spring wheel 0.5–1 turn. Feed the cord in, letting the spring unwind automatically; this guarantees proper tension and cord fraying prevention. Apply a thin layer of pull‑cord lubrication to the cord surface before re‑installing the housing, aligning it exactly as before, and secure it with the original bolts. Verify that the cover fits without twists, then test the pull. Use an extender to remove the bolts. Before starting, review the safety precautions outlined in the guide to avoid injury. Mowing safety is essential for preventing accidents while working around a running mower. Zero‑turn mowers offer tight turning radii that make navigating complex landscapes much easier.
Safety Precautions for Pull‑Cord Replacement
A few key safety steps will keep you injury‑free while replacing the pull‑cord. First, wear personal protective equipment—gloves, safety glasses, and sturdy shoes—to shield hands and eyes from sharp edges and whipping rope. Position the mower on a flat, stable surface and disconnect the spark plug wire to prevent accidental start‑up. Apply recoil spring precautions: grip the cord firmly, insert a screwdriver into the pulley slot to lock the spring, and wind the pulley backward only until tension is felt, avoiding overtightening or full release that could cause a violent snap. Use needle‑nose pliers to extract the old cord, keep tools organized, and work in a well‑lit area. Finally, after threading the new cord, slowly release tension by hand, verify smooth retraction, and reconnect the spark plug only when the mechanism operates safely. Cut the rope with side cutters before burning the end to prevent fraying. When removing the blade, be sure to secure the blade with a block of wood to avoid accidental rotation. Following the proper body mechanics described in the safety guide will further reduce strain and prevent injury.
Diagnose Common Pull‑Cord Problems in Minutes
When the pull‑cord won’t catch, you can pinpoint the culprit in minutes by checking the starter’s pawls, pulley, blades, rust, and recoil spring. First, pull the cord while watching the pawls; if they stay retracted, they’re broken or worn—replace plastic pawls with metal ones. Next, Diagnose pulley wear: spin the starter manually, listen for grinding, and feel for excess play; a worn pulley usually means the whole OEM assembly must be swapped. Then, inspect for jammed engine blades: flip the mower, disconnect the spark plug, and rotate the blade shaft; rocks, sticks, or dense grass will lock the blades and stop the cord from catching. Finally, examine rusted components and recoil spring tension; clean, lubricate, or replace as needed. The mower’s side discharge shield can block the blade if it’s hanging and must be removed to restore proper function. Also, verify that the fuel line is clear of debris to prevent ignition issues.
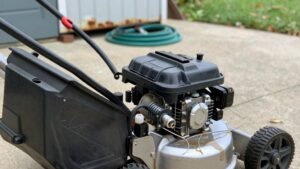
Remove the Starter Housing Without Damaging the Mower
After confirming the pull‑cord isn’t catching, you’ll need to remove the starter housing to inspect the internal components. First, turn off the mower, let it cool, and disconnect the spark‑plug boot. Remove the rope handle and wear gloves. Locate the housing—usually on top or the side—and note any plastic cover. Follow your inspection checklist: check bolt count, housing orientation considerations, and any hidden screws. Using a screwdriver, lock the pulley, then loosen the 3‑4 perimeter bolts with a wrench or socket. Lift the housing straight up, avoiding any twisting that could crack brackets. Verify that mounting clips align before setting the housing aside. Keep the work area well‑lit and stable throughout. Remember to secure the pulley before removing the rope to prevent accidental release. If the cord is still jammed after removal, inspect the recoil spring for metal fatigue before proceeding. Also, inspect the fuel line for any cracked sections that could cause leaks.
Extract the Old Cord and Clean the Recoil Mechanism
The worn pull‑cord shows clear signs of deterioration—frayed outer casing, separation from the core, and stiff retraction—so you’ll need to extract it before cleaning the recoil. First, lock the pulley by inserting a small screwdriver between the pulley and starter housing; this secures the pulley and prevents accidental spin. Grip the cord end with needle‑nose pliers and apply slow, steady tension while pulling it outward through the access hole. If the cord is knotted at the handle, cut it with side cutters. Once the cord clears, wipe the cavity with a dry cloth, remove any fibers from the pulley grooves, and inspect recoil components for wear. Verify that the pulley rotates freely and returns to its original position before proceeding. Use a 5/16 socket to remove the three bolts holding the cover in place. A properly timed spark plug ensures optimal engine performance. A spark plug condition can be quickly checked with a spark tester before reassembly.
Feed and Secure the New Pull Cord Properly
If you’ve already measured, sealed, and cut the new cord, the next step is to feed it into the recoil housing and secure it correctly. Align the two holes in the housing and pulley, then insert the cord from the outside toward the interior. Use a screwdriver in the notch to hold tension while you feed about twelve inches, applying a smooth cord insertion strategy for threading ease. Keep the cord taut and avoid tangles; a lightly melted end slides more readily. Once the cord reaches the pulley, tie a firm knot inside, pull the handle to lock the knot, and trim excess. Melt the knot tip for extra security, then proceed to wind the remaining length through the handle. The Craftsman M100 often requires the handle to be pulled out further to clear blocked blades. Before starting the mower, perform a quick safety check to ensure all components are properly installed and functional. Verify that the fuel level is adequate before testing the mower.
Re‑assemble the Starter Housing and Test the Cord
Snap the starter housing back onto the blower, then secure it with the supplied bolts, washers, and nuts, making sure the pulley spins freely. Align the new recoil starter with the housing mounting points, insert the bolts from the blower side, and tighten evenly for a secure mounting. Use the provided washers to prevent wobble, and check that the pulley rotates without binding. Before final tightening, perform debris removal by wiping any shavings from the bolt holes and pulley groove. Next, loop the starter rope onto the guide, reattach the spark‑plug wire, and pull the cord slowly to confirm smooth retraction and proper tension. Verify the engine cranks cleanly, then run a brief test start after the cooling period. Always perform fuel safety checks before operating the mower to prevent hazardous accidents. Remember to disengage the spark plug before any maintenance to ensure the mower is completely powered off. Check the spark plug condition regularly to maintain optimal engine performance.
Quick Maintenance Tips to Keep the Pull Cord Running Smoothly
When you regularly inspect and lubricate the pull‑cord system, you’ll keep the mower starting smoothly and avoid costly repairs. Perform starter mechanism diagnostics each season: disconnect the spark plug, flip the mower, and examine the blade housing for debris. Spray WD‑40 on the cord and into the spring recess, then work the pulley spring back‑and‑forth to verify tension. Use fine steel wool to scrape rust from ball bearings before applying oil to the assembly’s center. Follow operator safety protocols by wearing gloves and ensuring the engine is dead before any disassembly. Document each lubrication and inspection date; repeat the spray if resistance rises. This routine maintains friction‑free motion and prevents premature spring failure. The recoil mechanism can be replaced with a $15 part from Amazon, and the replacement screws are 10mm in size. Store the mower in a dry location to prevent fuel contamination during winter.
Troubleshoot Persistent Pull‑Cord Issues After Re‑installing?
Regularly lubricating the pull‑cord system keeps the mower starting smoothly, but re‑installing the cord can still introduce problems. First, verify knot tension; an overtightened knot can bind the pulley, while a loose knot lets the cord slip. Check that the V‑hook sits in the pulley notch; a mis‑seated hook prevents spring engagement and causes limp recoil. Inspect the pulley for wobble—loosened screws, worn mounting points, or a mismatched aftermarket pulley alternative will create play and uneven winding. Apply reverse winding techniques: align the arrow on the housing, turn the cord back exactly half a turn, then tighten all fasteners to proper torque. Finally, pull the cord fully, release, and confirm rapid, smooth recoil without binding. Ensure the V‑groove is undamaged and properly aligned before final assembly. Proper storage in a cool, dry environment can significantly extend the lifespan of the pull‑cord mechanism. Cleaning the deck regularly also helps prevent debris buildup that can affect cord performance. Regularly inspect the blade for sharpness and damage to avoid uneven cutting that may strain the pull‑cord system.