Soak your chosen seed—perennial ryegrass, tall fescue, or Kentucky bluegrass—in moisture‑retentive paper towels inside a zip‑lock bag for 24 hours, invigorating the water every 12 hours and keeping the temperature around 70 °F. After the first day, drain and replace the water daily, extending the soak to 2 days for fescue and ryegrass or 4‑5 days for bluegrass until a 1‑3 mm radicle appears. Transfer the sprouted kernels to a damp, shaded tray, mist lightly, and mix with Milorganite at a 1:4 weight ratio before broadcasting. Continue for to explore ideal planting depth and post‑plant care.
Select the Right Grass for Pre‑Germination
When you choose a grass species for pre‑germination, prioritize germination velocity, environmental tolerance, and blend compatibility. For climate specific selection in cool‑season regions, perennial ryegrass delivers the fastest emergence (5–10 days) after a brief 1–2‑day soak, especially when blended 10–30 % with fescue or Kentucky bluegrass. Turf‑type tall fescue offers a balance of rapid establishment and durability, thriving in compacted clay and full‑sun sites; its drought resilience exceeds fine fescue. Kentucky bluegrass, though slower (≈3 weeks), supplies rhizomatous spread and cold hardiness, performing best in moist, well‑drained soils at low‑mid‑70 °F daytime temps. Jonathan Green’s Texas Bluegrass is a new, heat‑ and drought‑tolerant blend of tall fescue and Texas bluegrass that can be pre‑germinated to enhance summer lawn vigor. Select soil appropriate options by matching these species to your site’s moisture regime, sun exposure, and intended traffic load. Understanding seed viability helps ensure successful germination.
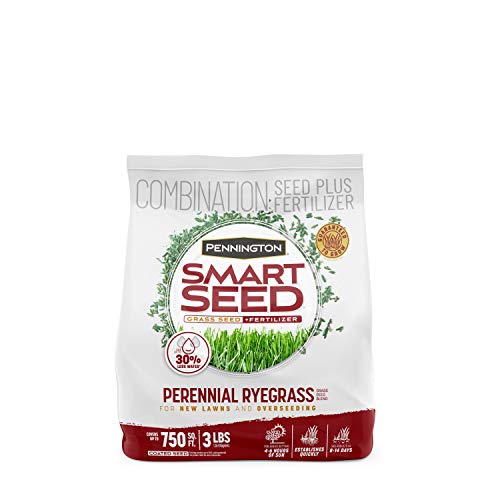
This lawn seed is great for areas getting 4 to 6 hours of sun

Drought & Heat Resistance - Once healthy and deep roots are established, this blend of grass seeds for lawn is resistant to heat, drought, insects, disease, and brown patches for a durable lawn in challenging conditions

REGENERATING PERENNIAL RYEGRASS SEED BLEND: Combines innovative RPR technology and elite perennial ryegrass varieties to create a beautiful outdoor space year-round
Collect Required Tools & Materials
Gathering the appropriate tools and materials is essential for a controlled pre‑germination process. First, select a moisture‑retentive paper towel and a zip‑lock plastic bag to house the seeds during germination monitoring. Keep the bag in a refrigerator for cool‑season varieties (30–120 days) or a cool, dark area for other species. Use cheesecloth, burlap, or permeable woven bags for larger seed batches, securing them with string, a rubber band, or a tie. Prepare a clean 5‑gallon bucket or 1‑gallon plastic bucket for soaking, and have a perforated container for drainage. For spreading, employ a broadcast or rotary spreader, then protect the seeded area with a thin straw layer, germination blanket, or light sand dressing. Store any unused seed in a dry, airtight container to preserve viability. Change water every 12–24 hours to keep the seed moist and oxygenated. Proper storage reduces the risk of seed deterioration and maintains germination rates. Understanding the seeding rate helps ensure even coverage and optimal lawn density. Including a balanced amount of protein in the seed mix supports early root development.

Stylish Home Essential: A Tissue Decorative Organizer adds a touch of style to your living space, ensuring that your tissues are always within reach while complementing your home decor

SPECIFICATION : Thick 20 PCS 18" x 23" (excludes the zipper), The reclosable zip bags were thickened to 5mil. The seal bags with sturdy zipper are heavy duty and durable,We have various sizes for you to choose from.
Soak Pre‑Germinated Grass Seed: Timing & Temperature
After securing the tools and materials, you’ll move on to soaking the pre‑germinated seeds. Begin with a 24‑hour soak, changing water every 12 hours, then extend to the ideal soaking duration for each species: 2 days for tall fescue, ryegrass, and Bermuda; 4–5 days for Kentucky bluegrass; up to 14 days for Bermuda in warm conditions. Maintain 70 °F for 3–5 day incubation, but allow cooler 60 °F to accelerate primed seed. Employ continuous water aeration with an aquarium pump during the first 48 hours to prevent hypoxia and dissolve germination inhibitors. After the initial 24‑hour period, drain completely, then replace water daily, stirring seed to guarantee even exposure. This protocol maximizes enzymatic activation while minimizing rot. Pre‑germination provides greater control over timing and establishment. Proper storage of unused seed can extend viability for several weeks to months, especially when kept in a cool, dry place with low humidity conditions. The optimal temperature window for most cool‑season grasses is between 60 °F and 75 °F for rapid germination.
Watch Sprouts & Stop Soaking
How can you tell the seeds are ready to leave the water? When a white radicle 1–3 mm long pierces the seed coat, you’ve reached the sprouting threshold. Check the batch twice daily—every 12 hours during the early phase—to confirm uniform emergence. Once visible roots appear, cease full submersion; drain the container completely and transfer the seeds to a damp, shaded tray. Maintain moisture by misting, not soaking, to preserve oxygen exchange. Begin post sprout handling immediately: spread the seedlings gently, keep them warm, and sow within 24–48 hours. Avoid continuous immersion beyond the first 24‑48 hours, as over‑soaking induces rot and reduces germination. Consistent monitoring frequency and careful post sprout handling guarantee ideal readiness for planting. Use a 5‑gallon bucket to hold enough water for the entire seed batch. Selecting a seed variety with a germination temperature that matches your local climate can further speed up establishment. Proper soil‑to‑seed depth ensures the seedlings have enough contact with moisture while avoiding excessive burial.
Mix Pre‑Germinated Seed With Milorganite
When you blend the pre‑germinated seed with Milorganite, you create a carrier‑based mix that guarantees uniform distribution and safeguards delicate seedlings. Use a 1:4 weight ratio—one pound of seed to four pounds of Milorganite—for all turf species. First, drain excess moisture from the seed, then place seed and Milorganite in a clean bucket. Hand‑mix or stir with a paddle until the seed adheres to the organic particles, achieving even distribution. The carrier’s granular texture enables precise uniform application with a drop or rotary spreader, matching label rates per 1,000 sq ft. Milorganite supplies nitrogen and phosphorus, remains virtually salt‑free, and protects tender sprouts while delivering starter fertilizer. This procedure yields a consistent, manageable blend ready for immediate sowing. The mixture can be applied by hand to targeted bare spots for quick coverage.

LAWN BARE SPOT REPAIR: Scotts PatchMaster Lawn Repair Mix Sun + Shade Mix is a combination mulch, seed, and lawn fertilizer product specifically designed to provide all-in-one bare spot repair and grass patch repair for lawns
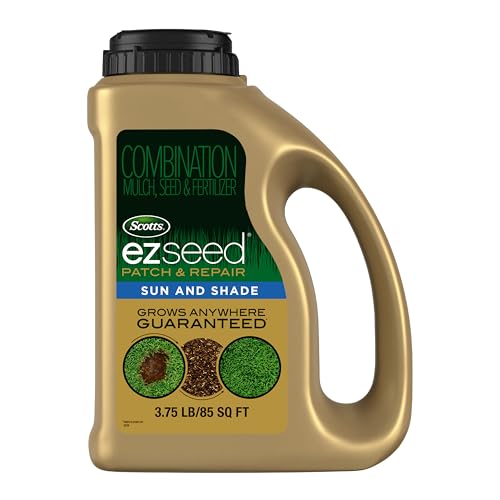
WHEN TO APPLY : This lawn seed mix of Kentucky bluegrass seed, perennial ryegrass, and fine fescue grass seed germinates best when daytime temperatures are between 60°F and 80°F with no danger of frost

SUN AND SHADE GRASS SEED: This combination lawn seed, grass fertilizer, and soil improver thrives in a variety of conditions
Prepare Your Soil Bed for Strong Roots
Why does a well‑prepared soil bed matter for robust root development? A stable, aerated matrix supplies oxygen, water, and nutrients directly to emerging radicles, reducing stress and promoting uniform elongation. First, clear the area of sticks, dead grass, and weeds using a rotary tiller to a six‑inch depth, eliminating physical obstructions and allelopathic compounds. Next, loosen compacted layers into a powdery texture, then firm the seedbed lightly with a roller to achieve a ¼‑½‑inch surface consistency. Spread topsoil amendments—lime, sulfur, gypsum, or wood ash—according to the pH test results, and mix them thoroughly. Finally, check for proper soil pH, targeting 6.0‑7.0, and pre‑water to saturation, ensuring the amendment zone is uniformly moist before seeding. Multiple passes with a thatch rake are required to properly create a fine, powdery texture. Adding a layer of quality topsoil improves seed‑to‑soil contact, which is essential for uniform moisture retention. Using a sod cutter can speed up removal of old turf, allowing for a smoother transition to the prepared seedbed.
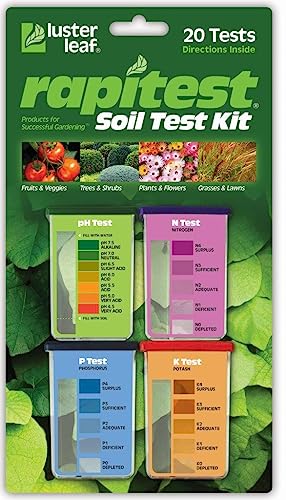
Quick, at home results for Soil pH, Nitrogen, Phosphorous and Potash Innovative and inexpensive soil test kit features an easy-to-use capsule system and patented color comparators

Kindly NOTE: This soil tester can not be applied to test pH value of any other liquid. If the soil is too dry the indicator will not move, and water it before testing.

Accurate Soil pH Testing: Dewildetradingco Soil pH Test Strips offer measurements of soil pH levels (pH 3.5-9). As an essential tool for every gardener and grower, these test strips help determine the optimal pH for various plants, such as outdoor plants, indoor plants, gardens, grass lawns, fruit trees, flowers, vegetables, and forest shrubs.
Plant the Pre‑Germinated Seed at the Proper Depth
Having loosened and amended the soil, you now place the pre‑germinated seed at the correct depth to guarantee adequate moisture absorption and root commencement. Aim for an even soil depth of about ¼ inch for most species; annual ryegrass and tall fescue can tolerate up to ½ inch, while perennial ryegrass should not exceed 15 mm. Use a light rake or a shallow‑impact seeder to embed the seed just beneath the surface, ensuring full seed‑to‑soil contact without burying it too deep. This positioning protects the embryo from desiccation, provides immediate access to moisture, and aligns with the germination window. Verify the surface is level, remove debris, and confirm that no seed lies deeper than the specified range, as excess depth impedes emergence. Proper watering after planting is essential to keep the seed moist until germination, and a consistent moisture schedule helps prevent drying out. Maintaining optimal soil temperature further accelerates germination and promotes uniform growth. Choosing the right seed depth for each grass type maximizes germination success.
Water, Maintain & Troubleshoot Common Issues
How often should you water newly pre‑germinated grass seed? You need to keep the top 1.5 inches of soil consistently moist for the first 10–14 days, which means applying light water 2–4 times per day for 5–10 minutes each session. Follow ideal watering schedules by irrigating early morning and again late afternoon, using a mist nozzle to avoid runoff. Monitor soil temperature and humidity; on hot, windy days increase supplemental watering needs to maintain the moisture gradient. After two weeks, reduce frequency to 1–2 times daily for 30–40 minutes, then shift to deep weekly watering once the canopy reaches four inches. Troubleshoot by checking for puddling (overwatering) or crusted soil (underwatering), and adjust timing to prevent fungal growth from night‑time moisture. Perform a water output cup test to verify even sprinkler coverage. Maintaining a proper soil moisture level is crucial to prevent seed rot while encouraging strong germination. Adjust watering duration based on soil type to ensure optimal infiltration and reduce runoff. Using bird‑repellent netting can keep birds away while the seed establishes.
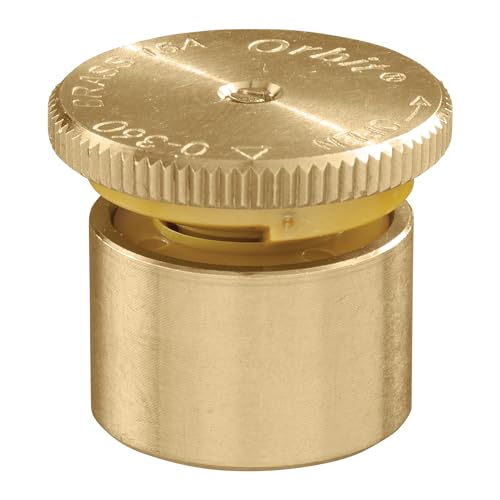
UNIVERSAL COMPATIBILITY: Designed to fit all major brands of pop-up spray heads, making it easy to replace existing nozzles and maintain your irrigation system. Delivers up to a 15-foot spray distance for efficient landscape watering (distance may vary based on PSI and other factors).

7 ADJUSTABLE WATERING PATTERNS: Each carefully selected pattern has an unique purpose,and each spray pattern will meet all of your watering needs. To change patterns simply twist the nozzle.Turn the spray nozzle dial to choose appropriate pattern easily with a faucet on the handle.
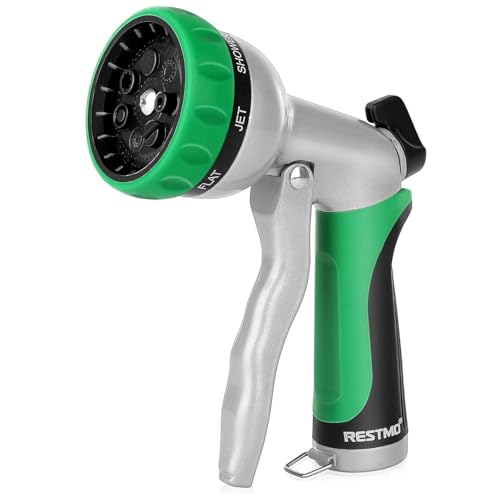
HEAVY-DUTY GARDEN HOSE NOZZLE: Body and trigger are constructed with 100% powder-coated metal material, which is robust to resist rust, corrosion and wear. The shock resistant rubberized bezel dial can also prevent it from accidental drops and damage. It is much stronger, more durable and long-lasting than plastic water nozzles.