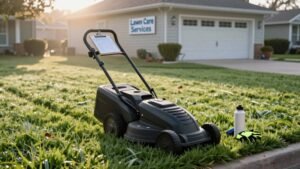
First, make sure fresh fuel reaches the engine and the carburetor vent and air filter are clean; then check the battery voltage and tighten any loose connections. Remove the spark plug, clean it, and verify the gap is 0.020‑0.030 in before reinstalling it with a torque wrench. If it still won’t start, drain the carburetor bowl, clean deposits, test the needle and float, and adjust as needed. Next, empty the oil, refill with the recommended viscosity, and confirm the level. Finally, reassemble, run the mower at idle, and fine‑tune any remaining adjustments—more details follow if you keep going.
Diagnose Common Lawn‑Mower Starting Problems Quickly
Kick off your troubleshooting by confirming the fuel supply is fresh and unobstructed; stale gasoline, clogged lines, or a missing stabilizer will choke the carburetor and halt ignition. First, drain any fuel older than thirty days and replace it with fresh gasoline, adding a stabilizer if the mower sits unused for long periods. Next, check fuel line condition: disconnect the line, inspect for cracks or kinks, and verify free flow by blowing through it or using a clear hose to spot blockages. Then, inspect spark arrester for carbon buildup or obstruction; clean or replace it to guarantee proper exhaust flow and prevent back‑pressure that can affect ignition. Finally, verify the air filter is clean and the carburetor vent is clear, because restricted airflow will also prevent starting. A dead or weak battery can also keep the mower from cranking, so test the voltage before proceeding. Proper storage temperature is crucial, as extreme heat or cold can accelerate battery degradation and reduce overall performance.
Inspect and Replace Spark Plugs for Starting Problems
You’ll want to start by checking the spark plugs whenever the mower won’t fire, because a fouled or worn plug is a common culprit for starting problems. Follow the manufacturer’s spark plug replacement frequency—typically each season or every 25–30 hours, and at least annually. First, disconnect the plug lead, then clean the surrounding area with a wire brush to keep debris out. Use a 5/8‑inch socket to turn the plug counter‑clockwise and remove it. Inspect for carbon fou, cracked porcelain, or burned electrodes; replace if any are present. Measure the gap with a feeler gauge, aiming for 0.020–0.030 inches, and perform spark plug gap adjustment by gently bending the electrode if needed. Hand‑thread the new plug, torque to 15 ft‑lb, reconnect the lead, and test the engine. A torque wrench ensures the plug is tightened to the correct specification. Proper safety gear should always be worn when performing maintenance to prevent injury.


Includes (2) RC12YC Spark Plugs.

Is the Carburetor Causing Your Starting Problems? How to Test and Fix It?
If the mower won’t start or stalls after a few pulls, the carburetor is often the culprit because it regulates fuel delivery. First, locate the bowl, unscrew the bottom bolt, and drain any fuel. Inspect the bowl for crusty deposits or varnish; clean it with carburetor cleaner and compressed air. Next, test the needle and seat: invert the carburetor so the float drops, insert a pressure tester, and apply 5‑7 PSI. Stable pressure means the needle seats correctly; a drop signals a faulty needle or seat that must be replaced. Perform a float adjustment by turning the screw until the float hovers ¼‑½ inch above the needle tip. If cleaning doesn’t restore steady idle, a carburetor rebuild is required. Use fresh fuel with stabilizer and replace the air filter to prevent recurrence. Old gas can cause the carburetor to become fouled.
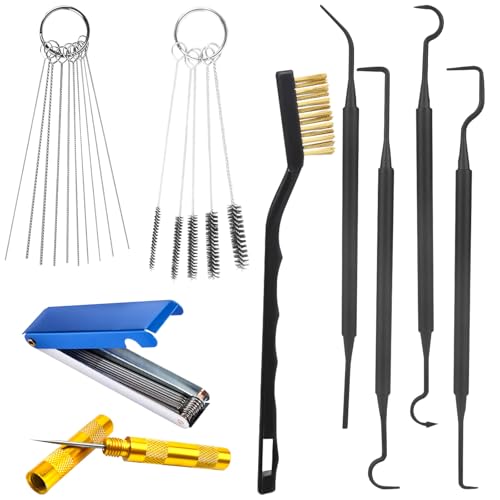
【Material】Engineered for performance and longevity, our carburetor cleaning kit utilizes high-grade stainless steel and tough nylon. The stainless steel components offer reliable strength and are designed to maintain their integrity, while the nylon brushes effectively scrub sensitive parts without causing damage. This thoughtful material selection provides a consistent and dependable cleaning experience through repeated use on various projects.

Fit for Honda CRF250R 2004-2009 2012-2017, CRF250X 2004-2009 2012-2017V, TRX450R 2006-2009, TRX450ER 2006-2009 2012-2014, CRF450R 2002-2008, CRF450X 2005-2014V

Replace: K10-WAT, D10-WAT. Fits most WA and WT series carburetors. Replace Echo number: 12310016330. This K10-WAT kit is an extremely common carburetor rebuild kit used on several different brands of 2-cycle equipment including Edger, String Trimmer, Leaf Blower, Chainsaw and more. Some of these brands are Poulan, Weedeater, Ryobi, Ryan, IDC, Homelite, Lawnboy, Toro, McCulloch, Craftsman and more.
Disassemble Engine Internals When Starting Problems Persist
Why bother with guesswork when the engine still won’t start after cleaning the carburetor? First, disconnect the spark plug wire and let the engine cool completely. Remove the engine from the mower deck if there’s no drain plug, then pry off the flywheel with a crowbar after loosening its nut. Separate the crankcase, sump cover, and head by prying evenly around the perimeter, noting each self‑tapping screw to avoid stripping. Press down the compression springs, extract the valve spring retainers, and inspect each valve for chipping; perform a valve adjustment if seating is off. Examine the piston, crankshaft, and bearings, and check camshaft lubrication points, especially the oil slinger. Reassemble in reverse order, ensuring precise alignment of camshaft, tappets, and gears before testing free movement. Also verify the flywheel nut torque is set to 55 ft‑lbs. Before testing the engine, use a multimeter to check the solenoid resistance to confirm it is within the proper range. A multimeter can also measure coil continuity to ensure the ignition coil is functioning properly. A clogged or dirty air filter can restrict airflow and cause the engine to stall.

The cable is made from premium flexible steel wire, ensuring durability and strength. The threaded connector body and the micro pressure screws are also constructed from high-quality steel, providing robust and reliable performance in various applications.

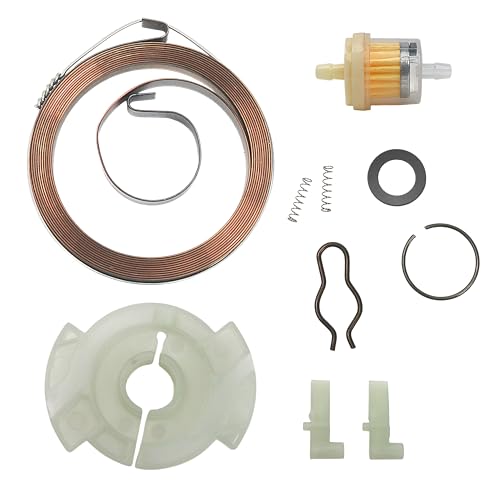
Package: 10pcs/set of pull recoil starter repair kit with fuel filter. Durable and works well for long use. It's an ideal kit to replace and repair recoil to make it work like new.
Drain Old Oil, Re‑Fill With Recommended Viscosity, and Check Level
First, empty the fuel tank by running the engine until it runs dry, then turn the mower off and disconnect the spark‑plug wire to prevent accidental start‑up. Lay cardboard under the mower, then tip it on its side and drain the oil from the filler spout into a pan, or remove the drain plug with a socket wrench and rock the mower to free trapped oil. Wipe any spills, apply absorbent powder, and transfer the used oil to a sealed container for proper oil storage. Follow the operator’s manual for the recommended viscosity, pour the new oil to the fill line, and retighten the cap. Run the engine at idle, check for leaks, and verify the level with the dipstick. Dispose of the old oil at a certified facility for safe oil disposal. Using a milk container as a makeshift oil catcher can keep the area clean and prevent spills. Ensure you work in a well‑ventilated area to minimize inhalation of fumes. Always place the mower on a level surface before beginning any maintenance.

[STAIN-FREE MAINTENANCE] Stop oil spills on your mower deck. The 14.98 inch total length** (with11.12 inch flexible hose) extends past the frame, allowing you to drain oil directly into a pan without the mess.
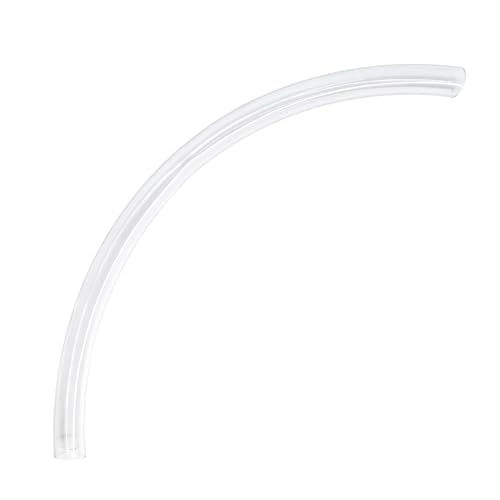
**Exact OEM Replacement, Secure Leak-Proof Fit** Direct replacement for OEM part # 532148456 and 148456, 1:1 precision manufacturing ensures a tight, secure connection without any modification. This oil drain tube eliminates oil leaks and messy spills during oil changes, protecting your mower engine and lawn from oil damage.

5401 Oil Drain Valve Contains Hose and Cap. 1/4 Turn Oil Drain and Hose, Thread Pitch - 3/8 x 18 NPTF
Reassemble, Test the Ignition, and Fine‑Tune the Mower
Precision is key when you reassemble the mower, test the ignition, and fine‑tune the flywheel and valves. Reverse the disassembly order, aligning the spindle, blade, and belt precisely before tightening each bolt to the manufacturer’s torque spec. Reattach the deck securely, then reconnect the spark‑plug wire after you’ve verified the flywheel‑magneto gap is no thicker than a playing card. Inspect wiring for wear, clean or replace the plug, and gap it correctly before final installation. Pry off the flywheel, store the key, then reinstall it using the marked alignment. Press down compression springs, replace any chipped valves, and lock them in place. Adjust throttle linkage for smooth response, and maintain the air filter system by cleaning or replacing the filter element before the final safety check. Always wear protective gloves when handling the blade to prevent cuts. Before lifting the mower, engage the safety lock to prevent accidental startup. Wear hearing protection to guard against noise‑induced hearing loss.
Plan a Preventive Maintenance Schedule to Avoid Future Starting Problems
After reassembling and fine‑tuning the mower, set up a preventive maintenance schedule to keep starting problems at bay. Begin each session by checking oil level, inspecting the air filter, and verifying spark plug condition. Every 10‑hour interval, clean battery terminals, lubricate pivot and caster axles, and measure tire pressure. At 25‑hour marks, clean engine cooling fins and pre‑cleaner components. Change oil after the first 5 hours, then replace oil and oil filter every 50 hours. Replace air filter, spark plug, and fuel filter each 100 hours; always maintain proper fuel mixture and check fuel filter condition before refueling. Before storage, add fuel stabilizer, drain fuel, and lubricate moving parts. Follow these tasks methodically to guarantee reliable ignition throughout the season. Regularly clean the deck to prevent grass buildup that can engine performance, and consult the mower’s manual for specific blade sharpening guidelines. Using the correct engine oil viscosity ensures optimal lubrication and prolongs engine life.

SIZE CHECK: 2-1/4" H. Compatible with select John Deere (D100, E100, S100 series), Husqvarna (YTH series), Craftsman, Cub Cadet (XT1, XT2), Toro TimeCutter, Troy-Bilt, Ariens, Poulan Pro equipment. Verify filter height and fitment before ordering, especially when replacing short or tall lawn mower oil filter profiles.

2 Pack Genuine Briggs & Stratton 492932s Oil Filter 492932 Vanguard Small OEM

Wide Compatibility: These oil filters are compatible with the following engine, lawnmower, and tractor models: YTH20K46, YTH21K46, 12-050-01, 1205001, 12-050-01-S, 1205001S, 12-050-01-S1, 1205001S1, 1205001-S1, KH-12-050-01-S1, 12-050-08, KH-12-050-08, KH-12-050-01-S; suitable for... Models include CH18, CH20, CH22, CH23, CH25, CH26, CV15, CV17, CV18, CV20, CV22, CV23, CV25, CV26, KT715, KT725, KT730, KT735, KT740, KT745, SV470 - SV620, etc