First, put on ANSI Z87.1 eye protection, earplugs, and non‑slip boots, then grip the front‑assist handle and strap the shoulder strap to shift the weight to your torso while keeping the shaft parallel to the ground. Choose a right‑shaft trimmer for higher torque, adjust the head angle so the string runs parallel, and maintain a 15‑20‑foot safety radius. Use a sweeping back‑and‑forth motion, keeping the head at a slight angle near trees and vertically for walkways. After cutting, turn off the unit, clean the guard, and wind fresh 10‑20‑foot line clockwise, leaving a short tail. Properly inspecting the spark plug, air filter, and connections will keep it running smoothly, and the next steps will show you how to fine‑tune technique for shrubs and troubleshoot common issues.
Wear Essential Safety Gear for Your String Trimmer
When you start a string‑trimmer, put on the full set of PPE before you pull the trigger. First, secure eye protection: wear ANSI Z87.1‑rated safety glasses or goggles, and add a face shield if debris is likely. Next, protect your hearing with earplugs or earmuffs; the engine’s close‑range noise can cause irreversible damage. For foot safety, practice proper footwear selection—sturdy, non‑slip boots or tall leather work boots that resist cuts from the line and shield against thrown objects. Cover your hands with adequate hand protection; choose gloves with anti‑vibration padding to dampen shock, prevent tingling, and guard against sharp blades or metal burrs. Finally, wear long pants and close‑fitting clothing to avoid entanglement and protect legs from projectiles. This ensemble minimizes risk and guarantees efficient operation. Understanding the cutting head mechanism helps you select the appropriate line for different vegetation. Regularly inspect the fuel mix to ensure optimal engine performance.
Select the Right Trimmer & Shaft
Choosing the right trimmer and shaft hinges on matching the tool’s design to your task’s intensity and your own ergonomics. Curved shafts give you a compact, lightweight unit, ideal for small yards and light‑duty work, while straight shafts deliver higher torque and reduced vibration, making them suited for aggressive trimming and brush cutting. Evaluate ergonomic design considerations: shorter users benefit from the compact reach of a curved shaft; taller operators prefer the extended reach of a straight shaft to avoid stooping. Vibration reduction features are more pronounced in straight‑shaft models, which also tend to have sturdier head designs for commercial use. Balance purchase price against durability, and select a handle—loop for quick jobs, U‑shaped for prolonged use—to complement your shaft choice and minimize fatigue. The straight shaft offers greater reach for taller users. Straight‑shaft trimmers provide superior torque for dense vegetation. Understanding the edge quality differences between tools helps you choose the right equipment for precise lawn boundaries. Reel mowers, with their scissor‑like blades, deliver a clean cut that is especially effective on small, flat lawns.

Genuine Ryobi Replacement Part.

𝗦𝗣𝗢𝗢𝗟 𝗖𝗔𝗣𝗔𝗖𝗜𝗧𝗬: String trimmer head holds up to 15 feet (4.6 meters) of .095-inches (2.4 mm) trimmer line to the maximum line size of .105-inches (2.7 mm) of any shape
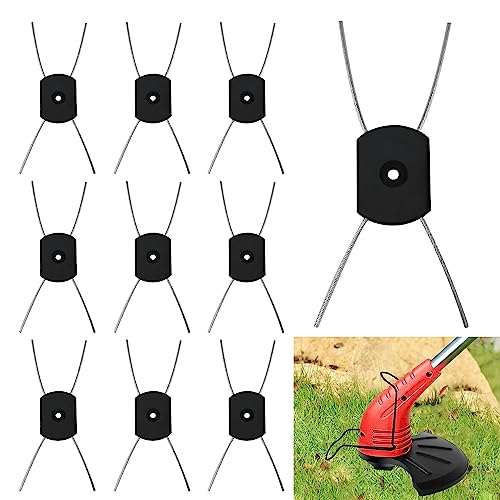
Considerable Quantity Weed Wacker Head: You will receive 10 pieces steel wire string trimmer head, enough quantities can meet your daily use and replacement needs. Note: It fits electric weed trimmer with 5.5mm(0.2inch) bore size. Also, you can modify these a bit by drilling a bigger hole in the middle to fit your weedwackers.
Configure Shaft Type & String Size
A few key decisions shape how your trimmer performs: selecting a straight or curved shaft and matching the string diameter to the job’s power requirements. Straight shafts deliver higher torque, longer reach, and less vibration, making them ideal for aggressive brush cutting and large properties. Curved shafts are lighter, more maneuverable, and better for tight flower beds or obstacles. Check attachment compatibility if you plan to switch shaft types; many units accept interchangeable heads without tools. Match string size to the shaft’s power rating: straight shafts handle multiple gauges and even blade adapters, while curved shafts usually support a single diameter. Consider shaft wear: solid steel drives resist fatigue, whereas plastic or braided cables may stretch over time, affecting cutting consistency. Choose the combination that balances durability, torque, and maneuverability for your specific tasks. Curved shaft trimmers are lighter and have better balance due to the shorter shaft. Selecting the appropriate power source, such as a battery‑powered model, can also influence overall performance and maintenance needs. Low emissions contribute to a cleaner environment when using electric-powered. Brush cutters excel at tackling dense, woody vegetation. dense brush often requires the power and durability of a brush cutter, making the right shaft and string choice crucial for effective trimming.

1.Universal fit 1 inch gearbox grass strimmer(Electric and petrol) and fit 99% 1 inch straight shaft brushcutter.

Part Number: 308473005

2 IN 1 TRIMMER & EDGER : Easily converts from a string trimmer to an edger lawn tool in just seconds.
Adopt Proper Holding Position & Stance for Your String Trimmer
If you position yourself correctly before you start, you’ll keep the trimmer steady, reduce fatigue, and avoid accidental strikes. Place both feet on firm ground, keeping at least 24 inches between the guard and your toes. Grip the front assist handle straight, straighten your front arm, and bend the rear hand slightly for a natural pivot. Align your shoulders so the trimmer head stays parallel to the ground, achieving stable instrument alignment and a straighter body posture. Use the shoulder strap if provided; it transfers weight from your arms to your torso, further stabilizing the tool. Keep the trimmer head parallel to the ground, maintain a 15‑20‑foot safety radius, and never lift the cutter deck while cutting. This stance minimizes fatigue and maximizes control. Proper ergonomics improve comfort while you work. Following the safety guidelines outlined in the five‑step restring guide ensures the trimmer operates at peak efficiency. Regularly check the mower’s blade sharpness before each session to maintain an even cut and protect the grass. Understanding the role of cutting line thickness helps you match the trimmer to different grass densities.
Execute Basic Cutting Motion
When you start cutting, keep the trimmer head slightly angled so the string runs parallel to the ground. Apply the sweeping stroke technique by moving the unit back‑and‑forth in a smooth, controlled arc, letting the rotating string skim the grass surface. Use the right side of the trimmer for counter‑clockwise spin models to eject debris outward, and avoid hovering directly above the turf to prevent scalping. Leverage string power by focusing the cut at the fast‑moving string tips; the whipping motion of a single line delivers crisp, clean cuts, while dual‑line heads increase speed on dense growth. Maintain the angle throughout each stroke, ensuring consistent contact with plant bases and ideal energy transfer. Wear long pants to protect legs from stray debris. Choosing the correct line thickness helps match the trimmer to various grass types and weed densities. Properly preparing the lawn edge with a clean trim line before trimming ensures a sharp, professional finish. Stihl’s high‑efficiency motor design provides longer runtime and consistent power delivery, making it a reliable choice for extended trimming sessions.
Apply Edge‑Trimming Technique
Even before you start edging, flip the trimmer head to the vertical position, set the deflector shield toward your body, and turn the unit upside‑down so your thumb can reach the trigger; then hold the side of the handle for steadier control. Reach full speed, then maintain a 90‑degree angle with the cord straight up and down, keeping the trimmer level. Apply consistent angle adjustment as you guide the head along the planned edge, moving opposite the line’s rotation direction—clockwise spin, left‑to‑right; counter‑clockwise, right‑to‑left. Push soil and grass outward to create a crisp line, ensuring efficient trimmer alignment by keeping your arms stationary and your body moving slowly. This method yields a clean, repeatable edge without scalping. Good edging creates a professional, manicured look that enhances the overall appearance of the lawn. Always wear protective gear to reduce the risk of injury while operating the trimmer. Proper edge preparation includes clearing debris and marking the desired line before you begin. Remember to check the mower’s weight distribution before lifting to avoid strain.
Modify Technique for Trees, Shrubs & Walkways
A well‑adjusted technique for trees, shrubs, and walkways lets you protect plant bark while delivering a clean edge. Hold the trimmer at a slight angle near tree bases, matching the grass height, and keep the line clear of bark to Minimize tree/shrub damage. Use a curved‑shaft model for tight spaces, trimming from top down on tall grass to avoid tangling. For shrubs, angle the head even with surrounding cut, position the string perpendicular to ground, and stay clear of stems; a lighter curved shaft eases perimeter work. When edging walkways, hold the unit vertically, keep the spool flat and parallel, and employ a straight shaft for long runs to Optimize walkway trimming. Watch for debris, rocks, and uprooted dirt to maintain a crisp edge. Proper blade angle is crucial for achieving a uniform cut without gouging the soil. Consistently checking the deck level before each session helps maintain even cutting and optimal mower performance. Deck leveling ensures the mower cuts at the correct height across the entire cutting width.
Reload & Wind String Correctly
Protecting bark and keeping clean edges depends on a well‑tensioned line, so after you finish edging trees, shrubs, and walkways, turn your attention to reloading and winding the string correctly. First, power off the trimmer and clean the head. Push the side tabs to remove the cap or bump knob, then pull the spool out. Discard the old line and cut a fresh piece 10–20 feet long, matching the gauge shown in the manual or STIHL chart. Thread the string through the spool’s notches, feeding half through each hole for dual‑end models, and lock the end in the top notch. Follow the arrow direction, winding clockwise, applying even pressure for a tight but not overtight coil. Stop before the rim, leave a short tail, then reinstall the spool, thread the ends through the eyelets, and snap the cap back. Adjust spool tension if the line feeding mechanism feels loose, ensuring consistent feed during use. The Gator speed load system can advance line automatically without manual winding. The cutting power of Husqvarna models often surpasses that of Echo, providing longer runtime for demanding tasks.

4 Different Size Fuel Line Hose - I.D x O.D: 0.08" x 0.14" (2mm x 3.5mm), 1/8" x 1/4" (3mm x6mm),1/8" x 3/16"(3mm x5mm),3/32" x 3/16" (2.5mm x5mm) Assoreted Sizes - One Kit Covers Many Small Engine Fuel Line ID/OD combinations Includes Four Common Fuel Line Sizes

4 Different Size Fuel Line Hose - I.D x O.D: 0.08" x 0.14" (2mm x 3.5mm), 1/8" x 1/4" (3mm x6mm),1/8" x 3/16"(3mm x5mm),3/32" x 3/16" (2.5mm x5mm) Assoreted Sizes - One Kit Covers Many Small Engine Fuel Line ID/OD combinations Includes Four Common Fuel Line Sizes

Repower Fuel Line Kit Replacement Manufacturer Part Number: ECHO Craftsman 90069,90097,90097Y,900518
Inspect Your Trimmer After You’re Done
After each session, you should thoroughly inspect the trimmer to guarantee every component is clean, secure, and ready for the next use. Begin by removing debris from the guard and cutting tool with a damp cloth or soft brush; apply an all‑purpose cleaner if dirt is stubborn. While cleaning, clean worn components and verify the guard is firmly attached. Next, examine the air filter; wash foam filters with soap, dry, then lightly oil before reinstalling, or replace paper filters immediately. Remove the spark plug, brush away surrounding grime, and inspect electrodes for wear or corrosion. Finally, inspect tightness of connections on all fasteners, handles, and throttle triggers, tightening any loose screws or nuts. This systematic check preserves performance and extends service life. Also, check the fuel line for cracks before storing the trimmer.
Fix Common Problems So It Lasts Longer
Ever notice your trimmer sputters or stops feeding line midway? First, keep the line long enough outside the head; a short line triggers automatic retraction and stalls feed. If you have a bump‑feed model, install a compatible aftermarket bump head to restore dependable feeding. For melting issues, bump the line out frequently and avoid prolonged cuts in dense foliage—this reduces friction heat and supports overheating prevention. Clean the head housing each session, remove debris, and rewind the line neatly to prevent spool jams. Replace worn or low‑quality line with a thicker, branded version to avoid breakage on rough surfaces. Finally, service the fuel system, spark plug, or battery as required; a well‑maintained power source guarantees extended usage lifespan. Adjust handle to improve ergonomics and reduce arm fatigue.

This model does not include any adapters


Item Package Dimension: 3.899999996022L x 3.0699999968686W x 1.49999999847H inches