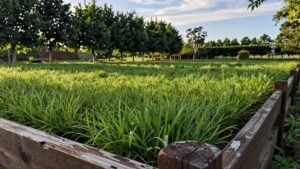
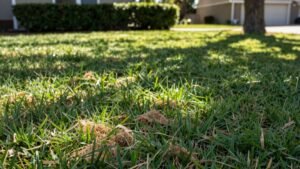
Check the seed heads: when they turn a uniform tan‑orange‑gold, feel firm but not doughy under a thumbnail, and the moisture drops to 35‑50 %, they’re ready. Swath at about 60 % color change on the main stem, preferably early morning, evening, or overnight with dew, and keep the rollers light and parallel to the wind. Choose hand harvesting for small, uneven plots and mechanical harvesters for large, flat fields, or combine both for best results. After cutting, dry the bulk quickly, screen out oversized debris, winnow with vertical airflow, rinse and soak to remove pulp, then eliminate dust, shells, and insect‑damaged seeds. Pack the clean seed in breathable cloth sacks or airtight bins with desiccant, label each lot, palletize above the floor, and store at 40‑50 °F with less than 60 % humidity to prevent premature germination; the next sections will guide you through each step in detail.
How to Tell When Grass Seed Is Ready to Harvest
When can you tell a grass seed is ready to harvest? Look for tan, orange, or golden color variation across the whole head, not just the top. Scan multiple lawn sections; uniform hue means the seed heads have ripened from top to bottom. Next, press a thumbnail onto a seed—medium to hard pressure should dent it without feeling dough‑soft. That firmness, combined with moisture content between 35‑50 %, signals the ideal window. Finally, give a gentle palm strike; if seeds pop out, they’re fully mature and must be harvested immediately. Perform these checks in several spots to confirm at least 75 % of heads meet the criteria before you start. Swathing should be done in the early morning or late night when dew is present.
Swathing the Field: Timing, Dew‑Day Technique, and Row Setup
A good rule of thumb is to swath once the seed heads hit about 60 % colour change on the main stem, which you confirm by cracking a few pods and looking for the characteristic yellow‑brown hue. Schedule the cut for early morning, evening, or overnight when dew coats the grass; the moisture cushions seeds and limits shattering. Keep temperature monitoring in mind—avoid mid‑day heat above 22‑23 °C, which can lock chlorophyll and produce green seed. Align swaths with prevailing wind monitoring, laying them parallel to the breeze to prevent pods from blowing away and to promote even drying. Adjust the roller for light, downward pressure, tuck edges into stubble, and maintain airflow, especially in wide, heavy swaths. Successful germination requires optimal temperature to ensure rapid seed sprouting.
Choosing Mechanical or Hand Harvest for Grass Seed
Which method suits your seed‑harvest goals—hand or machine—depends on scale, terrain, and species delicacy. If you work a small, uneven lot with rare or delicate grasses, hand harvesting lets you select only ripe heads, preserving integrity and avoiding unripe seed. Expect hand harvesting challenges: intense labor, low yields per hour, and limited access to steep or wet areas. For large, uniform fields on flat terrain, mechanical harvesting offers speed and fewer workers, but mechanical harvesting limitations include poor selectivity, high seed damage (up to 95 %), and the need for even, trellised ground. Combine both approaches when possible: use a sickle for high‑value patches, then run a brush harvester across the bulk to maximize volume while minimizing waste. The hand spreader provides more precise placement of seed in small areas. The visual guide shows that grass seed is typically small, oval‑shaped, and ranges in color from light brown to dark brown. Understanding the pollination process is essential for timing the harvest to capture mature seeds. Properly timing the harvest with the grass growth cycle can significantly improve yield quality.
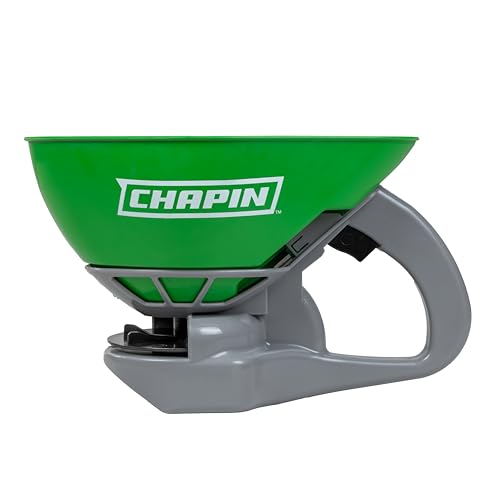
Chapin Garden Spreader: Designed for all your residential lawn and garden seed, pest control and fertilizer spreader need, this 0.3 Gal hand held broadcast spreader is weather-resistant, has a green poly hopper and ideal for smaller spaces

SUN AND SHADE GRASS SEED: This combination lawn seed, grass fertilizer, and soil improver thrives in a variety of conditions

Establishes quickly
Cleaning Grass Seed After Combining for Pure, Viable Grain
After you’ve chosen hand or machine harvesting, the next step is to clean the combined material so only pure, viable grain remains. Dry the bulk immediately to stop mold, then sweep out rocks, sticks, and sand. Use a scalping screen with large holes, shake the seed through, and discard oversized debris. Switch to a finer screen, repeat until chaff is gone, and run the seed through a debearder for uniform flow. Apply vertical airflow to winnow light material, and use a box fan to dry and separate non‑viable seeds. If pulp persists, rinse over a ¼‑inch screen, soak 8–12 hours, then decant and dry with directed airflow. Finally, remove dust, empty shells, and insect‑damaged seeds, always careful to avoid seed damage and keep seed viability high. The process benefits from the region’s high‑yield production, especially in the Inland Northwest. Proper soil aeration is essential for maintaining moisture balance in sandy conditions. Proper aeration also enhances water absorption throughout the root zone. Implementing regular aeration can reduce soil compaction and promote healthier root development.

LAWN BARE SPOT REPAIR: Scotts PatchMaster Lawn Repair Mix Sun + Shade Mix is a combination mulch, seed, and lawn fertilizer product specifically designed to provide all-in-one bare spot repair and grass patch repair for lawns

Grow grass up to 2X times faster than seed alone with Scotts Turf Builder Rapid Grass Sun & Shade Mix (when applied at the new lawn rate, subject to proper care)

Rebels is the original premium Tall Fescue lawn seed and it's still the best Tall Fescue on the market
Packing, Palletizing, and Storing Harvested Grass Seed
Most growers pack harvested grass seed in breathable cloth sacks or burlap bags to promote airflow and curb mold. You’ll also use airtight plastic bins or sealed buckets when humidity spikes, adding desiccant packs to capture residual moisture. Keep each seed type in its own container and label every bag with the lot number.
When palletizing, place bags on pallets above the floor, use clean bins, and secure pallets in pest‑proof metal cabinets. Attach matching labels to each pallet and never co‑mix lots.
For storage, maintain temperature control between 40‑50 °F (under 70 °F max) and humidity control below 60 % RH. Cool, dry conditions with desiccants extend viability for 10‑18 months, preserving germination rates. Proper storage can significantly boost seed viability. Seasonal temperature monitoring helps prevent premature germination.
Ensuring proper soil pH before planting can enhance seed uptake and promote uniform lawn establishment.

Premium fabric planter / nursery container for soil or soilless medium

🌱 NATURAL HEMP BAG: Reusable sprouting sack made from breathable hemp fibers. Ideal for sprouting beans, grains, and seeds without plastic. Provides airflow for faster, healthier sprout growth.

Designed to fit in your back pocket or just about anywhere else