First, disconnect the mower’s power and let the engine cool, then turn off the fuel valve, clamp the hose, and siphon out the gasoline. Gather wrenches, screwdrivers, a magnetic tray, a bucket of warm soapy water, carburetor cleaner, and an ultrasonic bath. Photo‑document each bolt and spring before you loosen mounting bolts, remove the bowl, and capture the governor spring layout. Soak all metal parts for 10–15 minutes, scrub with a soft brush, then ultrasonically clean for 30 minutes, flipping halfway. Rinse, dry, reassemble using your reference photos, reinstall the carburetor, start the engine, and verify a steady idle—continue for a detailed step‑by‑step guide.
Safety First: Disconnect Power and Drain Fuel
Before you begin, pull the spark‑plug wire to guarantee the engine can’t start inadvertently. Then turn off the engine and let it cool for at least thirty minutes. Perform a Visual_Inspection of the fuel system, locate the black rubber fuel line, and identify the Fuel_Shut off solenoid near the carburetor inlet. Disconnect the negative battery terminal on electric‑start mowers. Unplug the Fuel_Shut off solenoid to enable draining. Clamp the fuel hose with pliers, place a approved container beneath, and siphon fuel using an approved pump. If a drain screw or bowl nut is present, loosen it after clamping the line to empty residual gas. Run the engine in an open, ventilated area until it sputters out, ensuring all fuel is removed before proceeding. Check for vacuum leaks by spraying carb cleaner around the gaskets. Properly cleaning the carburetor prevents the buildup of fuel residue that can cause poor performance.
Gather Tools and Cleaning Supplies for Carburetor Work
After disconnecting power and draining the fuel, gather the hand tools, cleaners, and safety gear you’ll need to open and scrub the carburetor. Lay out a set of wrenches (various sizes) and flat‑ and Phillips screwdrivers on a magnetic tray to organize small parts. Keep picks, a hard plastic scraper, and a brush within reach for debris removal. Fill a bucket with warm water and multi‑purpose detergent, then add a spray can of carburetor cleaner for internal passages. Position a fuel drain pan or funnel nearby, and have rags, a sponge, and a compressed‑air hose ready for drying and blowing out clippings. Finally, lay out replacement components—new gaskets, seals, and any needed clamps—so you can store replacement components efficiently during reassembly. Check the float for proper operation before reinstallation. Inspect the crankcase for overfilled oil to avoid excess spillage. Remember to consult the mower’s manual for the correct oil capacity before adding any new oil.
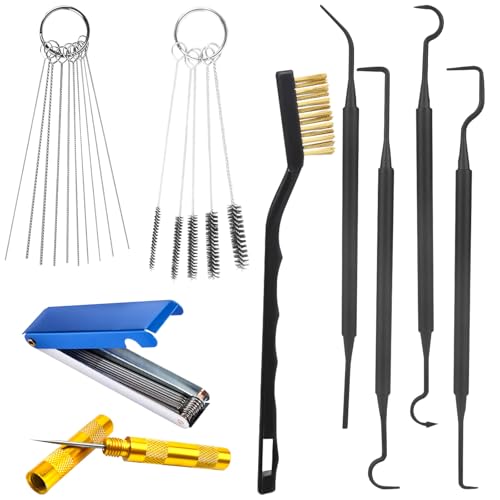
【Material】Engineered for performance and longevity, our carburetor cleaning kit utilizes high-grade stainless steel and tough nylon. The stainless steel components offer reliable strength and are designed to maintain their integrity, while the nylon brushes effectively scrub sensitive parts without causing damage. This thoughtful material selection provides a consistent and dependable cleaning experience through repeated use on various projects.

SAVE YOUR TIME AND HANDY - Did you ever spend a lot of time on cleaning the ports? And the dock didn’t leave at all. These make cleaning a ethanol damaged or dirty carburetor a lot easier, working great and handy, never have a hard time cleaning the ports from now on.
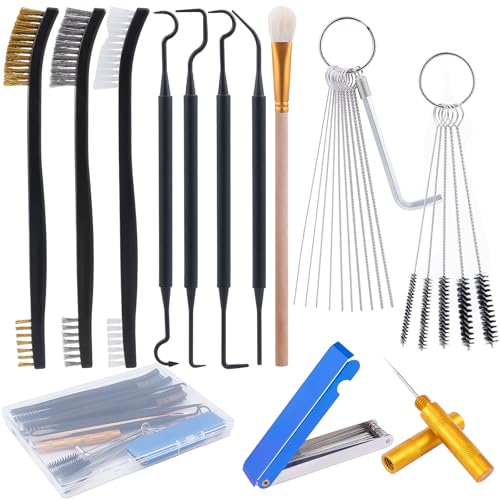
Complete 33-Piece Carb Cleaning Kit – Includes 13 stainless steel cleaning wires, 5 nylon brushes, 10 cleaning needles, 1 throttle wrench, 1 pointed tweezers, 3 double-ended brushes, and 4 hooks. Everything you need as a carb cleaning tool set in one box
Disassemble the Carburetor Using Photo‑Guided Steps
Start by securing the spark‑plug lead away from the plug, then remove the air‑cleaner assembly and turn off the fuel valve or clamp the fuel line. Photograph the governor spring layout before you unbolt the carburetor; this visual reference prevents mis‑placement later. Loosen the mounting bolts while the governor remains attached, then remove any pipe‑mount bolts and slide the studs off. Capture the pin and gunk buildup with a close‑up shot, then loosen the fuel line clamp and slide the nipple off. Detach the spacer and rear nuts, then separate the bowl. Keep the float, inlet needle valve, and gasket together in a labeled tray. Rotate the throttle plate closed, photograph screw locations, and remove the throttle and choke assemblies. Document each step, then prime the carburetor and test fuel flow before proceeding to cleaning. Drainage of residual fuel is essential to avoid spills and ensure safe handling.
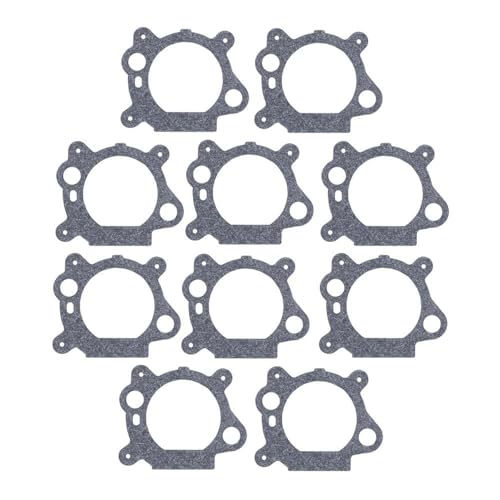
Carburetor Gasket Replaces # for 795629 272653 272653S; The 795629 Air Cleaner Gasket is attached to the part number 795259 Air Cleaner Base on one side and to the Carburetor on the other side.

Carburetor Replaces # 16221-883-800 16212-ZL8-000 16228-ZL8-000; The purpose of the Carburetor Gasket is to prevent an air leak, which would cause the engine to run poorly.
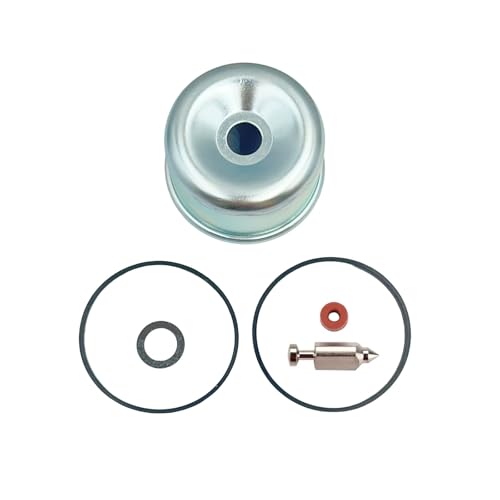
Carburetor Float Bowl Seal O Ring Gasket Kit Replace Part Number: 796611, 398191, 20-141-1 20-141, 525-864, compatible with Wal-bro 493640
Soak, Brush, and Ultrasonically Clean Jets and Passages
A solid three‑step routine—soak, brush, then ultrasonic clean—ensures the jets and passages are free of stubborn deposits before reassembly. First, submerge the metal components in a carburetor cleaning solution for 10–15 minutes; this pre‑soaking loosens grime and prepares surfaces for cavitation. While the parts soak, use a soft‑bristled toothbrush to scrub exterior dirt and, vitally, to access internal passages that manual tools cannot reach. Rinse briefly with a degreaser spray to remove dislodged debris. Transfer the parts to an ultrasonic bath filled halfway with water and 2 % cleaning fluid; degas the solution for 30 minutes, then run a 10‑minute cycle, flipping the carburetor halfway through to eliminate trapped air bubbles. This systematic approach delivers a thorough, repeatable cleaning. The larger 30‑liter cleaner can accommodate a full set of carburetors at once. Regular maintenance also prevents the engine won’t start issue commonly caused by clogged fuel lines.

Scientifically Engineered Ultrasonic Cleaner Fluid: This sonic cleaner solution removes, dirt, varnish, gums and other contaminants that deposit on carburetors, valves, and heat exchangers exterior and interior parts over time. Perfectly designed for you car carburetor cleaner, motorcycle carburetor cleaner, ultrasonic carb cleaning kit, engine components, heads, valves, seats, rockers, and more.

Target grease in hard-to-reach areas: Ultrasonic action helps loosen oil and grime from small carburetors, metal injector components and tools. Use a compatible cleaning solution for motorcycle, lawn mower and small-engine parts.
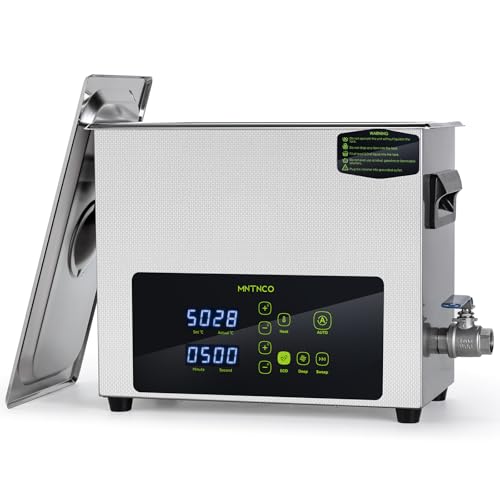
【Touch operation】: When you use the ultrasonic cleaner, you only need to gently touch the controls to change the settings, which is very convenient. With ordinary ultrasonic cleaning machine, you need to hold the machine in one hand and press the buttons with the other, which is more trouble. This ultrasonic cleaner will greatly improve your experience.
Check Every Jet and Float Bowl for Blockages and Wear
Having finished the soak‑brush‑ultrasonic routine, you now turn your attention to each jet and the float bowl to verify they’re clear and undamaged. First, remove the fuel bowl nut and pull the bowl aside; catch the draining fuel in a container. Inspect float connection for smooth hinge‑pin movement and guarantee the metering needle slides freely. Next, locate the main jet in the bolt that secures the bowl; insert a white probe into the cross‑drilled hole to affirm an unobstructed round aperture. Flush the jet from both directions, then assess jet wear by checking for daylight shine or irregular edges. Open the pilot jet by unscrewing the base screw, count idle‑screw threads, and clear any varnish or debris. Finally, examine the emulsion tube and metering needle for erosion, noting any narrowing that could restrict fuel flow. Floral wire is often used to gently clear a partially blocked jet without enlarging the orifice.
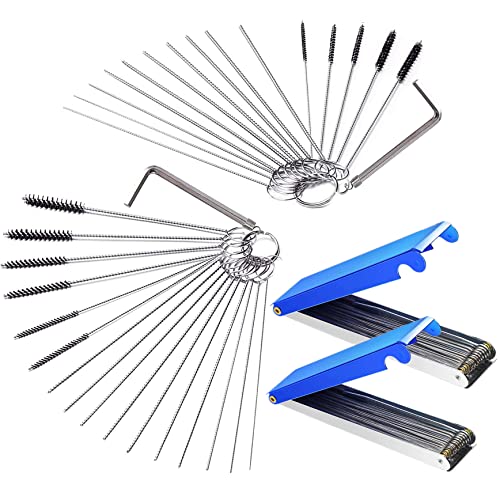
🚫 REVIVE YOUR CLOGGED ENGINES: Struggling with a lawnmower or weed eater that won’t start? Over time, old fuel leaves behind gummy ethanol deposits that choke small jets. Our professional 60-piece carburetor cleaning master kit easily clears out trapped dirt and carbon buildup, restoring your small engines to peak performance in minutes.

Are you annoyed that some tight spaces cannot be cleaned up? Congratulations on finding the one you want. 5 different width Nylon Brushes + 10 different diameter Cleaning Needles + 13 different diameter Cleaning Wires can help you clean out the blockages that you can't see. You do not need to dirty your beautiful hands. This set of tools can easily help you clean up the corners that bother you,MAKE YOUR WORK EASY..

Make Your Work More Easy - Are you annoyed that some tight spaces cannot be cleaned up? Congratulations on finding the one you want. 5 different width Nylon Brushes + 10 different diameter Cleaning Needles + 13 different diameter Cleaning Wires can help you clean out the blockages that you can't see. You do not need to dirty your beautiful hands. This set of tools can easily help you clean up the corners that bother you.
Reassemble the Carburetor With Your Reference Photos
When you’re ready to put the carburetor back together, pull up the reference photos you took during disassembly and use them as a visual checklist for every component’s exact position and orientation. Begin by installing the inlet needle seat with the groove facing down, using the bushing driver, then attach the inlet needle to the float and insert the assembly into the carburetor body. Insert the hinge pin and center pin, place the rubber gasket, and secure the fuel bowl with the fiber washer and bowl nut. Reconnect the throttle rod to the throttle plate control, verify maintaining linkage alignment with the photos, and reattach the choke rod and throttle spring exactly as shown. Finally, store reference photos in a folder for future maintenance. Remove the air filter before reassembly to prevent debris from entering the carburetor. Dry brush the filter before reinstalling to ensure optimal airflow. Always wear protective gloves when handling sharp components to avoid injury.
Install the Carburetor, Start the Engine, and Verify Idle
After confirming that every component matches the reference photos, bolt the carburetor back onto the mower, aligning the mounting holes precisely. Re‑attach the fuel line, checking for leaks as part of fuel system diagnosis, then reconnect the throttle linkage and spark plug wire. Tighten all 8 mm screws, secure the air filter cover, and verify the replacement part selection matches the original specifications. Fill the tank with ethanol‑free gasoline, pull the recoil starter, and let the engine run one to two minutes, watching for a smooth start without hesitation or smoke. Once warm, observe a steady idle, confirm clean airflow through the filter, and guarantee no black exhaust smoke. Test throttle response for consistent acceleration and listen for even running without skipping or stalling. Insert the 7 mm bolts to secure the back plate before final tightening.
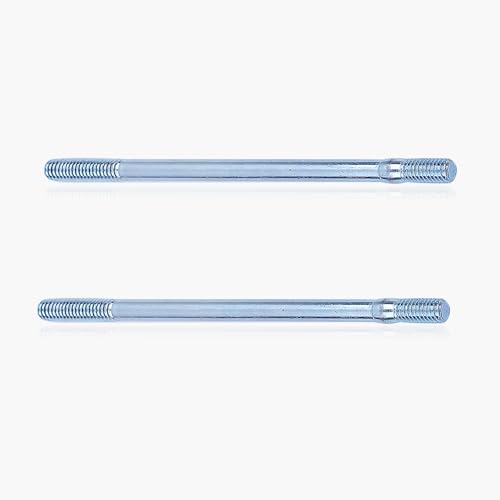
【Replacement part number】For 90043-ZE1-020【Wide Compatibility】Fit for Hon GX110 GX120 GX160 GX200 Small Gas engine and Clone

Fits most lawn mowers, snow throwers and other outdoor equipment

Suitable for a range of applications