Gather a low‑profile drain pan, a 14 mm socket set, a strap wrench, a funnel, and floor protection. Warm the T110 engine for 3‑5 minutes, then tilt the mower with the air‑filter side up and place the pan under the yellow/white drain plug. Remove the plug and let the old oil drain completely, wiping any spills with brake cleaner. Reinstall the plug, then slowly pour 5W‑30 synthetic oil until the dipstick reaches the full mark. Finally, check for leaks and clean the area; the next steps will show you how to handle the filter and maintenance schedule.
Gather Tools for a Craftsman T110 Oil Change
Before you begin, gather the essential tools: a low‑profile oil‑drain pan with a spout, a 14 mm socket set (including a ratchet, extension, and half‑inch spanner), a strap wrench for the filter, and a funnel that fits the dipstick tube. Lay a protective floor covering under the mower to keep the work area clean. Position the pan beneath the drain plug; its spout will channel oil directly to the recycling container, ensuring proper oil disposal. Use the 14 mm socket and extension to loosen the plug, then the half‑inch spanner for Briggs & Stratton models. Apply the strap wrench to rotate the filter counter‑clockwise, then remove it. Finally, insert the funnel into the dipstick tube, ready for fresh 5W30 oil. Ensure the oil collection container is positioned properly to avoid spills.
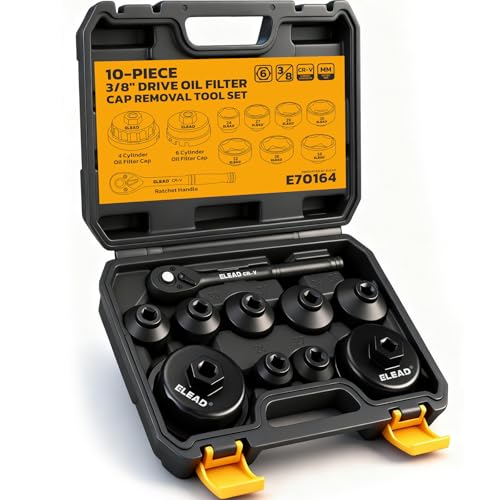
UNIVERSAL COMPATIBILITY - Fits Toyota, BMW, Honda, Mercedes, and Ford models, covering 7 essential metric sizes (24-38mm) for canister-style filter housings - perfect for DIY oil changes and professional shop use

[Effortless Oil Filter Changes] - Cenforge’s 10pc oil filter socket set includes 9 precision-sized metric sockets (24, 27, 29, 30, 32, 36, 38, 64, 64.5mm) + 3/8" drive wrench for quick, slip-free removal—no more messy struggles!
Warm the Engine, Then Position the Mower for Drainage
Now that your tools are ready, start the mower and let it run a few minutes until the oil warms up; the higher temperature lowers viscosity, letting the oil flow freely from the pan and passages. After three to five minutes, shut the engine, disconnect the spark‑plug wire, and let the mower sit for a brief cool‑down so the pan is warm but not scalding. Test the pan temperature with the back of your hand; if it feels safe, proceed. Tilt the mower so the air‑filter side faces upward, which maximizes drain plug accessibility and directs oil toward the drain outlet. Position a clean catch pan or jug directly beneath the drain plug, ensuring the surface is level and stable to prevent spills. Keep the gas cap covered with plastic wrap, and clear any debris from the fill area to maintain a clean drainage zone. This systematic positioning guarantees efficient oil removal while minimizing mess and safety hazards. Use a funnel to guide the oil into the pan without splashing. Check oil viscosity before refilling to ensure optimal engine performance. Follow the manufacturer’s recommended oil type to protect engine components and maintain warranty coverage. Read the owner’s manual for specific oil capacity and service intervals.
Remove Drain Plug and Collect Old Oil (Craftsman T110)
If you’ve already positioned the mower and secured a clean catch container, the next step is to remove the drain plug and collect the old oil. First, slide the lower‑right dash cover up to release its locking tabs, then locate the yellow or white drain plug near the frame. Consider drain plug orientation before you apply force; the plug doubles as a fill port, so align the 3/8” socket wrench correctly. Push the valve in, turn counter‑clockwise, and pull it outward to open. Attach the drain tube, position the oil pan beneath it, and remove the dipstick to aid flow. As oil drains, monitor oil spills during drainage, especially onto the main pulley, and wipe any runoff promptly with brake cleaner. When the stream stops, push the valve back in, turn clockwise until the pin locks, and reinstall the cover. Engine oil lubricates moving parts, reducing wear and extending the mower’s lifespan. Checking oil level before starting the mower ensures proper lubrication and prevents engine damage. Remember to wear gloves to protect your hands from hot oil. Proper disposal of used oil helps protect the environment and complies with local regulations.


Replacement part number: 731-05628 73105628

[STAIN-FREE MAINTENANCE] Stop oil spills on your mower deck. The 14.98 inch total length** (with11.12 inch flexible hose) extends past the frame, allowing you to drain oil directly into a pan without the mess.
Replace the Oil Filter (Craftsman T110, if Applicable)
The Craftsman T110 doesn’t have an oil‑filter housing, so there’s nothing to replace. Because the model omits a filter, you skip any oil filter installment step and move directly to refilling. If you ever work on a different Craftsman mower that includes a filter, you would first verify the correct part number—such as 492932, 36563/740057A, or 7124603—then remove the old filter, discard it responsibly, and install the new one according to torque specs. For the T110, focus solely on checking the dipstick after the oil drain, ensuring the level meets the manufacturer’s mark. When disposing of used filters on other models, place them in a sealed container and follow local hazardous‑waste guidelines. This systematic approach eliminates unnecessary actions and maintains engine health. Regular oil changes based on run‑time intervals help prevent engine wear and ensure optimal performance. A common cause of a mower not starting is a dead battery, which should be tested before attempting other repairs. Proper wire continuity checks can also diagnose electrical issues before they affect engine start‑up.

SIZE CHECK: 2-1/4" H. Compatible with select John Deere (D100, E100, S100 series), Husqvarna (YTH series), Craftsman, Cub Cadet (XT1, XT2), Toro TimeCutter, Troy-Bilt, Ariens, Poulan Pro equipment. Verify filter height and fitment before ordering, especially when replacing short or tall lawn mower oil filter profiles.

2 Pack Genuine Briggs & Stratton 492932s Oil Filter 492932 Vanguard Small OEM

Genuine, OEM Briggs & Stratton Replacement Part
Refill a Craftsman T110 With 5W30 Synthetic Oil
Skipping the oil‑filter step, you can move straight to refilling the Craftsman T110 with 5W‑30 synthetic oil. First, locate the fill plug on the engine’s top, clean the surrounding area, and remove the plug by hand or screwdriver. Using a calibrated measuring cup, pour the oil slowly, checking the dipstick after each small addition. The T110 holds roughly one quart; verify the exact amount with the manual’s capacity chart. Using 5W 30 synthetic oil can extend drain intervals, but note potential oil quality tradeoffs such as differing viscosity in extreme temperatures and deviation from the manufacturer’s straight‑30W recommendation. After reaching the full mark on the dipstick, reinstall the plug, tighten securely, and let the engine settle before the next step. Locate the oil filter before starting the refill process.

Advanced protection against the four main causes of engine breakdown: wear friction heat and deposits

The information below is per-pack only

SAE 10W-30 MOTOR OIL FOR SMALL ENGINES: One 32 fl oz bottle of STP Premium Synthetic Blend 4 Cycle Small Engine Oil SAE 10W-30, formulated for small engines in lawnmowers, generators, tractors, snow blowers, and other outdoor power equipment
Check for Leaks and Clean Up After the Oil Change
After the oil change, wipe down any visible oil, then run the mower for two minutes to see whether fresh oil reappears, which pinpoints the leak source. Next, inspect the upper bearing ring seal, valve gasket, and oil‑fill tube seal for wear, damage, or looseness. Trace any oil tracks on the deck or underside back to their origin, and wipe the suspected areas clean before a second run. Run the mower again for ten minutes, then examine the engine underside and valve cover for new drips; this confirms post repair integrity. Finally, dispose of used oil per regulations, clean the mower deck and surrounding ground, and wipe the engine exterior and fill‑tube area to remove any residual residue. Valve cover gasket replacement is a simple fix for many Briggs and Stratton single‑cylinder engines. cracked fuel line is a common cause of leaks that can be quickly identified by checking for wet spots around the fuel system. Regularly checking the oil level before each use helps prevent overfilling and reduces the risk of leaks. Blade cleaning also helps maintain proper airflow and reduces overheating.