Secure the parking brake, verify the seat and bypass switches are active, and check the blade‑engagement circuit with a multimeter. Roll the mower onto level ground, lock the brake, set the transmission to neutral, and guarantee tire pressure matches the spec. Adjust the seat, raise the deck to transport height, and set the throttle to half‑idle. Engage the starter solenoid, crank for no more than five seconds, and watch for a rapid click if the battery’s low. After the engine warms, move the throttle to full‑speed, engage the blades, and you’ll be ready to mow—continue for detailed steps on shutdown and post‑run checks.
Verify Safety Before Starting the Mower
Ever wonder why your Husqvarna won’t fire up? First, engage the parking brake; the mower won’t start until the electric lock is released by moving the lever left. Check the warning symbol—if it stays lit, the brake is still engaged. Next, raise the cutting deck to the transport position using the lever; a lowered deck blocks ignition. Verify the seat switch is active by sitting down; inspect the connection under the seat for chew damage or disconnection. If the switch fails, consider seat switch bypass options temporarily for diagnosis, but replace the switch afterward. Finally, perform the parking brake release procedure and confirm the bypass arm is in the inner position for each axle. This checklist guarantees all safety systems are satisfied before you pull the starter. Test continuity with a multimeter to confirm the brake safety switch is functioning. Check fuel level before starting to ensure the engine receives adequate fuel. Parallel ignition can significantly reduce start‑up time on modern zero‑turn mowers. Properly lubricate the drive belts to maintain smooth power transmission and prevent premature wear.
Place the Mower on Level Ground and Secure the Area
After confirming all safety switches are disengaged, roll the mower onto a flat surface and lock the parking brake. Position the machine for level surface positioning by checking that all four tires read the manufacturer‑specified pressure; inflate low tires until sidewall markings match. Shift the transmission to neutral, then engage the clutch pedal fully and apply the brake lever to lock the brake. Clear the surrounding area of debris, tools, and persons to achieve secure area compliance. Verify the deck is raised to its highest setting, then measure side‑to‑side distances from the deck bottom to the ground; they must be equal, with the front 5–10 mm lower than the rear. Once measurements confirm stability, tighten locknuts and proceed to the next setup step. Check tire pressure before proceeding. Always read the user manual before operating any equipment. For optimal performance, ensure the mower’s oil level is within the recommended range. Wearing protective gloves helps prevent injuries while handling the mower.
Engage Blade Switch and Lock Steering Controls
Before you start the mower, make sure the parking brake is fully engaged and the steering wheel is centered; then locate the blade engagement switch on the dashboard, move it to the “engage” position, and verify that the PTO clutch receives power so the blades can spin. Pull the steering wheel straight ahead, lock the parking brake lever, and confirm the steering lock holds the wheel in place. If the blades need to stop, disengage the PTO switch before releasing the lock. Inspect the blade cable for tension, check the PTO solenoid, and guarantee the electrical deck is connected securely. After confirming all connections, you can safely engage the blade switch and lock the steering for operation. Remove the hood before proceeding to ensure unobstructed access to the control panel. Applying a pre‑emergent herbicide at the optimal temperature window can prevent weeds from germinating without damaging the turf. Always perform a brief visual inspection of the mower deck for debris, as obstructed deck can cause blade damage or uneven cutting.
Adjust Seat, Deck Height, and Throttle for Starting the Mower
Need to get the seat, deck height, and throttle set correctly before you fire up the Husqvarna mower. Pull the lever under the seat, sit down, and slide the adjustment lever (A) until your operator posture feels natural and you can fully depress the clutch/brake pedal. Lower the armrests for pedal comfort, then tighten the lever. Loosen the steering‑wheel screw, raise it to match your height, and secure it. For deck height, loosen the front 11/16‑inch nut, set the front deck 2.5–3 inches off the ground, and tighten. Then loosen the rear 3/4‑inch nut, raise the rear deck about 0.5 inch higher than the front, and lock both sides level. Check deck level using a carpenter’s level to ensure even cutting geometry before adjusting the throttle. Finally, move the throttle to full‑open, loosen the engine‑clamp bolt, pull the cable fully open, and retighten the bolt. This promotes favorable posture, pedal comfort, and proper cutting geometry before starting. Adjust the rear deck by tightening the nut to raise it until the back is approximately 0.5 inches higher than the front. Consult the owner’s manual to verify the exact notch positions for a three‑inch cut. Blade leveling ensures an even cut and prolongs blade life.

Genuine, OEM Husqvarna Replacement Part


Replacement Lawn Tractor Seat Adjustment Knob Replaces for Part Number - 720-04061, 720 04061, 72004061
Set Choke and Fuel Valve for Cold‑Weather Starts
Now that your seat, deck height, and throttle are set, move on to the choke and fuel valve for cold‑weather starts. Pull the throttle lever fully to the choke position; this limits air and enriches the fuel mixture for a cold engine. Verify the choke fully closes by watching the carburetor linkage move and adjust the throttle cable screw until there’s no play at full choke. Next, turn the ignition to “run” and listen for the solenoid click. That audible cue confirms the anti‑backfire solenoid opened, allowing fuel flow. If you don’t hear it, inspect solenoid operation before cranking. Guarantee the solenoid activates each time you start; a faulty solenoid blocks fuel and prevents ignition. This sequence adjusts fuel mixture and ensures proper fuel valve function in cold conditions. Check the spark plug for fouling before starting to ensure reliable ignition. The fuel line is close to failing and needs replacement. Check solenoid resistance with a multimeter before proceeding. Also, confirm that the air filter is clean to avoid restricted airflow during startup.

Precision Fit :Designed to replace OEM part numbers 746-1085, 946-1085A, 746-1085A, and 60-057, ensuring seamless compatibility with MTD 600/700 Series, for Cub Cadet LT1042-LT1050, and Troy-Bilt 13AJ609G766 models.
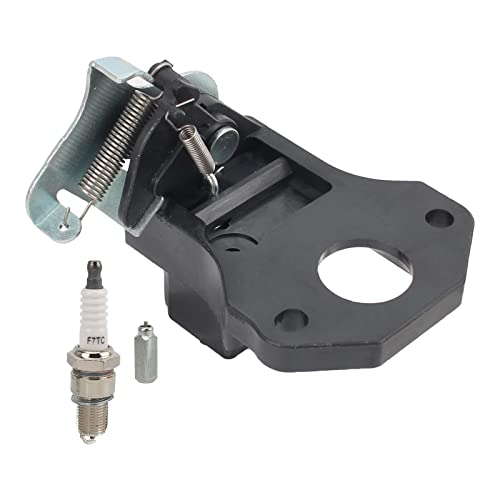
Part Number: 16600-Z8B-900, 16620-Z8D-305.

Package Content: You will receive 1 piece of universal choke cable for 237 rotary in the package. Perfect for DIY repairs and maintenance improvements.
Turn Ignition Key and Limit Starter Attempts to Five Seconds
When you turn the ignition key fully clockwise to the START position, the starter solenoid engages and the engine begins cranking; keep the cranking to no more than five seconds, then release the key to prevent overheating. First, verify the parking brake is set and the throttle is in the low or rabbit position. Guarantee the seat and clutch safety switches give consistent switch feedback; any mismatch will stop the solenoid. A proper battery condition is essential—low voltage will produce a rapid click without cranking. If the engine doesn’t turn, wait ten to fifteen seconds before a second attempt, never exceeding three tries. After each five‑second crank, release the key, let the starter cool, and repeat only if the battery remains strong and all interlocks are engaged. Ensure the parking brake is engaged before attempting to start. Check the spark plug for fouling before each use. Also, inspect the fuel line for clogs that could prevent fuel delivery. A clogged mower deck can cause the starter cord to jam, so inspect and clear any debris before pulling the cord.
Warm the Engine at Mid‑Throttle After Starting
A mid‑throttle warm‑up after you’ve cranked the mower gets the engine to its proper operating temperature in just a few minutes. Set the throttle to roughly half‑idle and let the mower run for 3‑4 minutes, adjusting for ambient cold if needed. This controlled temperature progression lets oil thin gradually and raises oil pressure, while the air‑cooled cylinder stays within safe limits. The half‑throttle setting guarantees even component expansion, preventing piston‑to‑bore mismatches that can cause cold seizure. Keep the mower in neutral, avoid PTO engagement, and monitor the throttle linkage for consistent positioning. After the warm‑up, you can safely increase load, but still avoid full throttle until the engine reaches full operating temperature. Remember to check tire pressure before operating to ensure stable traction. Additionally, verify that the mower’s fuses are intact to prevent electrical issues during startup. Properly drain fuel before storage helps avoid carburetor gumming in winter. Regularly inspect the battery for age‑related wear to maintain reliable power output.
Run the Mower at Full Throttle for Mowing
You should set the throttle lever to the full‑speed (rabbit/fast) position before you start mowing. After the engine warms up, release the parking brake, verify steering is neutral, and engage the blades. Keep the throttle at full speed throughout the cut; this maximizes blade RPM, guarantees optimal fan cooling, and delivers the cleanest cut. Maintain proper throttle maintenance by checking the pivot bolt, tightening the lock nut, and adjusting the cable so the lever stays securely open under vibration. Use consistent full throttle use during straight runs and zero‑turns to avoid turf damage and to keep the engine at its most efficient point. Periodically inspect the throttle for play, and correct any looseness before the next session. Always wear eye protection when operating the mower.

✅65" Lawn Mower Throttle Cable: This lawn mower throttle cable is approx. 65 in / 165 cm, offering flexible routing for replacing stuck, loose, worn, broken, or aging throttle cables on many walk-behind push garden mowers.

Control Cable Replace Part number: 183281 532183281 198463 532198463;

Product Information:60-522 control cable,throttle control lever assembly 60522 lawn mower throttle control cable, throttle choke cable tractor lawn mower throttlecompatible with
Lower Throttle, Raise Deck to Transport Position, and Stop the Engine
Typically, you’ll lower the throttle to the idle position, then raise the deck to its transport height before shutting the engine off. Ease the throttle lever gradually from full speed to idle, keeping the engine at low RPM to avoid stalling. Once idle, turn the ignition key off, let the engine idle briefly, then remove the key. Next, loosen the front link locknut, turn it clockwise, and lift the deck to its highest setting. Adjust the rear stays clockwise until the front deck sits 5–10 mm lower than the rear, confirming transport mode. Thoroughly tighten all locknuts, then Verify deck height settings before moving. Engage the parking brake, wait for the blades to stop fully, and you’re ready to transport the mower.

Replace Part Number : 532195270, 532420525, 581506904, 420525, 195270, 581506902, 191912, 194208, 194209, 532195270, 532194209, 532194208, 819191912, 581506903, 532195264

PERFECT FIT FOR 42" DECKS:Mower deck wheels and bracket kit compatible with Husqvarna, Craftsman LT1000/LT2000, Poulan Pro, and select Jo-hn Deere models. Ensures precise deck leveling and prevents lawn scalping for a pristine cut

Precise Replacement Match: Replaces part numbers: 532195270, 195270, 581506903 and 532195264. Machined to exact factory dimensions with accurate hole spacing, length and bend angle for a tight, wobble-free fit, ensuring smooth deck height adjustment with no jamming.
Perform a Quick Post‑Shutdown Check for Blade Disengagement and Locked Controls
After the engine’s off, immediately verify that the blade‑disengagement system and all controls are locked before moving the mower. Begin blade disengagement verification by pulling the PTO lever to the off position, then rotate the blades by hand; they should turn freely without resistance. Inspect the idler pulley arm and blade‑brake arm for binding, wear grooves, or contact. Guarantee the cutting‑deck belt is fully slackened; a tight belt indicates incomplete disengagement. Next, engage the parking brake, set steering levers in neutral, and confirm the seat‑switch disables throttle and choke. Perform a visual belt and pulley inspection: remove the deck cover, look for frayed belt, broken tension spring, debris on the idler pulley, and grass buildup in pulley grooves. If any anomaly appears, stop work and contact an authorized dealer. Check the idler pulley spring for corrosion and damage before reassembly.

Includes two (2) Husqvarna 46-Inch High-Lift Mulching Lawn Mower Blades for use on Husqvarna riding mowers

Replaces: RH Brake Arm 532199470, 199478, 199477, 197261, 532199477, LH Brake Arm 199471: 532199471, 400132, 199471, 532400132

Replaces Number: 537285601 (Support Flange), 537234901, 537292601 (Driver Assembly), 503856301 (Nut)