First, check you have a 0.095‑inch line, cut a 12‑foot piece, feed the ends into the inlet eyelets, and wind it evenly in the arrow direction while applying a fluid‑film lubricant inside the head. Turn the trimmer sideways so the head is a true 90‑degree angle and parallel to the sidewalk. Stand on the right side, grip the handle firmly, and make sure the head spins counter‑clockwise, cutting to the right. Guide the line opposite the spin—right to left—while keeping the throttle at full speed and the thumb steady. Keep the cut no deeper than 1‑1.5 inches for a clean edge. If you keep going, you’ll uncover more tips for flawless edges.
Prepare Your Trimmer for Edge Work
Kick off your edge‑work prep by checking the trimmer line: pick a 0.095‑inch, angular‑edged strand for durability, or a 0.080‑inch version for lighter residential edging. Verify proper line sizing matches your Echo model to avoid bogging. Cut a 12‑foot piece for smoother loading, or follow the 20‑foot recommendation if your spool holds it. Fold the length in half, locate the midpoint, and feed each end one inch into the inlet eyelets, ensuring a slight protrusion for alignment. Apply a thin coat of fluid‑film lubricant—or a light WD‑40 spray—to the head interior; this adequate line lubrication reduces friction and prevents jams. Wind the line evenly in the arrow direction, leave six inches on each side, then reassemble the head, confirming free feed before you start edging. The U‑Turn head fits Echo trimmers and provides a dual‑line configuration. Proper line selection can extend the life of your trimmer and improve cutting performance. Understanding thedifferentpurpose of trimmer line] helps you choose the right material for various grass types.

200-Foot Length in optic yellow color

Replacement trim line for your string trimmer to cut through grass and plants

. 095-inch diameter trimmer line strips
Position the Line at a 90‑Degree Angle and Keep the Head Parallel
Now that the line is loaded and lubricated, turn the trimmer sideways so the head points straight up, creating a 90‑degree angle. Hold the shaft level, keep your arms steady, and maintain a consistent angle adjustment as you move along the edge. Position the line at a 90‑degree angle against the hard surface, letting it graze the edge without pressing into the ground. Keep the head parallel to the sidewalk by aligning it vertically; your wrist should stay level, especially on uneven terrain. Use a slight wrist tilt only to follow the edge’s contour, but always return to the proper line placement. This posture gives you a clean cut, about two inches deep, and prevents fraying or over‑cutting. When edging from the sidewalk side, the shield helps protect you from debris that is blown away from the user in the 2:00 position. Understanding the motor’s cutting action helps you maintain consistent performance. Selecting the right tool based on grass type can significantly improve edge quality and reduce wear.
Choose the Right Rotation Direction for Trimmer Edging
The rotation direction of your trimmer determines how you should position yourself and move while edging. Most Echo‑style units spin counterclockwise, cutting to the right and ejecting debris leftward. Stand on the right side, keep your body toward the cutting side, and hold the handle with a firm, balanced grip—this is Choosing ideal trimmer grip. Align the head so the string moves forward along the edge; the spin will naturally pull the trimmer toward the grass, letting you maintain Upholding pressure. You pressure. the the prevents thehead the consistent pressure, and consistent pressure guarantees a clean cut. Verify rotation by watching the string’s motion; if it spins clockwise, reverse your stance and adjust your grip accordingly. This alignment maximizes control, safety, and edge precision. Proper stance ensures the operator is on the correct side for the rotation direction. Using a sharp trimmer line helps achieve a cleaner edge and reduces wear on the head. Regular line tension checks prevent uneven cutting and extend the life of the trimmer. Selecting the appropriate engine power rating can further improve trimming efficiency on dense grass.

Maxi Edge .080" Trimmer Line

Premium co-polymer nylon for industry-leading durability

Includes one 140-Foot, .5-Pound spool of Husqvarna Trim Force .095 Inch String Trimmer Line for Husqvarna string trimmer models
Master the Edge‑Guiding Motion: Move Opposite the Spin
After confirming your trimmer’s counter‑clockwise spin, position yourself so the cutting side faces the lawn and the ejection side points away from the edge. Then, move opposite the spin—walk from right to left—so the right‑hand side of the head does the cutting while the left side ejects debris. This motion aligns with right handed methods and respects your edging direction preferences, preventing grass from being scalped and keeping the cut path clear. Keep your body slightly turned so the right side stays nearer the wall or curb; this reduces twisting and maintains steady pressure. If an obstacle blocks the left‑to‑right path, step onto the lawn and continue the opposite motion, preserving clean, consistent edges without back‑tracking. Choosing a battery‑powered trimmer can reduce noise and emissions while delivering sufficient power for most residential lawns. Husqvarna models often provide longer battery life, offering extended runtime for larger yards.
Set Full‑Throttle Speed for Consistent Edge Cuts
One tip that instantly improves edge quality is to keep the throttle fully open while you trim. When you set the trimmer to full‑throttle speed, you hit the optimum operating speed for a two‑stroke engine, delivering maximum power and a clean, uniform cut along the curb. Hold the thumb in the straight‑up‑down position so the throttle response consistency stays steady; any wobble will cause uneven lines. Begin with a medium speed to gauge grip, then shift to full throttle for long, continuous runs. This eliminates the need for frequent refueling and prevents engine deposits. By maintaining a constant, wide‑open throttle, you achieve pro‑level edge flow without sacrificing control. Using a straight shaft trimmer makes it easier to keep the head steady and maintain a consistent edge. Proper grass height is essential for a healthy lawn, and a cutting height of 2.5–3 inches promotes deeper root growth. Reel mowers provide a quieter, zero‑emission alternative for small, flat lawns.
Avoid Common Trimmer Edging Mistakes
If you let a few simple mistakes slip, your edging will look uneven and damage the lawn. Cutting deeper than 1–1.5 inches exposes soil, invites weeds, and weakens root systems; keep the string tip just barely touching the turf and adjust depth for grass thickness. Hold the trimmer head perpendicular to the ground—any angle creates uneven cuts, gaps, and divots. Use the correct string length: too short strains the motor and short reach, too long loses control. Walk backward on the first pass to keep debris away and maintain straight lines; practice forward walking once you’re comfortable. Finally, perform proper trimmer maintenance and consistent tool usage, and reseed thin edges regularly to preserve a clean, healthy border. Speed feed head makes line replacement quick and easy. Proper edging angle ensures a uniform cut and prevents damage to the lawn. Leveling the deck ensures consistent cutting height across the mower.
When to Upgrade From Trimmer Edging to a Dedicated Edger
Mistakes like cutting too deep or holding the trimmer at an angle can ruin a clean border, and once those errors become frequent, it’s a sign that a dedicated edger will serve you better. You’ll notice the need when you manage a large yard with extensive driveways, sidewalks, or garden beds that demand crisp, straight lines for a professional appearance enhancement. Overgrown grass, stubborn roots, or hard‑surface edges quickly outpace a trimmer’s power, and you’ll spend more time fighting rather than trimming. If you find yourself performing frequent edge reclamation, or the trimmer’s blade can’t keep up, the inconsistency signals it’s time to upgrade. A bladed edger delivers the precision and durability required for high‑volume, exact‑line edging that a string trimmer simply can’t match. Blade edger can create a deeper, more pronounced groove, removing accumulated dirt and debris that a string trimmer cannot. Properly using a sod cutter before installing new sod ensures a uniform surface and reduces future edging issues. Always wear protective gear when operating cutting equipment to prevent injuries. Maintaining a consistent edge angle while edging helps achieve a uniform cut and prevents uneven wear on the blade.

Versatile Edging Performance: The grass edger is ideal for creating sharp borders along driveways, sidewalks, patios, and hardscapes
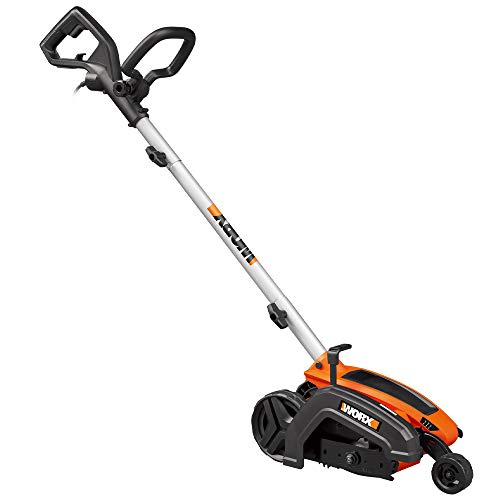
POWER LIKE THE PROS: The 12 Amp motor spins the 7.5” blade fast and deep at 4700 revolutions per minute, giving you professional-looking lines and edges.
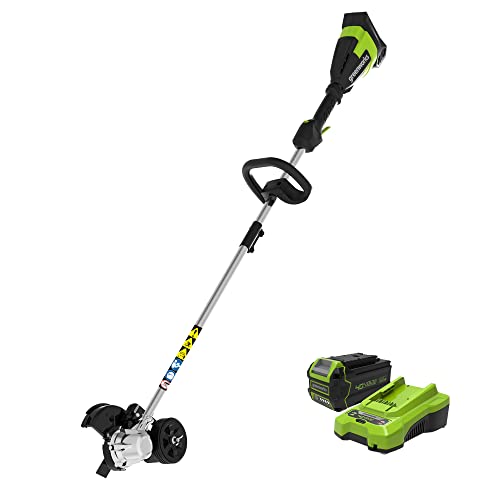
CLEAN, PROFESSIONAL LAWN EDGING – Designed to create sharp, defined edges along driveways, sidewalks, patios, and landscaping for a polished lawn appearance.
Maintain Perfect Edges With Bi‑Weekly Touch‑Ups and Quick Clean‑Ups
Ever wondered how to keep your lawn edges razor‑sharp without spending hours each week? You’ll maintain a manicured edge aesthetically by scheduling bi‑weekly touch‑ups right before mowing. Trim the edge channel first, using a 90‑degree angle and a horizontal pass followed by a vertical pass. Keep the string length just right, and spin the head sideways when you walk backwards around beds. For quick clean‑ups, remove the guard for precision, spray WD‑40 into the head, and run the trimmer through the established channel to clear debris. This routine preserves an aesthetically pleasing lawn, prevents mower‑missed spots, and keeps hard edges crisp throughout peak season. Consistency and proper direction give professional results with minimal effort. Proper string length prevents damage and ensures optimal performance. Follow the five‑step guide to safely replace the trimmer line when it wears out. Using a 30 % vinegar solution can also help eliminate stubborn weeds that encroach on the edge channel. Incorporating proper mowing height helps suppress weed growth by shading the soil and promoting a denser turf.