You’re cranking but not firing because either fuel isn’t reaching the cylinder, the spark isn’t igniting the mixture, or compression is low. First, verify fuel flow: disconnect the line, attach a clear hose, and look for a steady 0.5‑1 ml/s stream; also check pump pressure (3‑5 psi) and discover the filter isn’t clogged. Next, inspect the spark plug and coil: clean the plug, confirm a strong spark at 350 RPM, and measure coil resistance. Then, run a compression test; readings below 65 psi signal a mechanical problem. Finally, check safety switches, the flywheel key, and the air filter for blockages. If you keep going, you’ll uncover more specific fixes.
Why Your Lawn Mower Won’t Start: Quick Overview
Why isn’t your mower cranking into life? If the starter spins but the engine won’t fire, first check the throttle linkage. A faulty throttle linkage can keep the carburetor closed, starving the engine of fuel. Next, inspect the carburetor adjustment; a compromised carburetor adjustment often results from varnished passages or an improperly set idle mixture, limiting fuel flow after the initial spark. Verify that the carburetor float moves freely and that the needle valve drops to admit gas. While you’re at it, confirm the battery delivers adequate voltage, the starter clutch engages cleanly, and the pinion gear meshes without sticking. Address these mechanical and fuel‑delivery issues before moving on to spark or compression diagnostics. You may also need to tap the solenoid to free a stuck plunger. Additionally, check for a clogged air filter which can restrict airflow and cause the engine to stall. Also, use a multimeter to test the solenoid’s continuity and resistance before replacing it.
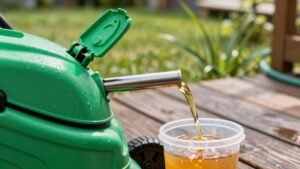
Test Fuel Delivery in 2 Minutes
A quick two‑minute fuel‑delivery test starts by locating the mower’s fuel line and disconnecting it from the carburetor. Attach a clear hose to the line, point it into a container, and crank the engine while watching. If fuel spurts, note the fuel flow rate; a steady stream of 0.5–1 ml/s indicates normal operation. Next, connect a pressure gauge to the fuel pump outlet. Rotate the engine and read the fuel pump pressure; most small‑engine mowers show 3–5 psi. Anything lower suggests a weak pump or clogged filter. If the pressure spikes or the flow stops, replace the pump or clean the line. Verify the hose is free of kinks and the connection is tight before re‑installing the carburetor. A weak fuel pump can also cause intermittent cranking without start‑up. Checking the crankcase oil level can reveal over‑filling, which may exacerbate fuel delivery issues. Proper storage temperature prevents capacity loss and extends overall battery life.
Check Spark Plug and Ignition Coil
You’ll want to start by removing the spark plug and inspecting it for wear, carbon buildup, or oil fouling; a dirty or damaged plug is often the first clue that the ignition system isn’t firing. Pull the plug wire, check the boot for solid metal contact, and look for fouling. If the plug looks good, install a new one to eliminate plug failure. Next, clip a spark tester between the ignition cable and cylinder head, spin the flywheel to at least 350 RPM, and verify a spark jumps the tester gap. No spark? Disconnect the kill wire from the coil primary tab and repeat the test; a spark now indicates a wiring issue. If still silent, measure coil resistance, perform a spark gap adjustment on the flywheel magnets, and if necessary, perform a coil replacement troubleshoot. Re‑test after each step to confirm ignition restores. Bypassing the wiring system can quickly isolate the coil as the source of the problem. Also, remember to check spark plug gap before reinstalling to ensure proper ignition. Follow the step‑by‑step guide for spark plug replacement to guarantee a secure fit and correct torque. Always wear safety glasses while handling the blade to protect your eyes from metal shards.
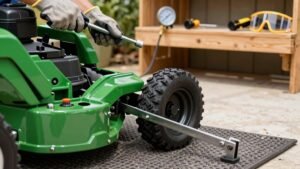
Measure Compression to Rule Out Mechanical Issues
Now that you’ve confirmed the ignition is firing, the next step is to check the engine’s mechanical health by measuring compression. Disconnect the ignition and fuel lines, then remove each spark plug. Screw the appropriate adapter into the plug hole, attach the Schrader‑valve gauge, and label the cylinder. Crank the engine for six to ten strokes, allowing the gauge to stabilize, then note the compression test readings on your notepad. Release the pressure before moving to the next cylinder. Compare each PSI value to the manufacturer’s spec—typically around 120 PSI for a Briggs and Stratton mower. Readings below 65–70 PSI suggest a faulty compression seal, worn rings, or valve damage, indicating a mechanical issue that must be repaired before the mower will start. Ensure the gauge is tightened hand‑tight to prevent leaks. Regularly cleaning the air filter can also improve compression consistency. Maintaining proper oil level is essential for optimal engine performance and longevity.
Safety Switches, Flywheel Key, and Other Common Roadblocks
If the engine cranks but won’t fire, the culprit is often a safety switch or a mis‑aligned flywheel key. Check the brake safety switch first: engage the brake fully, then measure continuity with a multimeter. If you see no continuity, jumper the terminals; the engine should crank, confirming a bad switch. Replace it and verify the brake pedal adjustment is correct. Next, test the seat sensor. Sit on the mower, probe the seat switch for continuity; a lack of reading means you need a seat sensor replacement. Finally, inspect the flywheel key. Look for a sheared or displaced key, which misaligns ignition timing and kills spark. Replace the key, re‑align the flywheel, and re‑test the start circuit. Safety switches can act as circuit breakers that must be engaged for the mower to start. Also, ensure the fuel line is free of blockages and the primer bulb is fully primed before attempting another start. Clogged air filter can also restrict airflow, causing the engine to stall shortly after cranking. Using rock salt as a herbicide can damage surrounding grass, so it should be applied sparingly and only to isolated weeds.